Design Breathtaking Graphics Using Adobe Illustrator's Gradient Strokes

 April 24, 2025

 WalterWhite

 0
0
If you're looking to take your designs in Adobe Illustrator from flat to fabulous, mastering gradient strokes is the way to go. This guide will walk you through the ins and outs of creating and tweaking gradient strokes, giving your artwork that extra pop of depth and visual flair. Whether you're crafting logos, illustrations, or infographics, getting the hang of gradient strokes will supercharge your design toolkit.
Understanding Gradient Strokes in Adobe Illustrator
What are Gradient Strokes?
Gradient strokes in Adobe Illustrator are a game-changer, letting you apply a gradient not just to the fill but to the outline of shapes or paths. This creates a stunning effect where the stroke color smoothly shifts between different shades, adding a dynamic touch that can elevate your artwork. Unlike a plain old solid-color stroke, gradient strokes offer a customizable look that can really make your designs stand out.
The perks of using gradient strokes include:
- Visual Interest: They catch the eye and make your designs more captivating.
- Depth and Dimension: The color transitions add a sense of depth, making your work feel less flat.
- Customization: You're in control of the colors, their positions, and the overall vibe.
- Versatility: They can jazz up everything from logos to illustrations.
To start playing with gradient strokes, you'll need to get cozy with the Gradient panel in Illustrator. This is your go-to spot for crafting and fine-tuning your gradients.
Accessing the Gradient Panel
The Gradient panel is your main hub for working with gradient strokes. You can pop it open in a few ways:
- Window Menu: Head to
Window > Gradient. - Properties Panel: If the Properties panel is up (Window > Properties), you'll spot a Gradient section when you've got an object with a stroke selected.
- Toolbar: The Gradient Tool (G) can also whip up the Gradient panel, though it's mostly used for tweaking the gradient's direction and placement on your object.
Once you've got the Gradient panel open, you'll see a bunch of options for customizing your gradient:
- Gradient Type: Choose from Linear, Radial, or Freeform Gradients.
- Color Stops: Add, remove, and adjust the colors in your gradient.
- Angle: Tweak the rotation for Linear gradients.
- Aspect Ratio: Control the shape of Radial gradients.
- Location: Pinpoint where you want your color stops along the gradient.
Now that you know how to get to the Gradient panel, let's dive into making a gradient stroke.
Creating a Basic Shape and Adding a Stroke
Drawing a Rectangle with a Stroke
Let's start with a simple rectangle and add a gradient stroke to it.
Here's how you do it:
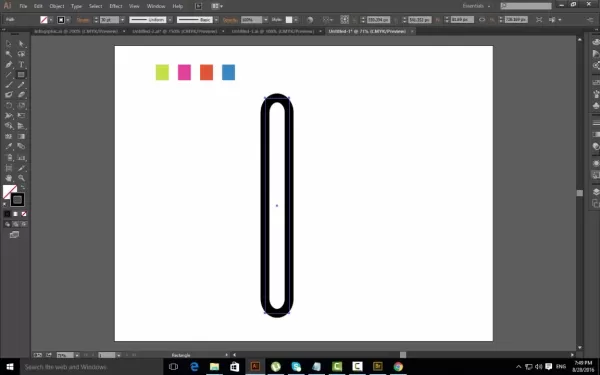
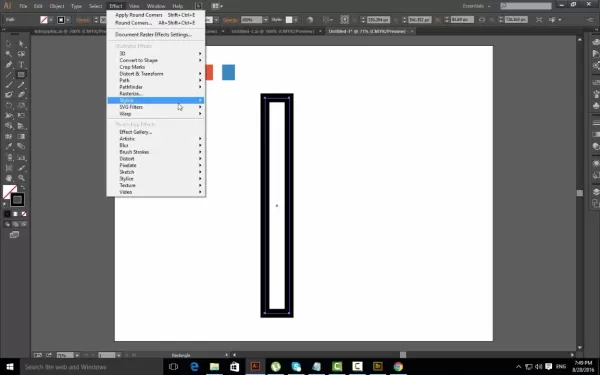
- Select the Rectangle Tool (M): Click on the Rectangle Tool in the toolbar.
- Draw a Rectangle: Click and drag on the artboard to create a rectangle of your desired size.
- Ensure a Stroke is Applied: In the Properties panel (Window > Properties), make sure the 'Stroke' option has a color applied. If it doesn't, click on the 'Stroke' swatch and pick a color. It doesn't matter which color, since we're going to switch it to a gradient soon.
- Remove Fill Color: Make sure the Fill color is set to 'None'. You can do this by selecting the rectangle, going to the 'Fill' option in the Properties panel, and choosing the 'None' swatch (the white square with a red diagonal line).
Now that we've got a basic rectangle with a stroke, let's turn that stroke into a gradient.
Converting the Stroke to a Gradient
Now that you've created a rectangle with a stroke, let's transform that stroke into a gradient:
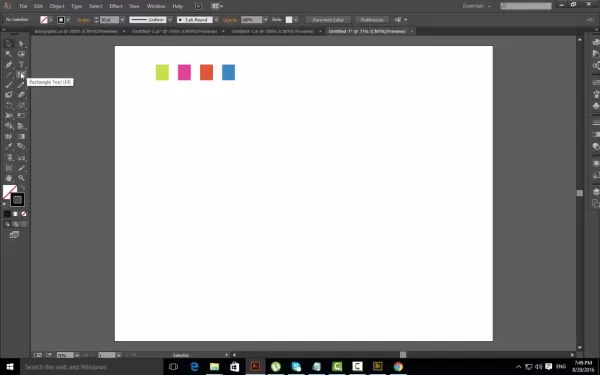
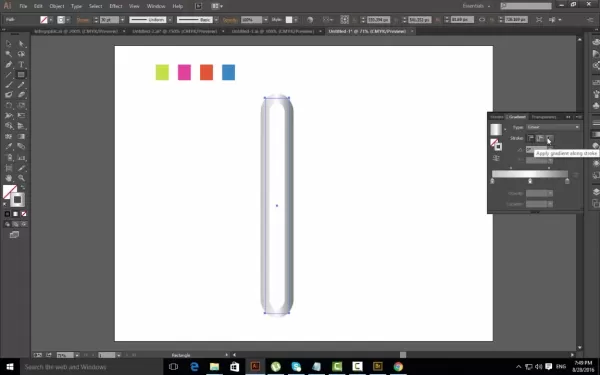
- Select the Rectangle: Use the Selection Tool (V) to click on the rectangle you created.
- Open the Gradient Panel: Go to
Window > Gradient to open the Gradient panel. - Apply Gradient to Stroke: In the Gradient panel, click on the 'Stroke' icon. This tells Illustrator to apply the gradient to the stroke rather than the fill.
- Choose a Gradient: Click on one of the default gradient swatches in the Gradient panel. You'll see the stroke of your rectangle immediately update with the gradient. If the default swatches aren't your style, you can always whip up your own.
Here are some common gradient types:
- Linear Gradient: This creates a straight-line transition between colors.
- Radial Gradient: This creates a circular transition, radiating from a center point.
- Freeform Gradient:
 This lets you go wild with highly customizable gradients, placing and blending color stops freely. (More on this later)
Now your rectangle has a gradient stroke. Let's move on to customizing it.
Customizing Your Gradient Stroke
Adjusting Gradient Colors and Positions
Tweaking the gradient colors and their positions is key to getting that perfect look. Here's how to do it:
- Access the Gradient Slider: In the Gradient panel, you'll see a gradient slider showing the current gradient colors. The small squares beneath the slider are called 'color stops'.
- Change Color Stops: Double-click on a color stop to open the Color panel. From here, you can pick a new color. You can use the color sliders, enter a hex code, or choose a color from the swatches.
- Add Color Stops: To add a new color stop, just click below the gradient slider where you want the color to go. A new color stop will pop up, which you can then customize.
- Remove Color Stops: Drag a color stop away from the slider until it vanishes. Or, select the color stop and hit the 'Delete' icon in the Gradient panel.
- Adjust Color Stop Positions: Click and drag the color stops along the slider to shift their positions. Moving color stops closer together creates a sharper transition, while spreading them out makes for a smoother blend.
Playing around with these settings lets you whip up unique and eye-catching gradient strokes. It's also worth considering color theory to understand how colors will work together and what kind of emotional response your gradient might evoke.
Using the Gradient Tool (G) for Directional Control
The Gradient Tool (G) gives you another layer of control over your gradient strokes, letting you adjust the gradient's direction and length right on the artboard.
Here's how to use it:
- Select the Gradient Tool (G): Click on the Gradient Tool in the toolbar (or press 'G' on your keyboard).
- Adjust the Gradient: Click and drag on the object to set the gradient's direction. The starting point of your drag will be the beginning of the gradient, and the ending point will be the end of the gradient.
- For a Linear Gradient, dragging across the object will change the angle and length of the gradient.
- For a Radial Gradient, dragging will shift the center point and radius of the gradient.
- Fine-Tune in the Gradient Panel: For more precise control, you can mix the Gradient Tool with the settings in the Gradient panel. Use the Gradient Tool for broad adjustments and the Gradient panel for fine-tuning.
The Gradient Tool is especially handy for linear gradients where you want to control the angle and spread of the color transition. Experiment with different dragging directions and lengths to nail the look you're after.
Illustrator Pricing
Understanding Adobe Illustrator's Subscription Plans
Adobe Illustrator is part of Adobe's Creative Cloud subscription service. There are a few plans to choose from, depending on your needs and budget:
- Single App Plan: This plan gives you access to Adobe Illustrator only. It's perfect if Illustrator is the only Adobe app you need. Pricing for the single app plan varies by region and any current promotions.
- All Apps Plan (Creative Cloud): This plan gives you access to all Adobe Creative Cloud apps, including Photoshop, InDesign, Premiere Pro, and more. It's a great option if you need a variety of creative tools.
- Business Plans: Adobe also offers plans tailored for businesses, which include extra features like team collaboration tools and centralized license management.
It's a good idea to check out the Adobe Creative Cloud website or reach out to Adobe Sales directly to get the latest pricing for your region. Keep an eye out for discounts and promotions, especially if you're a student or educator. Adobe often offers special rates for those who qualify.

Think about your design needs and budget when picking the right plan for you.
Advantages and Disadvantages of Gradient Strokes
Pros
- Enhanced visual appeal
- Added depth and dimension
- High degree of customization
- Modern and professional look
Cons
- Can be overused and appear dated if not applied thoughtfully
- May not be suitable for all design styles
- Requires careful color selection to avoid clashing
Exploring Core Features for Gradient Strokes
Key Illustrator Features for Effective Gradient Strokes
Adobe Illustrator has a bunch of core features that help you create stunning gradient strokes:
- Gradient Panel: Your central control for gradient creation and customization.
- Color Panel: Lets you pick your colors.
- Stroke Panel: Adjust stroke weight, caps, corners, and alignment.
- Gradient Tool (G): Allows you to interactively adjust the gradient on the artboard.
- Expand Appearance: This feature is handy for converting strokes with effects into filled paths, allowing for advanced editing and manipulation.
- Shape Builder Tool: Lets you merge complex shapes together easily.
These core features of Adobe Illustrator work together to give you a smooth and efficient workflow for crafting your gradient strokes. Experiment with different settings and combinations to achieve the results you're looking for.
Don't forget to explore Illustrator's other effects, like Drop Shadow or Scribble, which can create unique graphics.
Creative Use Cases for Gradient Strokes
Gradient Strokes in Various Design Projects
Gradient strokes can spice up a wide range of design projects, making them visually appealing and eye-catching. Here are some inspiring ways to use them:
- Logo Design:
 Use gradient strokes to add a modern and dynamic feel to logo outlines, creating a sense of depth and sophistication. This is especially effective for minimalist logos where the gradient can be the star of the show.
 - Illustration: Apply gradient strokes to character outlines or background elements to add dimension and visual interest. This can make illustrations appear more three-dimensional and engaging.
- Typography: Use gradient strokes on text to create unique and stylish typographic effects. This is great for headings, posters, and other display text where you want to make a statement.
- Icon Design: Enhance icon outlines with gradient strokes to make them pop and appear more modern. This is especially useful for app icons and website icons.
- Infographics: Use gradient strokes to highlight key data points or create visual connections between elements in your infographic. This helps guide the viewer's eye and make the information more digestible.
- Web Design: Incorporate gradient strokes into button outlines, border elements, or other UI components to add a touch of visual flair to your website. This can make your site more engaging and memorable.
The key is to experiment and find creative ways to integrate gradient strokes into your designs. Whether you're working on a logo, illustration, or website, gradient strokes can add a unique and professional touch.
Frequently Asked Questions
Can I use gradient strokes on text in Illustrator?
Yes, you can apply gradient strokes to text in Illustrator. First, convert your text to outlines by selecting the text and going to Type > Create Outlines. This turns the text into editable paths, allowing you to apply a gradient stroke just like any other shape. Keep in mind that complex text with thin strokes may not render as well with gradients, so it's best to use bold, simple fonts for the best results.
Are gradient strokes suitable for all design styles?
No, gradient strokes aren't a one-size-fits-all solution. They work best in modern, dynamic, and visually driven designs. In more minimalist or traditional designs, gradient strokes might feel out of place or overwhelming. It's important to consider the overall aesthetic of your project and whether gradient strokes align with that style. Experiment and use your best judgment to determine if they enhance or detract from the design.
Related Questions
How do I create a seamless gradient?
To create a seamless gradient, you need to carefully select colors that blend well together and adjust their positions to create a smooth transition. Make sure that adjacent color stops are similar in hue and value. Experiment with adding more color stops to create a more gradual transition. You can also use the 'Smooth Color' option in the Gradient panel to further refine the blend. Finally, test your gradient across different sizes and resolutions to ensure it remains seamless and visually appealing.
Related article
 Google.org Unveils Newest AI Opportunity Fund Recipients
Nonprofits are the unsung heroes tackling community challenges head-on. However, to make a bigger impact, they need to harness the power of cutting-edge technology like AI. A 2024 Google.org report highlighted a critical issue: many nonprofits are missing out on AI due to a lack of training. Althoug
Python Random Story Generator: Spark Your Creative Writing
Writer's block can feel like a towering wall between you and your creativity, but fear not—technology has your back. One of the coolest solutions out there is a Python-based random story generator. This nifty tool can kickstart your imagination, throw in some wild plot twists, and even churn out ent
Streamline Project Management with PMotto's AI Task Creation
In the whirlwind of today's business world, effective project management isn't just helpful—it's essential for staying ahead. Enter PMotto, a revolutionary tool that's changing the game by using machine learning to transform how project managers handle tasks and make decisions. This article dives in
Comments (0)
0/200
Google.org Unveils Newest AI Opportunity Fund Recipients
Nonprofits are the unsung heroes tackling community challenges head-on. However, to make a bigger impact, they need to harness the power of cutting-edge technology like AI. A 2024 Google.org report highlighted a critical issue: many nonprofits are missing out on AI due to a lack of training. Althoug
Python Random Story Generator: Spark Your Creative Writing
Writer's block can feel like a towering wall between you and your creativity, but fear not—technology has your back. One of the coolest solutions out there is a Python-based random story generator. This nifty tool can kickstart your imagination, throw in some wild plot twists, and even churn out ent
Streamline Project Management with PMotto's AI Task Creation
In the whirlwind of today's business world, effective project management isn't just helpful—it's essential for staying ahead. Enter PMotto, a revolutionary tool that's changing the game by using machine learning to transform how project managers handle tasks and make decisions. This article dives in
Comments (0)
0/200
April 24, 2025
WalterWhite
0
If you're looking to take your designs in Adobe Illustrator from flat to fabulous, mastering gradient strokes is the way to go. This guide will walk you through the ins and outs of creating and tweaking gradient strokes, giving your artwork that extra pop of depth and visual flair. Whether you're crafting logos, illustrations, or infographics, getting the hang of gradient strokes will supercharge your design toolkit.
Understanding Gradient Strokes in Adobe Illustrator
What are Gradient Strokes?
Gradient strokes in Adobe Illustrator are a game-changer, letting you apply a gradient not just to the fill but to the outline of shapes or paths. This creates a stunning effect where the stroke color smoothly shifts between different shades, adding a dynamic touch that can elevate your artwork. Unlike a plain old solid-color stroke, gradient strokes offer a customizable look that can really make your designs stand out.
The perks of using gradient strokes include:
- Visual Interest: They catch the eye and make your designs more captivating.
- Depth and Dimension: The color transitions add a sense of depth, making your work feel less flat.
- Customization: You're in control of the colors, their positions, and the overall vibe.
- Versatility: They can jazz up everything from logos to illustrations.
To start playing with gradient strokes, you'll need to get cozy with the Gradient panel in Illustrator. This is your go-to spot for crafting and fine-tuning your gradients.
Accessing the Gradient Panel
The Gradient panel is your main hub for working with gradient strokes. You can pop it open in a few ways:
- Window Menu: Head to
Window > Gradient. - Properties Panel: If the Properties panel is up (Window > Properties), you'll spot a Gradient section when you've got an object with a stroke selected.
- Toolbar: The Gradient Tool (G) can also whip up the Gradient panel, though it's mostly used for tweaking the gradient's direction and placement on your object.
Once you've got the Gradient panel open, you'll see a bunch of options for customizing your gradient:
- Gradient Type: Choose from Linear, Radial, or Freeform Gradients.
- Color Stops: Add, remove, and adjust the colors in your gradient.
- Angle: Tweak the rotation for Linear gradients.
- Aspect Ratio: Control the shape of Radial gradients.
- Location: Pinpoint where you want your color stops along the gradient.
Now that you know how to get to the Gradient panel, let's dive into making a gradient stroke.
Creating a Basic Shape and Adding a Stroke
Drawing a Rectangle with a Stroke
Let's start with a simple rectangle and add a gradient stroke to it.
Here's how you do it:
- Select the Rectangle Tool (M): Click on the Rectangle Tool in the toolbar.
- Draw a Rectangle: Click and drag on the artboard to create a rectangle of your desired size.
- Ensure a Stroke is Applied: In the Properties panel (Window > Properties), make sure the 'Stroke' option has a color applied. If it doesn't, click on the 'Stroke' swatch and pick a color. It doesn't matter which color, since we're going to switch it to a gradient soon.
- Remove Fill Color: Make sure the Fill color is set to 'None'. You can do this by selecting the rectangle, going to the 'Fill' option in the Properties panel, and choosing the 'None' swatch (the white square with a red diagonal line).
Now that we've got a basic rectangle with a stroke, let's turn that stroke into a gradient.
Converting the Stroke to a Gradient
Now that you've created a rectangle with a stroke, let's transform that stroke into a gradient:
- Select the Rectangle: Use the Selection Tool (V) to click on the rectangle you created.
- Open the Gradient Panel: Go to
Window > Gradientto open the Gradient panel. - Apply Gradient to Stroke: In the Gradient panel, click on the 'Stroke' icon. This tells Illustrator to apply the gradient to the stroke rather than the fill.
- Choose a Gradient: Click on one of the default gradient swatches in the Gradient panel. You'll see the stroke of your rectangle immediately update with the gradient. If the default swatches aren't your style, you can always whip up your own.
Here are some common gradient types:
- Linear Gradient: This creates a straight-line transition between colors.
- Radial Gradient: This creates a circular transition, radiating from a center point.
- Freeform Gradient: This lets you go wild with highly customizable gradients, placing and blending color stops freely. (More on this later)
Now your rectangle has a gradient stroke. Let's move on to customizing it.
Customizing Your Gradient Stroke
Adjusting Gradient Colors and Positions
Tweaking the gradient colors and their positions is key to getting that perfect look. Here's how to do it:
- Access the Gradient Slider: In the Gradient panel, you'll see a gradient slider showing the current gradient colors. The small squares beneath the slider are called 'color stops'.
- Change Color Stops: Double-click on a color stop to open the Color panel. From here, you can pick a new color. You can use the color sliders, enter a hex code, or choose a color from the swatches.
- Add Color Stops: To add a new color stop, just click below the gradient slider where you want the color to go. A new color stop will pop up, which you can then customize.
- Remove Color Stops: Drag a color stop away from the slider until it vanishes. Or, select the color stop and hit the 'Delete' icon in the Gradient panel.
- Adjust Color Stop Positions: Click and drag the color stops along the slider to shift their positions. Moving color stops closer together creates a sharper transition, while spreading them out makes for a smoother blend.
Playing around with these settings lets you whip up unique and eye-catching gradient strokes. It's also worth considering color theory to understand how colors will work together and what kind of emotional response your gradient might evoke.
Using the Gradient Tool (G) for Directional Control
The Gradient Tool (G) gives you another layer of control over your gradient strokes, letting you adjust the gradient's direction and length right on the artboard.
Here's how to use it:
- Select the Gradient Tool (G): Click on the Gradient Tool in the toolbar (or press 'G' on your keyboard).
- Adjust the Gradient: Click and drag on the object to set the gradient's direction. The starting point of your drag will be the beginning of the gradient, and the ending point will be the end of the gradient.
- For a Linear Gradient, dragging across the object will change the angle and length of the gradient.
- For a Radial Gradient, dragging will shift the center point and radius of the gradient.
- Fine-Tune in the Gradient Panel: For more precise control, you can mix the Gradient Tool with the settings in the Gradient panel. Use the Gradient Tool for broad adjustments and the Gradient panel for fine-tuning.
The Gradient Tool is especially handy for linear gradients where you want to control the angle and spread of the color transition. Experiment with different dragging directions and lengths to nail the look you're after.
Illustrator Pricing
Understanding Adobe Illustrator's Subscription Plans
Adobe Illustrator is part of Adobe's Creative Cloud subscription service. There are a few plans to choose from, depending on your needs and budget:
- Single App Plan: This plan gives you access to Adobe Illustrator only. It's perfect if Illustrator is the only Adobe app you need. Pricing for the single app plan varies by region and any current promotions.
- All Apps Plan (Creative Cloud): This plan gives you access to all Adobe Creative Cloud apps, including Photoshop, InDesign, Premiere Pro, and more. It's a great option if you need a variety of creative tools.
- Business Plans: Adobe also offers plans tailored for businesses, which include extra features like team collaboration tools and centralized license management.
It's a good idea to check out the Adobe Creative Cloud website or reach out to Adobe Sales directly to get the latest pricing for your region. Keep an eye out for discounts and promotions, especially if you're a student or educator. Adobe often offers special rates for those who qualify.
Think about your design needs and budget when picking the right plan for you.
Advantages and Disadvantages of Gradient Strokes
Pros
- Enhanced visual appeal
- Added depth and dimension
- High degree of customization
- Modern and professional look
Cons
- Can be overused and appear dated if not applied thoughtfully
- May not be suitable for all design styles
- Requires careful color selection to avoid clashing
Exploring Core Features for Gradient Strokes
Key Illustrator Features for Effective Gradient Strokes
Adobe Illustrator has a bunch of core features that help you create stunning gradient strokes:
- Gradient Panel: Your central control for gradient creation and customization.
- Color Panel: Lets you pick your colors.
- Stroke Panel: Adjust stroke weight, caps, corners, and alignment.
- Gradient Tool (G): Allows you to interactively adjust the gradient on the artboard.
- Expand Appearance: This feature is handy for converting strokes with effects into filled paths, allowing for advanced editing and manipulation.
- Shape Builder Tool: Lets you merge complex shapes together easily.
These core features of Adobe Illustrator work together to give you a smooth and efficient workflow for crafting your gradient strokes. Experiment with different settings and combinations to achieve the results you're looking for.
Don't forget to explore Illustrator's other effects, like Drop Shadow or Scribble, which can create unique graphics.
Creative Use Cases for Gradient Strokes
Gradient Strokes in Various Design Projects
Gradient strokes can spice up a wide range of design projects, making them visually appealing and eye-catching. Here are some inspiring ways to use them:
- Logo Design: Use gradient strokes to add a modern and dynamic feel to logo outlines, creating a sense of depth and sophistication. This is especially effective for minimalist logos where the gradient can be the star of the show.
- Illustration: Apply gradient strokes to character outlines or background elements to add dimension and visual interest. This can make illustrations appear more three-dimensional and engaging.
- Typography: Use gradient strokes on text to create unique and stylish typographic effects. This is great for headings, posters, and other display text where you want to make a statement.
- Icon Design: Enhance icon outlines with gradient strokes to make them pop and appear more modern. This is especially useful for app icons and website icons.
- Infographics: Use gradient strokes to highlight key data points or create visual connections between elements in your infographic. This helps guide the viewer's eye and make the information more digestible.
- Web Design: Incorporate gradient strokes into button outlines, border elements, or other UI components to add a touch of visual flair to your website. This can make your site more engaging and memorable.
The key is to experiment and find creative ways to integrate gradient strokes into your designs. Whether you're working on a logo, illustration, or website, gradient strokes can add a unique and professional touch.
Frequently Asked Questions
Can I use gradient strokes on text in Illustrator?
Yes, you can apply gradient strokes to text in Illustrator. First, convert your text to outlines by selecting the text and going to Type > Create Outlines. This turns the text into editable paths, allowing you to apply a gradient stroke just like any other shape. Keep in mind that complex text with thin strokes may not render as well with gradients, so it's best to use bold, simple fonts for the best results.
Are gradient strokes suitable for all design styles?
No, gradient strokes aren't a one-size-fits-all solution. They work best in modern, dynamic, and visually driven designs. In more minimalist or traditional designs, gradient strokes might feel out of place or overwhelming. It's important to consider the overall aesthetic of your project and whether gradient strokes align with that style. Experiment and use your best judgment to determine if they enhance or detract from the design.
Related Questions
How do I create a seamless gradient?
To create a seamless gradient, you need to carefully select colors that blend well together and adjust their positions to create a smooth transition. Make sure that adjacent color stops are similar in hue and value. Experiment with adding more color stops to create a more gradual transition. You can also use the 'Smooth Color' option in the Gradient panel to further refine the blend. Finally, test your gradient across different sizes and resolutions to ensure it remains seamless and visually appealing.


 Google.org Unveils Newest AI Opportunity Fund Recipients
Nonprofits are the unsung heroes tackling community challenges head-on. However, to make a bigger impact, they need to harness the power of cutting-edge technology like AI. A 2024 Google.org report highlighted a critical issue: many nonprofits are missing out on AI due to a lack of training. Althoug
Google.org Unveils Newest AI Opportunity Fund Recipients
Nonprofits are the unsung heroes tackling community challenges head-on. However, to make a bigger impact, they need to harness the power of cutting-edge technology like AI. A 2024 Google.org report highlighted a critical issue: many nonprofits are missing out on AI due to a lack of training. Althoug
 Python Random Story Generator: Spark Your Creative Writing
Writer's block can feel like a towering wall between you and your creativity, but fear not—technology has your back. One of the coolest solutions out there is a Python-based random story generator. This nifty tool can kickstart your imagination, throw in some wild plot twists, and even churn out ent
Python Random Story Generator: Spark Your Creative Writing
Writer's block can feel like a towering wall between you and your creativity, but fear not—technology has your back. One of the coolest solutions out there is a Python-based random story generator. This nifty tool can kickstart your imagination, throw in some wild plot twists, and even churn out ent
 Streamline Project Management with PMotto's AI Task Creation
In the whirlwind of today's business world, effective project management isn't just helpful—it's essential for staying ahead. Enter PMotto, a revolutionary tool that's changing the game by using machine learning to transform how project managers handle tasks and make decisions. This article dives in
Streamline Project Management with PMotto's AI Task Creation
In the whirlwind of today's business world, effective project management isn't just helpful—it's essential for staying ahead. Enter PMotto, a revolutionary tool that's changing the game by using machine learning to transform how project managers handle tasks and make decisions. This article dives in
5 Easy Steps to Reclaim Your Online Data Privacy - Start Today
Is AI Diminishing Our Intelligence? Scale AI CEO Urges U.S. to Lead in AI Race at Web Summit