


Beginner's Guide to Mastering Advanced Circuits in Rec Room AI
Ever wanted to breathe life into your Rec Room creations with AI that feels truly alive? This guide is your ticket to mastering Rec Room's circuit system for building engaging and dynamic AI characters. Whether you're a seasoned creator or just dipping your toes into the world of Rec Room, these core principles will elevate your gameplay to new heights. Let's embark on this journey to create intelligent, interactive characters that will captivate your players!
Key Points
- Mastering NavMesh baking for seamless AI pathfinding.
- Cloning and tweaking game maps to enhance AI behavior.
- Using Spawner Components to dynamically generate AI entities.
- Configuring AI behavior through circuit manipulation.
- Employing Trigger Volumes to detect players and trigger AI actions.
- Optimizing AI circuits for better performance and smoother gameplay.
Setting Up Your Rec Room AI Environment
Preparing the Game Map
Before we dive into the nitty-gritty of AI circuits, let's set the stage. Start by cloning your existing Game map. This clone will be the playground for your AI, allowing you to craft a rich, layered experience. Imagine it as building a secret underground world for your AI to roam, while your human players enjoy the main stage above.

Make sure there's ample space between the original and cloned maps. The more distance, the better, to avoid any audio or visual crossover. You don't want your players hearing AI sound effects from below or accidentally triggering AI actions.
Key Considerations for Map Preparation:
- Vertical Separation: Keep a good vertical distance to avoid audio bleed and prevent accidental AI activation.
- Map Coverage: Ensure the cloned map covers the entire playable area of the original map, allowing AI to navigate freely.
- Wall Integration: Clone the walls as well, using your maker pen. This keeps your AI characters within bounds and adds to the realism of your world.
Baking the NavMesh for AI Navigation
The NavMesh is like a roadmap for your AI, telling it where it can go. With your map cloned, it's time to bake this essential navigation tool.
Here's how to bake the NavMesh:
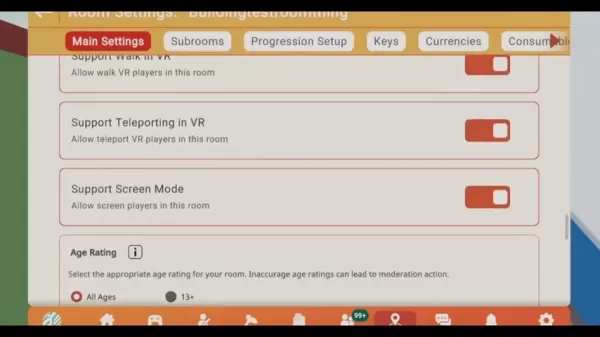
- Open the Room Settings menu.
- Head to the AI tab.
- Hit the Bake NavMesh button. Once done, a translucent white box will appear around your cloned map, indicating the AI's navigable area.
If you've moved or changed the AI's NavMesh, you might see purple areas on the map, marking new pathing zones. Remember, if you adjust the clone while baking, don't forget to clone the walls too, or your AI might take an unexpected dive off the map!
After baking, you may need to adjust the NavMesh to ensure your AI can explore the entire map. Use the "Manipulate" tool in your maker pen to expand the NavMesh to cover new areas. Don't forget to rebake after changes to make them stick.
Troubleshooting NavMesh Issues:
- NavMesh Not Appearing: Double-check that your cloned map is correctly aligned within the room's boundaries.
- AI Stuck in Place: Refine the NavMesh by adding or removing obstacles, and ensure the "Show in room" box is checked in settings.
AI Components and Circuitry in Rec Room
Spawning the Rec Room AI: The Spawner Component
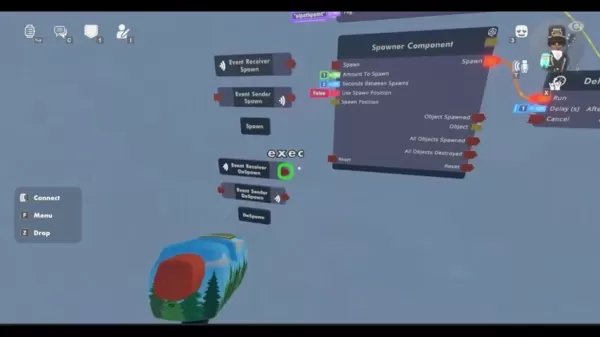
The Spawner Component is your gateway to bringing AI characters into your game world. It controls where, when, and how your AI appears, adding a dynamic flair to your Rec Room experiences.

Key Steps to Spawning AI with Spawner Component:
- Enable Beta Content in Room Settings to access the Spawner Component.
- Add the Spawner Component to your cloned map where you want your AI to appear.
- Configure the Spawner using your Maker Pen, setting the object to spawn and choosing "disengaged" behavior for non-aggressive spawns.
- Select an AI type like Melee Goblin or Mouse Bot, depending on your desired AI behavior.
- Detach the Spawner Component and move it to the AI circuitry area for easier manipulation.
Don't forget to tag your AI for easy circuit manipulation later. This helps with pathing and navigation.
Building the AI Circuitry: Core Components
The real magic happens with Rec Room's circuitry. By connecting various components, you can control your AI's behavior, movement, and interactions. It might seem complex, but breaking it down makes it manageable.
Essential Circuit Components for AI Behavior:
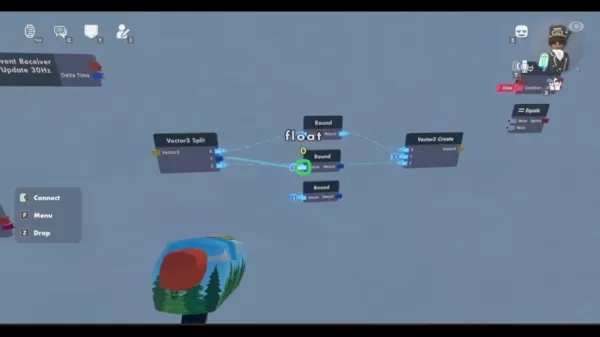
- Event Receiver: Triggers actions based on game events, set to "Update 30Hz" for smooth AI updates.
- Rec Room Object Get All With Tag: Identifies AI objects by tags, making them easy to manipulate.
- Is Valid: Checks if an object exists before further operations, avoiding errors.
- Rec Room Object Get First With Tag: Finds the first object with a specified tag.
- From Rec Room Object: Retrieves data from objects, converting it for use in other circuits.
- Vector3 Split & Create: Manages position data, crucial for AI movement.
- Add: Adjusts coordinates, like the Y-axis for AI positioning.
- Lerp: Ensures smooth transitions in character movement.
- Set Transform: Positions and rotates AI objects.
- Get Position: Reads an object's world position.
- Raycast: Detects objects in a line, useful for player detection.
- Get Closest: Identifies the nearest player.
- Subtract: Used in vector calculations for navigation.
To smooth out AI rotations and prevent jittering, add a Lerp to your circuit. It's a simple yet effective way to ensure your AI moves naturally.
Integrating Key Components for AI Success
Linking Objects for Dynamic AI Movement
Want your AI to move in interesting ways? It's all about connecting the right components. Trigger volumes, Rec Room objects, Vector3s, AI paths, and Event Receivers are your building blocks.
Step 1: Trigger Volume Connections
Start by connecting the trigger volume to your AI's animation controller or monster. This connection will animate your AI when a player enters the trigger volume, whether it's a monster roaring or an AI character speaking.
Step 2: Building AI Patrol Points
Connect an AI path to your AI, establishing patrol points for them to follow when no players are around.
Place these points logically within your map, ensuring they're within the playable area for effective patrolling.
Smooth Movement and Following Techniques
To take your AI's movement to the next level, clone your Vector3 Split and follow these steps:
- Place the clone above the set transforms.
- Connect the velocity to the Vector3 Split, ensuring smooth chasing movements.
Create additional components like "From Rec Room Object," a boolean, and an "if" chip to enhance your AI's responsiveness and interaction.
Enabling Room Authority for AI Spawning
To ensure everyone can enjoy your AI characters, enable room authority for AI spawning. Use an event definition and ensure beta content is enabled in settings. This setup allows AI to spawn smoothly and interact with players as intended.
Creating a Basic Line of Sight (LOS) AI Character
A good line of sight is crucial for your AI to effectively interact with players. Use a trigger and raycast to establish this connection, ensuring your AI can see and respond to players in its environment.
Rec Room AI: Analyzing the Benefits & Drawbacks
Pros
- Enhances interactivity and dynamism in Rec Room experiences.
- Boosts player immersion with realistic AI behaviors.
- Opens up creative avenues for storytelling and gameplay design.
- Offers a learning platform for circuit design principles.
- Enables a range of AI-driven experiences, from patrolling bots to quest-giving NPCs.
Cons
- Requires a solid grasp of Rec Room's circuit system.
- Can be time-consuming, especially for complex AI setups.
- Needs optimization to prevent lag with multiple AI characters.
- Limited by Rec Room's current circuit capabilities.
- May require manual troubleshooting for pathfinding and behavioral issues.
Frequently Asked Questions
How do I prevent audio bleed from the cloned map?
Ensure significant vertical separation between the original and cloned maps. Experiment with distances to find the sweet spot that minimizes audio bleed without impacting gameplay.
Why is my AI character stuck in one place?
Check that the NavMesh is correctly baked and covers all areas the AI should navigate. Remove any unintended obstacles that might be blocking the AI's path.
Can I use any AI character model with this guide?
While this guide focuses on Melee Goblins and Mouse Bots, the principles can be adapted to other AI models with adjustments to circuits and behavior settings.
Related Questions
What other types of AI can I create in Rec Room using circuits?
With a solid understanding of the basics, the sky's the limit. From flying bots to patrolling characters that only come out at night, the principles you've learned here are stepping stones to creating more advanced AI experiences. Experiment with pathfinding and circuit components to bring your unique AI ideas to life.
Related article
 Seeking Faith and Purpose in an Age of Skepticism
In our modern age of scientific inquiry and critical thinking, maintaining spiritual faith often feels like walking against the tide. Many struggle to reconcile timeless beliefs with contemporary skepticism, leaving them longing for deeper meaning. T
How ChatGPT Works: Capabilities, Applications, and Future Implications
The rapid evolution of artificial intelligence is transforming digital interactions and communication. Leading this transformation is ChatGPT, an advanced conversational AI that sets new standards for natural language processing. This in-depth examin
Salesforce’s Transformer Model Guide: AI Text Summarization Explained
In an era where information overload is the norm, AI-powered text summarization has become an indispensable tool for extracting key insights from lengthy documents. This comprehensive guide examines Salesforce's groundbreaking AI summarization techno
Comments (6)
0/200
Seeking Faith and Purpose in an Age of Skepticism
In our modern age of scientific inquiry and critical thinking, maintaining spiritual faith often feels like walking against the tide. Many struggle to reconcile timeless beliefs with contemporary skepticism, leaving them longing for deeper meaning. T
How ChatGPT Works: Capabilities, Applications, and Future Implications
The rapid evolution of artificial intelligence is transforming digital interactions and communication. Leading this transformation is ChatGPT, an advanced conversational AI that sets new standards for natural language processing. This in-depth examin
Salesforce’s Transformer Model Guide: AI Text Summarization Explained
In an era where information overload is the norm, AI-powered text summarization has become an indispensable tool for extracting key insights from lengthy documents. This comprehensive guide examines Salesforce's groundbreaking AI summarization techno
Comments (6)
0/200
![EricAllen]() EricAllen
EricAllen
 September 9, 2025 at 10:30:37 AM EDT
Les circuits avancés dans Rec Room ont l'air super puissants ! 😲 J'ai toujours voulu créer des PNJ plus intelligents, mais ça semble super technique... Est-ce que ce guide est vraiment accessible pour les débutants ou il faut déjà avoir des bases en programmation ?


 0
0
![JerryMoore]() JerryMoore
May 11, 2025 at 10:52:42 PM EDT
JerryMoore
May 11, 2025 at 10:52:42 PM EDT
Rec Room AI를 마스터하기 위한 가이드는 정말 유용해요! 초보자도 쉽게 따라할 수 있고, 회로 시스템에 대해 깊이 배울 수 있어요. 다만 정보가 많아서 조금 압도적일 수 있어요. 그래도 노력하면 됩니다! 한번 해보세요😊
0
![RalphMitchell]() RalphMitchell
May 11, 2025 at 8:31:38 PM EDT
RalphMitchell
May 11, 2025 at 8:31:38 PM EDT
Rec RoomのAIをマスターするためのガイドは素晴らしいです!初心者にも分かりやすく、回路システムについて深く学べます。ただ、情報量が多いので少し圧倒されるかも。でも、頑張れば大丈夫!試してみてくださいね😊
0
![CarlTaylor]() CarlTaylor
May 11, 2025 at 5:20:54 AM EDT
CarlTaylor
May 11, 2025 at 5:20:54 AM EDT
Este guia é um salva-vidas para quem está começando no Rec Room AI! É super detalhado e fácil de seguir, mesmo que você seja novo em circuitos. O único ponto negativo é que pode ser um pouco avassalador com todas as informações de uma vez. Mas, prática leva à perfeição, certo? Dê uma chance! 😊
0
![FrankJackson]() FrankJackson
May 11, 2025 at 3:18:14 AM EDT
FrankJackson
May 11, 2025 at 3:18:14 AM EDT
This guide is a lifesaver for anyone diving into Rec Room AI! It's super detailed and easy to follow, even if you're new to circuits. The only downside is it can be a bit overwhelming with all the info at once. But hey, practice makes perfect, right? Give it a go! 😊
0
![JustinAnderson]() JustinAnderson
May 11, 2025 at 1:43:01 AM EDT
JustinAnderson
May 11, 2025 at 1:43:01 AM EDT
¡Esta guía es un salvavidas para quien se mete en el AI de Rec Room! Es súper detallada y fácil de seguir, incluso si eres nuevo en los circuitos. El único inconveniente es que puede ser un poco abrumador con toda la información de golpe. Pero, la práctica hace al maestro, ¿verdad? ¡Dale una oportunidad! 😊
0
Ever wanted to breathe life into your Rec Room creations with AI that feels truly alive? This guide is your ticket to mastering Rec Room's circuit system for building engaging and dynamic AI characters. Whether you're a seasoned creator or just dipping your toes into the world of Rec Room, these core principles will elevate your gameplay to new heights. Let's embark on this journey to create intelligent, interactive characters that will captivate your players!
Key Points
- Mastering NavMesh baking for seamless AI pathfinding.
- Cloning and tweaking game maps to enhance AI behavior.
- Using Spawner Components to dynamically generate AI entities.
- Configuring AI behavior through circuit manipulation.
- Employing Trigger Volumes to detect players and trigger AI actions.
- Optimizing AI circuits for better performance and smoother gameplay.
Setting Up Your Rec Room AI Environment
Preparing the Game Map
Before we dive into the nitty-gritty of AI circuits, let's set the stage. Start by cloning your existing Game map. This clone will be the playground for your AI, allowing you to craft a rich, layered experience. Imagine it as building a secret underground world for your AI to roam, while your human players enjoy the main stage above.
Make sure there's ample space between the original and cloned maps. The more distance, the better, to avoid any audio or visual crossover. You don't want your players hearing AI sound effects from below or accidentally triggering AI actions.
Key Considerations for Map Preparation:
- Vertical Separation: Keep a good vertical distance to avoid audio bleed and prevent accidental AI activation.
- Map Coverage: Ensure the cloned map covers the entire playable area of the original map, allowing AI to navigate freely.
- Wall Integration: Clone the walls as well, using your maker pen. This keeps your AI characters within bounds and adds to the realism of your world.
Baking the NavMesh for AI Navigation
The NavMesh is like a roadmap for your AI, telling it where it can go. With your map cloned, it's time to bake this essential navigation tool.
Here's how to bake the NavMesh:
- Open the Room Settings menu.
- Head to the AI tab.
- Hit the Bake NavMesh button. Once done, a translucent white box will appear around your cloned map, indicating the AI's navigable area.
If you've moved or changed the AI's NavMesh, you might see purple areas on the map, marking new pathing zones. Remember, if you adjust the clone while baking, don't forget to clone the walls too, or your AI might take an unexpected dive off the map!
After baking, you may need to adjust the NavMesh to ensure your AI can explore the entire map. Use the "Manipulate" tool in your maker pen to expand the NavMesh to cover new areas. Don't forget to rebake after changes to make them stick.
Troubleshooting NavMesh Issues:
- NavMesh Not Appearing: Double-check that your cloned map is correctly aligned within the room's boundaries.
- AI Stuck in Place: Refine the NavMesh by adding or removing obstacles, and ensure the "Show in room" box is checked in settings.
AI Components and Circuitry in Rec Room
Spawning the Rec Room AI: The Spawner Component
The Spawner Component is your gateway to bringing AI characters into your game world. It controls where, when, and how your AI appears, adding a dynamic flair to your Rec Room experiences.
Key Steps to Spawning AI with Spawner Component:
- Enable Beta Content in Room Settings to access the Spawner Component.
- Add the Spawner Component to your cloned map where you want your AI to appear.
- Configure the Spawner using your Maker Pen, setting the object to spawn and choosing "disengaged" behavior for non-aggressive spawns.
- Select an AI type like Melee Goblin or Mouse Bot, depending on your desired AI behavior.
- Detach the Spawner Component and move it to the AI circuitry area for easier manipulation.
Don't forget to tag your AI for easy circuit manipulation later. This helps with pathing and navigation.
Building the AI Circuitry: Core Components
The real magic happens with Rec Room's circuitry. By connecting various components, you can control your AI's behavior, movement, and interactions. It might seem complex, but breaking it down makes it manageable.
Essential Circuit Components for AI Behavior:
- Event Receiver: Triggers actions based on game events, set to "Update 30Hz" for smooth AI updates.
- Rec Room Object Get All With Tag: Identifies AI objects by tags, making them easy to manipulate.
- Is Valid: Checks if an object exists before further operations, avoiding errors.
- Rec Room Object Get First With Tag: Finds the first object with a specified tag.
- From Rec Room Object: Retrieves data from objects, converting it for use in other circuits.
- Vector3 Split & Create: Manages position data, crucial for AI movement.
- Add: Adjusts coordinates, like the Y-axis for AI positioning.
- Lerp: Ensures smooth transitions in character movement.
- Set Transform: Positions and rotates AI objects.
- Get Position: Reads an object's world position.
- Raycast: Detects objects in a line, useful for player detection.
- Get Closest: Identifies the nearest player.
- Subtract: Used in vector calculations for navigation.
To smooth out AI rotations and prevent jittering, add a Lerp to your circuit. It's a simple yet effective way to ensure your AI moves naturally.
Integrating Key Components for AI Success
Linking Objects for Dynamic AI Movement
Want your AI to move in interesting ways? It's all about connecting the right components. Trigger volumes, Rec Room objects, Vector3s, AI paths, and Event Receivers are your building blocks.
Step 1: Trigger Volume Connections
Start by connecting the trigger volume to your AI's animation controller or monster. This connection will animate your AI when a player enters the trigger volume, whether it's a monster roaring or an AI character speaking.
Step 2: Building AI Patrol Points
Connect an AI path to your AI, establishing patrol points for them to follow when no players are around.
Place these points logically within your map, ensuring they're within the playable area for effective patrolling.
Smooth Movement and Following Techniques
To take your AI's movement to the next level, clone your Vector3 Split and follow these steps:
- Place the clone above the set transforms.
- Connect the velocity to the Vector3 Split, ensuring smooth chasing movements.
Create additional components like "From Rec Room Object," a boolean, and an "if" chip to enhance your AI's responsiveness and interaction.
Enabling Room Authority for AI Spawning
To ensure everyone can enjoy your AI characters, enable room authority for AI spawning. Use an event definition and ensure beta content is enabled in settings. This setup allows AI to spawn smoothly and interact with players as intended.
Creating a Basic Line of Sight (LOS) AI Character
A good line of sight is crucial for your AI to effectively interact with players. Use a trigger and raycast to establish this connection, ensuring your AI can see and respond to players in its environment.
Rec Room AI: Analyzing the Benefits & Drawbacks
Pros
- Enhances interactivity and dynamism in Rec Room experiences.
- Boosts player immersion with realistic AI behaviors.
- Opens up creative avenues for storytelling and gameplay design.
- Offers a learning platform for circuit design principles.
- Enables a range of AI-driven experiences, from patrolling bots to quest-giving NPCs.
Cons
- Requires a solid grasp of Rec Room's circuit system.
- Can be time-consuming, especially for complex AI setups.
- Needs optimization to prevent lag with multiple AI characters.
- Limited by Rec Room's current circuit capabilities.
- May require manual troubleshooting for pathfinding and behavioral issues.
Frequently Asked Questions
How do I prevent audio bleed from the cloned map?
Ensure significant vertical separation between the original and cloned maps. Experiment with distances to find the sweet spot that minimizes audio bleed without impacting gameplay.
Why is my AI character stuck in one place?
Check that the NavMesh is correctly baked and covers all areas the AI should navigate. Remove any unintended obstacles that might be blocking the AI's path.
Can I use any AI character model with this guide?
While this guide focuses on Melee Goblins and Mouse Bots, the principles can be adapted to other AI models with adjustments to circuits and behavior settings.
Related Questions
What other types of AI can I create in Rec Room using circuits?
With a solid understanding of the basics, the sky's the limit. From flying bots to patrolling characters that only come out at night, the principles you've learned here are stepping stones to creating more advanced AI experiences. Experiment with pathfinding and circuit components to bring your unique AI ideas to life.


 Seeking Faith and Purpose in an Age of Skepticism
In our modern age of scientific inquiry and critical thinking, maintaining spiritual faith often feels like walking against the tide. Many struggle to reconcile timeless beliefs with contemporary skepticism, leaving them longing for deeper meaning. T
Seeking Faith and Purpose in an Age of Skepticism
In our modern age of scientific inquiry and critical thinking, maintaining spiritual faith often feels like walking against the tide. Many struggle to reconcile timeless beliefs with contemporary skepticism, leaving them longing for deeper meaning. T
 How ChatGPT Works: Capabilities, Applications, and Future Implications
The rapid evolution of artificial intelligence is transforming digital interactions and communication. Leading this transformation is ChatGPT, an advanced conversational AI that sets new standards for natural language processing. This in-depth examin
How ChatGPT Works: Capabilities, Applications, and Future Implications
The rapid evolution of artificial intelligence is transforming digital interactions and communication. Leading this transformation is ChatGPT, an advanced conversational AI that sets new standards for natural language processing. This in-depth examin
 Salesforce’s Transformer Model Guide: AI Text Summarization Explained
In an era where information overload is the norm, AI-powered text summarization has become an indispensable tool for extracting key insights from lengthy documents. This comprehensive guide examines Salesforce's groundbreaking AI summarization techno
September 9, 2025 at 10:30:37 AM EDT
Salesforce’s Transformer Model Guide: AI Text Summarization Explained
In an era where information overload is the norm, AI-powered text summarization has become an indispensable tool for extracting key insights from lengthy documents. This comprehensive guide examines Salesforce's groundbreaking AI summarization techno
September 9, 2025 at 10:30:37 AM EDT
Les circuits avancés dans Rec Room ont l'air super puissants ! 😲 J'ai toujours voulu créer des PNJ plus intelligents, mais ça semble super technique... Est-ce que ce guide est vraiment accessible pour les débutants ou il faut déjà avoir des bases en programmation ?
0
May 11, 2025 at 10:52:42 PM EDT
Rec Room AI를 마스터하기 위한 가이드는 정말 유용해요! 초보자도 쉽게 따라할 수 있고, 회로 시스템에 대해 깊이 배울 수 있어요. 다만 정보가 많아서 조금 압도적일 수 있어요. 그래도 노력하면 됩니다! 한번 해보세요😊
0
May 11, 2025 at 8:31:38 PM EDT
Rec RoomのAIをマスターするためのガイドは素晴らしいです!初心者にも分かりやすく、回路システムについて深く学べます。ただ、情報量が多いので少し圧倒されるかも。でも、頑張れば大丈夫!試してみてくださいね😊
0
May 11, 2025 at 5:20:54 AM EDT
Este guia é um salva-vidas para quem está começando no Rec Room AI! É super detalhado e fácil de seguir, mesmo que você seja novo em circuitos. O único ponto negativo é que pode ser um pouco avassalador com todas as informações de uma vez. Mas, prática leva à perfeição, certo? Dê uma chance! 😊
0
May 11, 2025 at 3:18:14 AM EDT
This guide is a lifesaver for anyone diving into Rec Room AI! It's super detailed and easy to follow, even if you're new to circuits. The only downside is it can be a bit overwhelming with all the info at once. But hey, practice makes perfect, right? Give it a go! 😊
0
May 11, 2025 at 1:43:01 AM EDT
¡Esta guía es un salvavidas para quien se mete en el AI de Rec Room! Es súper detallada y fácil de seguir, incluso si eres nuevo en los circuitos. El único inconveniente es que puede ser un poco abrumador con toda la información de golpe. Pero, la práctica hace al maestro, ¿verdad? ¡Dale una oportunidad! 😊
0


