Comprehensive Guide to Mastering Font Size in Adobe Illustrator

 April 27, 2025

 RyanLee

 0
0
If you're diving into the world of graphic design and art, Adobe Illustrator is your go-to tool. It's packed with features that let you create visually stunning designs, and one of the key elements you'll be working with is typography. Getting the font size just right is crucial for both readability and the overall impact of your design. This guide will walk you through various methods to tweak font sizes in Adobe Illustrator, helping you make your text look its best, whether you're crafting headlines, body text, or any other textual element. Mastering font size adjustments can truly elevate your designs.
Key Points
- Get to grips with the differences between point type and area type text in Illustrator.
- Use the Character panel within the Properties panel for precise font size control.
- Learn how to scale text proportionally with the Selection tool.
- Explore the Scale tool for dynamic text resizing, with or without constraints.
- Access the Character panel through the Window menu if it's not visible.
Understanding Text Types and Initial Setup
Point Type vs. Area Type: Choosing the Right Approach
In Adobe Illustrator, you have two primary ways to create text: point type and area type. Point type is perfect for headlines or short texts where you want the text to expand freely. You create it by clicking with the Type tool (press 'T' to access it) and then typing away. On the other hand, area type is ideal for longer text like paragraphs. You create it by clicking and dragging the Type tool to form a text box, allowing the text to wrap within that space. Knowing which to use can make a big difference in how you manage font sizes and text layout. Each type behaves differently when you resize or scale, so picking the right one from the start can save you a lot of hassle down the line. No matter which you choose, getting a handle on font size is essential for creating eye-catching, readable designs in Adobe Illustrator.
Accessing the Type Tool in Adobe Illustrator
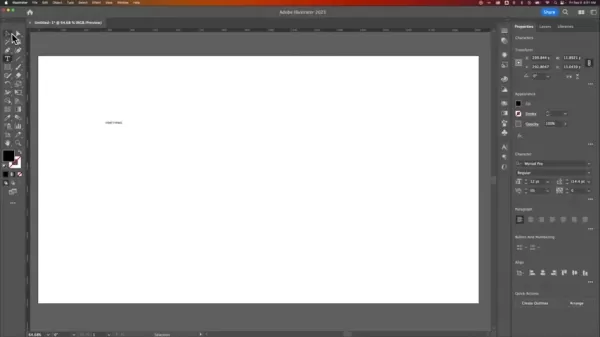
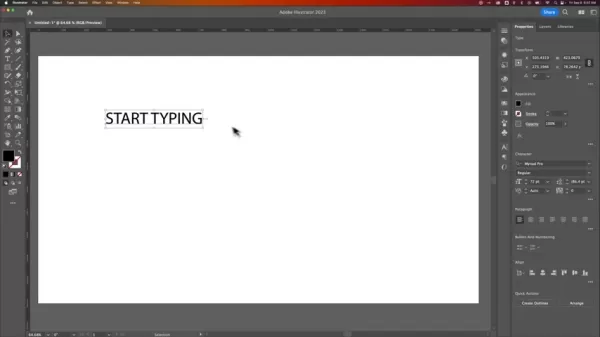
Before you start tweaking font sizes, you need to know how to use the Type Tool in Adobe Illustrator. You'll find it in the toolbar on the left side of your screen, marked with a 'T' icon. You can also hit the 'T' key on your keyboard to activate it quickly. Once you've got the Type Tool active, you can click anywhere on your artboard to create point type, or click and drag to create area type. This is the starting point for all your text work, so getting familiar with the Type Tool will streamline your design process. Consistent, readable typography is key to creating compelling graphics, and the right font size plays a big role in that.

Advanced Tips for Text Manipulation in Illustrator
Maintaining Readability and Visual Hierarchy
Adjusting font size is just one piece of the typography puzzle. Readability and visual hierarchy are also crucial. Readability is about how easily your text can be read and understood, influenced by factors like font choice, line height, and letter spacing. Visual hierarchy, meanwhile, helps guide the reader's eye through your design, highlighting what's important. You can achieve this through different font sizes, styles like bold or italics, and colors. For example, using a larger font for headings helps them stand out from the body text, making your design easier to scan and understand. Keeping your typography sharp, consistent, and readable is essential for creating compelling graphics, and choosing the right font size is a big part of that.
Using Paragraph Styles for Consistency
If you're working on a multi-page document or one with recurring text elements, paragraph styles can be a lifesaver. They let you set a bunch of formatting options (like font size, font family, line height, etc.) and apply them to multiple paragraphs at once. To set up a paragraph style, format a paragraph the way you want it, then go to Window > Type > Paragraph Styles. Click the 'Create New Style' button (it looks like a small page icon) to save your settings. You can then apply this style to other paragraphs by selecting them and clicking on the style in the panel. If you need to tweak the formatting later, you can update the style, and the changes will automatically apply everywhere you've used it. This ensures your design stays consistent, and keeping the right font size is crucial. Using consistent typography styles helps your audience feel at ease and enjoy your graphics.
Different Methods for Adjusting Font Size in Illustrator
Using the Character Panel in the Properties Panel
The simplest way to adjust font size is through the Character panel. First, select the text you want to change. You can do this with the Selection tool (the black arrow) to select the whole text object, or double-click inside the text with the Type tool to select specific parts. Once your text is selected, head over to the Properties panel on the right side of your screen. If you don't see it, go to Window > Properties to bring it up. In the Character section, you'll see a dropdown menu showing the current font size. You can either type in a new size or choose from the list. Hit Enter, and your text will update. This is the most precise way to control your font size, giving you full command over your typography in Adobe Illustrator.
Scaling Text Proportionally with the Selection Tool
For a more visual approach to resizing text, use the Selection tool to scale it proportionally. Select your text object with the Selection tool, then hover over one of the corner handles of the bounding box that appears. Click and drag the handle to resize. To keep the text's proportions intact, hold down the Shift key while dragging. This method is great for quickly adjusting text size without needing exact numbers. However, scaling this way can sometimes result in fractional point sizes, so you might want to refine it in the Character panel later. Ensuring your typography stays sharp and consistent is key to creating compelling graphics, and using the right font size is essential.
Utilizing the Scale Tool for Dynamic Resizing
The Scale tool offers another way to dynamically resize text, especially useful for area type text where you want to resize both the text and its text box at the same time. First, select your text object with the Selection tool, then find the Scale tool in the toolbar (it looks like a square being resized) or press 'S' on your keyboard. Click and drag on the artboard to resize, and hold Shift to keep the proportions even. The Scale tool lets you scale from a specific point by holding Alt (Option on Mac) and clicking where you want the anchor point to be. This method can be a bit tricky but offers flexibility, especially when managing font size within a specific text box.
Adobe Illustrator Pricing Plans
Understanding the Subscription Options
Adobe Illustrator is available through a subscription model, with different plans to suit various needs. Here's a quick rundown:
- Single App Plan: This gives you access to Adobe Illustrator alone. It's perfect if you're focused on vector graphics and don't need other Adobe apps.
- All Apps Plan (Creative Cloud): This plan includes over 20 Adobe creative apps, like Photoshop, InDesign, and Premiere Pro. It's great for professionals who need a wide range of tools for different projects.
Prices and features can change, so it's best to check the Adobe website for the latest info.
Advantages and Disadvantages of Scaling Text
Pros
- Quick and visual adjustments
- Proportional scaling maintains aspect ratio
- Useful for initial size estimations
Cons
- Can result in fractional point sizes
- Less precise than using the Character panel
- Scaling area text boxes can distort layout
Key Features of Adobe Illustrator for Text Handling
Advanced Typography Options
Adobe Illustrator offers a range of typographic controls that give designers precise control. Beyond adjusting font size, you can tweak kerning, tracking, leading, and baseline shift. The OpenType features let you use stylistic alternates, ligatures, and contextual sets to enhance your text's visual appeal. With the Touch Type tool, you can even modify individual letters for unique designs and custom typography layouts. Working with the Touch Type tool in Adobe Illustrator opens up endless design possibilities.
Integration with Adobe Fonts
Adobe Illustrator's integration with Adobe Fonts gives you access to thousands of high-quality fonts. You can browse, activate, and sync fonts directly in the app. Whether you need a classic serif or a modern sans-serif, the vast library has you covered. Adobe Fonts are included with most Creative Cloud subscriptions, making font size selection and management easier. Working with Adobe Fonts in Adobe Illustrator allows for limitless typographic design possibilities. Finding the perfect font size is important, but choosing the right font for the job is key.
Live Effects and Distortions
In Adobe Illustrator, you can apply live effects and distortions to text without permanently altering it. You can wrap, twist, inflate, and more to transform your text's look. These effects stay editable, so you can experiment freely. Combining live effects with advanced font size control via the Properties panel gives you a vast playground for creativity.
Use Cases: Where Font Size Matters Most
Logo Design and Branding
In logo design, font size is crucial for creating a recognizable and memorable mark. It ensures the brand's name is legible across different media, from business cards to billboards. A well-chosen font size, paired with a carefully selected font, can reinforce the brand's personality and values. When designing typography for logos in Adobe Illustrator, a crisp, clean aesthetic and clear visual hierarchy are essential.
Web and Mobile Design
For web and mobile design, font size directly affects user experience. Making sure text is readable on various screen sizes and resolutions is key for accessibility and engagement. Adobe Illustrator is often used to prototype website and app interfaces, where thoughtful font size considerations lay the groundwork for a user-friendly and visually appealing design.
Print Design and Layout
In print design, like brochures, posters, and magazines, font size determines how effectively information is communicated. A clear font size hierarchy guides readers through the content, highlighting key points. In Adobe Illustrator, designers fine-tune typographic settings to create visually striking and informative layouts.
Frequently Asked Questions About Font Sizes in Adobe Illustrator
How do I change the font size of multiple text boxes at once?
To change the font size of multiple text boxes at the same time, select all the text boxes you want to change with the Selection tool. Then, go to the Character panel in the Properties panel. Any font size changes you make there will apply to all selected text boxes. This is the most efficient way to keep your design consistent. For logos or branded text, maintaining a consistent font size will solidify brand recognition.
Why is my text appearing blurry after scaling?
Text can look blurry after scaling if it results in a fractional point size or if the text object isn't aligned to the pixel grid. To fix this, make sure the font size is a whole number (e.g., 12pt instead of 12.5pt) and that 'Align to Pixel Grid' is enabled in the Transform panel. This will help keep your text sharp and clear. Paying attention to detail and ensuring the correct font size is maintained will result in a professional-looking graphic.
Related Questions About Typography in Design
What are some best practices for choosing font sizes for different types of text (headings, body text, captions)?
Choosing the right font sizes depends on the type of text and its purpose. For headings, larger font sizes (e.g., 24-36pt) create a clear visual hierarchy and grab the reader's attention. Body text should be smaller (e.g., 10-12pt) for comfortable reading. Captions should be even smaller (e.g., 8-10pt) to provide context without overwhelming the main content. Always consider the overall design and your audience when deciding on font sizes. Working in Adobe Illustrator requires attention to detail. Choosing the appropriate font size for the job and using consistent typography styles will help your audience feel at ease and enjoy your graphics.
Text Type Recommended Font Size Purpose Headings 24-36pt Attract attention, create visual hierarchy Body Text 10-12pt Comfortable reading, convey the main content Captions 8-10pt Provide context, supplement the main content Subheadings 14-18pt Break up body text, guide the reader through the content Quotes 12-14pt Highlight important statements, add visual interest Bullet Points 10-12pt Organize information, improve readability Call to Action 14-16pt Draw attention to calls to action, prompt the user to take action
Related article
 Billy Idol's 'Rebel Yell': An In-Depth Look at the Live Performance
Billy Idol's 'Rebel Yell' transcends being just a song; it's an emblem of 1980s rock culture that continues to resonate with fans across generations. This piece takes you on a journey through the pulsating energy and iconic visuals of a live 'Rebel Yell' performance, unraveling the elements that cem
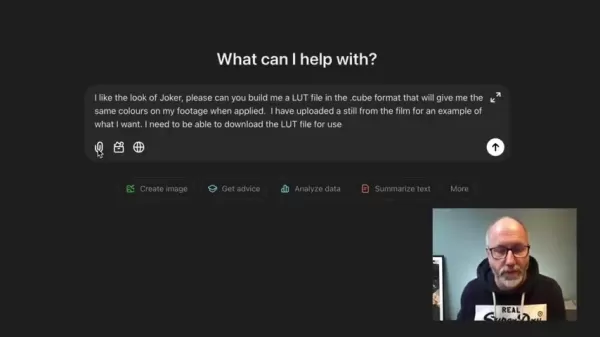
Transform Color Correction with AI LUTs in Video Editing
Are you ready to revolutionize your approach to color correction in video editing? AI-driven tools are now making it simpler than ever to achieve professional, cinematic looks. With the emergence of advanced AI models, creating custom LUTs (Look-Up Tables) tailored to specific aesthetics is now acce
Decoding Oshi no Ko's 'Idol': A Deep Dive Analysis
The opening theme of *Oshi no Ko*, titled "Idol," transcends being just a catchy J-pop tune; it's a narrative masterpiece that dives deep into the complexities of stardom, identity, and the often-blurred lines between an idol's public image and private reality. This song not only sets the stage for
Comments (0)
0/200
Billy Idol's 'Rebel Yell': An In-Depth Look at the Live Performance
Billy Idol's 'Rebel Yell' transcends being just a song; it's an emblem of 1980s rock culture that continues to resonate with fans across generations. This piece takes you on a journey through the pulsating energy and iconic visuals of a live 'Rebel Yell' performance, unraveling the elements that cem
Transform Color Correction with AI LUTs in Video Editing
Are you ready to revolutionize your approach to color correction in video editing? AI-driven tools are now making it simpler than ever to achieve professional, cinematic looks. With the emergence of advanced AI models, creating custom LUTs (Look-Up Tables) tailored to specific aesthetics is now acce
Decoding Oshi no Ko's 'Idol': A Deep Dive Analysis
The opening theme of *Oshi no Ko*, titled "Idol," transcends being just a catchy J-pop tune; it's a narrative masterpiece that dives deep into the complexities of stardom, identity, and the often-blurred lines between an idol's public image and private reality. This song not only sets the stage for
Comments (0)
0/200
April 27, 2025
RyanLee
0
If you're diving into the world of graphic design and art, Adobe Illustrator is your go-to tool. It's packed with features that let you create visually stunning designs, and one of the key elements you'll be working with is typography. Getting the font size just right is crucial for both readability and the overall impact of your design. This guide will walk you through various methods to tweak font sizes in Adobe Illustrator, helping you make your text look its best, whether you're crafting headlines, body text, or any other textual element. Mastering font size adjustments can truly elevate your designs.
Key Points
- Get to grips with the differences between point type and area type text in Illustrator.
- Use the Character panel within the Properties panel for precise font size control.
- Learn how to scale text proportionally with the Selection tool.
- Explore the Scale tool for dynamic text resizing, with or without constraints.
- Access the Character panel through the Window menu if it's not visible.
Understanding Text Types and Initial Setup
Point Type vs. Area Type: Choosing the Right Approach
In Adobe Illustrator, you have two primary ways to create text: point type and area type. Point type is perfect for headlines or short texts where you want the text to expand freely. You create it by clicking with the Type tool (press 'T' to access it) and then typing away. On the other hand, area type is ideal for longer text like paragraphs. You create it by clicking and dragging the Type tool to form a text box, allowing the text to wrap within that space. Knowing which to use can make a big difference in how you manage font sizes and text layout. Each type behaves differently when you resize or scale, so picking the right one from the start can save you a lot of hassle down the line. No matter which you choose, getting a handle on font size is essential for creating eye-catching, readable designs in Adobe Illustrator.
Accessing the Type Tool in Adobe Illustrator
Before you start tweaking font sizes, you need to know how to use the Type Tool in Adobe Illustrator. You'll find it in the toolbar on the left side of your screen, marked with a 'T' icon. You can also hit the 'T' key on your keyboard to activate it quickly. Once you've got the Type Tool active, you can click anywhere on your artboard to create point type, or click and drag to create area type. This is the starting point for all your text work, so getting familiar with the Type Tool will streamline your design process. Consistent, readable typography is key to creating compelling graphics, and the right font size plays a big role in that.
Advanced Tips for Text Manipulation in Illustrator
Maintaining Readability and Visual Hierarchy
Adjusting font size is just one piece of the typography puzzle. Readability and visual hierarchy are also crucial. Readability is about how easily your text can be read and understood, influenced by factors like font choice, line height, and letter spacing. Visual hierarchy, meanwhile, helps guide the reader's eye through your design, highlighting what's important. You can achieve this through different font sizes, styles like bold or italics, and colors. For example, using a larger font for headings helps them stand out from the body text, making your design easier to scan and understand. Keeping your typography sharp, consistent, and readable is essential for creating compelling graphics, and choosing the right font size is a big part of that.
Using Paragraph Styles for Consistency
If you're working on a multi-page document or one with recurring text elements, paragraph styles can be a lifesaver. They let you set a bunch of formatting options (like font size, font family, line height, etc.) and apply them to multiple paragraphs at once. To set up a paragraph style, format a paragraph the way you want it, then go to Window > Type > Paragraph Styles. Click the 'Create New Style' button (it looks like a small page icon) to save your settings. You can then apply this style to other paragraphs by selecting them and clicking on the style in the panel. If you need to tweak the formatting later, you can update the style, and the changes will automatically apply everywhere you've used it. This ensures your design stays consistent, and keeping the right font size is crucial. Using consistent typography styles helps your audience feel at ease and enjoy your graphics.
Different Methods for Adjusting Font Size in Illustrator
Using the Character Panel in the Properties Panel
The simplest way to adjust font size is through the Character panel. First, select the text you want to change. You can do this with the Selection tool (the black arrow) to select the whole text object, or double-click inside the text with the Type tool to select specific parts. Once your text is selected, head over to the Properties panel on the right side of your screen. If you don't see it, go to Window > Properties to bring it up. In the Character section, you'll see a dropdown menu showing the current font size. You can either type in a new size or choose from the list. Hit Enter, and your text will update. This is the most precise way to control your font size, giving you full command over your typography in Adobe Illustrator.
Scaling Text Proportionally with the Selection Tool
For a more visual approach to resizing text, use the Selection tool to scale it proportionally. Select your text object with the Selection tool, then hover over one of the corner handles of the bounding box that appears. Click and drag the handle to resize. To keep the text's proportions intact, hold down the Shift key while dragging. This method is great for quickly adjusting text size without needing exact numbers. However, scaling this way can sometimes result in fractional point sizes, so you might want to refine it in the Character panel later. Ensuring your typography stays sharp and consistent is key to creating compelling graphics, and using the right font size is essential.
Utilizing the Scale Tool for Dynamic Resizing
The Scale tool offers another way to dynamically resize text, especially useful for area type text where you want to resize both the text and its text box at the same time. First, select your text object with the Selection tool, then find the Scale tool in the toolbar (it looks like a square being resized) or press 'S' on your keyboard. Click and drag on the artboard to resize, and hold Shift to keep the proportions even. The Scale tool lets you scale from a specific point by holding Alt (Option on Mac) and clicking where you want the anchor point to be. This method can be a bit tricky but offers flexibility, especially when managing font size within a specific text box.
Adobe Illustrator Pricing Plans
Understanding the Subscription Options
Adobe Illustrator is available through a subscription model, with different plans to suit various needs. Here's a quick rundown:
- Single App Plan: This gives you access to Adobe Illustrator alone. It's perfect if you're focused on vector graphics and don't need other Adobe apps.
- All Apps Plan (Creative Cloud): This plan includes over 20 Adobe creative apps, like Photoshop, InDesign, and Premiere Pro. It's great for professionals who need a wide range of tools for different projects.
Prices and features can change, so it's best to check the Adobe website for the latest info.
Advantages and Disadvantages of Scaling Text
Pros
- Quick and visual adjustments
- Proportional scaling maintains aspect ratio
- Useful for initial size estimations
Cons
- Can result in fractional point sizes
- Less precise than using the Character panel
- Scaling area text boxes can distort layout
Key Features of Adobe Illustrator for Text Handling
Advanced Typography Options
Adobe Illustrator offers a range of typographic controls that give designers precise control. Beyond adjusting font size, you can tweak kerning, tracking, leading, and baseline shift. The OpenType features let you use stylistic alternates, ligatures, and contextual sets to enhance your text's visual appeal. With the Touch Type tool, you can even modify individual letters for unique designs and custom typography layouts. Working with the Touch Type tool in Adobe Illustrator opens up endless design possibilities.
Integration with Adobe Fonts
Adobe Illustrator's integration with Adobe Fonts gives you access to thousands of high-quality fonts. You can browse, activate, and sync fonts directly in the app. Whether you need a classic serif or a modern sans-serif, the vast library has you covered. Adobe Fonts are included with most Creative Cloud subscriptions, making font size selection and management easier. Working with Adobe Fonts in Adobe Illustrator allows for limitless typographic design possibilities. Finding the perfect font size is important, but choosing the right font for the job is key.
Live Effects and Distortions
In Adobe Illustrator, you can apply live effects and distortions to text without permanently altering it. You can wrap, twist, inflate, and more to transform your text's look. These effects stay editable, so you can experiment freely. Combining live effects with advanced font size control via the Properties panel gives you a vast playground for creativity.
Use Cases: Where Font Size Matters Most
Logo Design and Branding
In logo design, font size is crucial for creating a recognizable and memorable mark. It ensures the brand's name is legible across different media, from business cards to billboards. A well-chosen font size, paired with a carefully selected font, can reinforce the brand's personality and values. When designing typography for logos in Adobe Illustrator, a crisp, clean aesthetic and clear visual hierarchy are essential.
Web and Mobile Design
For web and mobile design, font size directly affects user experience. Making sure text is readable on various screen sizes and resolutions is key for accessibility and engagement. Adobe Illustrator is often used to prototype website and app interfaces, where thoughtful font size considerations lay the groundwork for a user-friendly and visually appealing design.
Print Design and Layout
In print design, like brochures, posters, and magazines, font size determines how effectively information is communicated. A clear font size hierarchy guides readers through the content, highlighting key points. In Adobe Illustrator, designers fine-tune typographic settings to create visually striking and informative layouts.
Frequently Asked Questions About Font Sizes in Adobe Illustrator
How do I change the font size of multiple text boxes at once?
To change the font size of multiple text boxes at the same time, select all the text boxes you want to change with the Selection tool. Then, go to the Character panel in the Properties panel. Any font size changes you make there will apply to all selected text boxes. This is the most efficient way to keep your design consistent. For logos or branded text, maintaining a consistent font size will solidify brand recognition.
Why is my text appearing blurry after scaling?
Text can look blurry after scaling if it results in a fractional point size or if the text object isn't aligned to the pixel grid. To fix this, make sure the font size is a whole number (e.g., 12pt instead of 12.5pt) and that 'Align to Pixel Grid' is enabled in the Transform panel. This will help keep your text sharp and clear. Paying attention to detail and ensuring the correct font size is maintained will result in a professional-looking graphic.
Related Questions About Typography in Design
What are some best practices for choosing font sizes for different types of text (headings, body text, captions)?
Choosing the right font sizes depends on the type of text and its purpose. For headings, larger font sizes (e.g., 24-36pt) create a clear visual hierarchy and grab the reader's attention. Body text should be smaller (e.g., 10-12pt) for comfortable reading. Captions should be even smaller (e.g., 8-10pt) to provide context without overwhelming the main content. Always consider the overall design and your audience when deciding on font sizes. Working in Adobe Illustrator requires attention to detail. Choosing the appropriate font size for the job and using consistent typography styles will help your audience feel at ease and enjoy your graphics.
| Text Type | Recommended Font Size | Purpose |
|---|---|---|
| Headings | 24-36pt | Attract attention, create visual hierarchy |
| Body Text | 10-12pt | Comfortable reading, convey the main content |
| Captions | 8-10pt | Provide context, supplement the main content |
| Subheadings | 14-18pt | Break up body text, guide the reader through the content |
| Quotes | 12-14pt | Highlight important statements, add visual interest |
| Bullet Points | 10-12pt | Organize information, improve readability |
| Call to Action | 14-16pt | Draw attention to calls to action, prompt the user to take action |


 Billy Idol's 'Rebel Yell': An In-Depth Look at the Live Performance
Billy Idol's 'Rebel Yell' transcends being just a song; it's an emblem of 1980s rock culture that continues to resonate with fans across generations. This piece takes you on a journey through the pulsating energy and iconic visuals of a live 'Rebel Yell' performance, unraveling the elements that cem
Billy Idol's 'Rebel Yell': An In-Depth Look at the Live Performance
Billy Idol's 'Rebel Yell' transcends being just a song; it's an emblem of 1980s rock culture that continues to resonate with fans across generations. This piece takes you on a journey through the pulsating energy and iconic visuals of a live 'Rebel Yell' performance, unraveling the elements that cem
 Transform Color Correction with AI LUTs in Video Editing
Are you ready to revolutionize your approach to color correction in video editing? AI-driven tools are now making it simpler than ever to achieve professional, cinematic looks. With the emergence of advanced AI models, creating custom LUTs (Look-Up Tables) tailored to specific aesthetics is now acce
Transform Color Correction with AI LUTs in Video Editing
Are you ready to revolutionize your approach to color correction in video editing? AI-driven tools are now making it simpler than ever to achieve professional, cinematic looks. With the emergence of advanced AI models, creating custom LUTs (Look-Up Tables) tailored to specific aesthetics is now acce
 Decoding Oshi no Ko's 'Idol': A Deep Dive Analysis
The opening theme of *Oshi no Ko*, titled "Idol," transcends being just a catchy J-pop tune; it's a narrative masterpiece that dives deep into the complexities of stardom, identity, and the often-blurred lines between an idol's public image and private reality. This song not only sets the stage for
Decoding Oshi no Ko's 'Idol': A Deep Dive Analysis
The opening theme of *Oshi no Ko*, titled "Idol," transcends being just a catchy J-pop tune; it's a narrative masterpiece that dives deep into the complexities of stardom, identity, and the often-blurred lines between an idol's public image and private reality. This song not only sets the stage for