Adobe Edge Animate Tutorial: Crafting Captivating Slideshows

 April 25, 2025

 GaryThomas

 0
0
In the ever-evolving world of web design, engaging your audience with dynamic content is crucial. One of the most effective ways to do this is through slideshows, which not only look great but also make information more digestible. In this tutorial, we'll dive into using Adobe Edge Animate to craft dynamic, responsive slideshows that will captivate your viewers on any device. From setting up your project to mastering advanced animations, we've got you covered.
Key Points to Remember
- Setting up a responsive document in Adobe Edge Animate.
- Importing and positioning images for the slideshow.
- Creating basic animations using Edge Animate timelines.
- Implementing navigation controls like next and back buttons.
- Adding interactivity with mouseover effects.
- Understanding easing functions for smoother animations.
- Ensuring compatibility across different browsers and devices.
- Optimizing performance for faster loading times.
Getting Started with Your Edge Animate Slideshow
Setting Up the Document
Creating an engaging slideshow starts with setting up your document in Adobe Edge Animate. You'll want to define the stage size and ensure it's responsive.
To get started, open Adobe Edge Animate and create a new file. You can do this by going to File > New or using the shortcut Ctrl+N on Windows or Cmd+N on Mac. This opens up a blank canvas, ready for you to start building your slideshow.
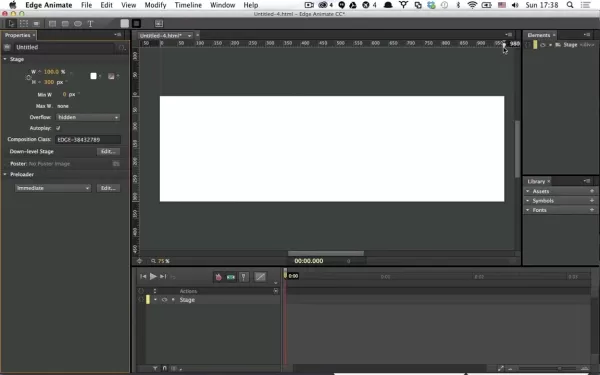
Next, set your stage size. In the Properties panel on the left, find the Stage section. Here, you can set the Width and Height in pixels—980x300 is a common choice for web slideshows, but feel free to adjust as needed.
To make your slideshow responsive, switch the Width to 100%. This way, your slideshow will scale to fit any screen size. Just click the pixel icon next to the Width field, change it to a percentage icon, and enter 100%. By default, the overflow is set to Hidden, keeping everything neatly within view.
Don't forget to save your project early and often. Go to File > Save As, name it something like "slideshow-tut.html", and be mindful of where you save it since renaming the HTML file later can be tricky.
Adding and Positioning Slides with Edge Animate
Importing Images
Once your document is set up, it's time to import your images. Edge Animate supports JPG, PNG, and GIF formats. You can import images by dragging and dropping them onto the stage, navigating to File > Import, or using the Library panel.
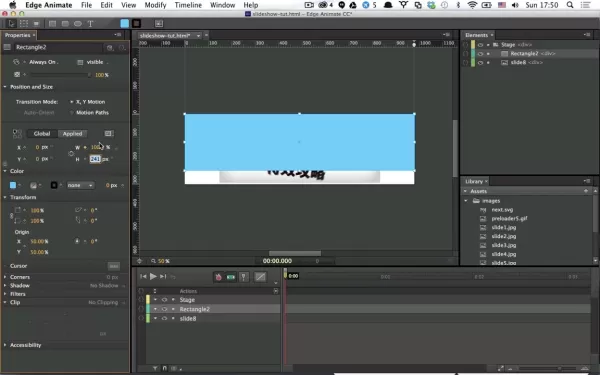
After importing, your images will appear in the Library panel on the right. From here, you can drag them onto the stage. For best organization, keep your images in a folder within the same directory as your project.
Assuming your images are prepped to fit your slideshow, position and size them using the Properties panel. To center them and avoid cutoffs, set the X and Y positioning to 0%, the height to auto, and the width to 70%. Then, adjust the style to transform-origin: 50% 50% for proper viewing. You can tweak these settings by clicking the pen icon next to the sizing, which opens a code editor where you can set the background size to 'auto' and positioning to percentages for more control.
Repeat this process to add more slides to your show.
Animating Your Slideshow
Animations are what make your slideshow come alive. Edge Animate's timeline-based system lets you create smooth transitions and engaging effects.
The timeline sits at the bottom of the Edge Animate interface, showing your animation frames and controlling element movements. To animate a slide, select it on the stage, and create a new keyframe on the timeline by clicking the Toggle Pin icon at your desired frame. For example, set the toggle at 0s and again at 0.75 seconds for a smooth flow, especially with easing options enabled.
Start with the slide off-screen to the right, and use an easing function like EaseOutQuad for a less robotic slide-in. Set the slide to fade in after 0.75 seconds from 0% of the screen. With multiple slides, you can stagger their entry by dragging them next to each other on the lower element bar.
To control slide transitions, insert a trigger to add a stop point. Select Insert Trigger followed by Stop. For additional slides, use the Duplicate option (D key) to create a copy, then adjust the name, image, and positioning. Remember, the goal is to allow time for each slide to slide in and out smoothly.
Additional Tips
When dealing with start and stop points, duplicating a prior version can solve many issues. This works because animations are set within elements, allowing them to coexist without odd coding requirements. Plus, once easing functions are set, they don't need reapplying for new versions.
How to Use Adobe Edge Animate for Dynamic Slideshows
Step-by-Step Guide to Creating a Slideshow
- Set Up Your Document:
- Open Edge Animate.
- Create a new file.
- Set the stage size (e.g., 980x300 pixels).
- Ensure responsiveness by setting width to 100%.
- Save your file.
- Import Images:
- Drag and drop images onto the stage or import them through File > Import.
- Position and size images appropriately.
- Animate Slides:
- Create keyframes on the timeline for each slide.
- Add transitions for smooth entry and exit.
- Apply easing functions for enhanced animation.
- Implement Navigation:
- Add next and back buttons using symbols.
- Attach JavaScript actions to the buttons for navigation.
- Test and Optimize:
- Preview your slideshow in different browsers.
- Optimize images for faster loading.
- Ensure responsiveness across devices.
Pros and Cons of Using Adobe Edge Animate
Pros
- Timeline-based animation: Makes it easy to create complex animations.
- HTML5 support: Creates content compatible with modern web browsers.
- Interactive elements: Allows the addition of buttons, rollovers, and forms.
- Code-free design: Designers can create animations without writing code.
Cons
- Discontinued support: Adobe no longer supports Edge Animate.
- Limited features: May not have all the features of modern animation tools.
- Performance issues: Animations can be resource-intensive, leading to performance issues.
- Steep learning curve: Can be difficult for beginners to learn.
FAQ
What is Adobe Edge Animate?
Adobe Edge Animate was a web design tool for creating interactive and animated content using HTML5, JavaScript, and CSS3. It was particularly useful for animations, banners, and slideshows without Flash.
Is Adobe Edge Animate still supported?
No, Adobe Edge Animate is no longer supported since 2015. However, it's still used for legacy projects or by designers who prefer its specific animation capabilities. Modern alternatives include Adobe Animate CC and other HTML5 animation tools.
What are the alternatives to Adobe Edge Animate?
Modern alternatives include Adobe Animate CC, Google Web Designer, Tumult Hype, GreenSock (GSAP), and CreateJS, all of which offer robust HTML5 animation capabilities.
How do I make my Edge Animate slideshow responsive?
To make your slideshow responsive, set the main stage width to 100% and use percentage values for positioning and sizing elements. Test across devices and browsers to ensure responsiveness.
Related Questions
How can I optimize my slideshow for faster loading times?
To optimize your slideshow for faster loading, consider image compression, code minification, browser caching, using a CDN, and implementing lazy loading techniques.
Can I add interactive elements to my Edge Animate slideshow?
Yes, you can add interactive elements like buttons, rollovers, forms, and external links using JavaScript actions in Edge Animate.
How do I ensure cross-browser compatibility for my Edge Animate slideshow?
Ensure cross-browser compatibility by testing on different browsers and devices, adhering to web standards, using vendor prefixes for CSS, and employing JavaScript frameworks to handle differences.
How do I embed an Edge Animate slideshow on my website?
To embed your slideshow, include the generated HTML, CSS, and JavaScript files in your web page. Copy the code and paste it into your website's HTML, ensuring the paths to your CSS and JavaScript files are correct.
Related article
 Deck Secures $12M to Use AI for Enhancing Website Functionality
Deck Secures $12 Million in Series A FundingDeck, a startup that boldly declares itself as the "Plaid for the rest of the internet," has successfully raised $12 million in a Series A funding round, just nine months after closing its seed financing. This news was shared exclusively with TechCrunch. T
EU mobilizes $200 billion in AI race against US and China
EU Announces €200 Billion Investment in AI to Compete with US and China
The European Union is set to invest a hefty €200 billion (approximately $206 billion) into artificial intelligence, aiming to keep pace with the US and China. This announcement came from EU Commission President Ursula von der L
AI Enhances Audio Quality in Descript's Studio Sound Feature
In the era of digital content, the quality of your audio can make or break your message. Poor audio can distract your audience, making it tough for them to stay engaged. Thankfully, Descript's Studio Sound steps in as a game-changer, using AI to transform your recordings into something that sounds l
Comments (0)
0/200
Deck Secures $12M to Use AI for Enhancing Website Functionality
Deck Secures $12 Million in Series A FundingDeck, a startup that boldly declares itself as the "Plaid for the rest of the internet," has successfully raised $12 million in a Series A funding round, just nine months after closing its seed financing. This news was shared exclusively with TechCrunch. T
EU mobilizes $200 billion in AI race against US and China
EU Announces €200 Billion Investment in AI to Compete with US and China
The European Union is set to invest a hefty €200 billion (approximately $206 billion) into artificial intelligence, aiming to keep pace with the US and China. This announcement came from EU Commission President Ursula von der L
AI Enhances Audio Quality in Descript's Studio Sound Feature
In the era of digital content, the quality of your audio can make or break your message. Poor audio can distract your audience, making it tough for them to stay engaged. Thankfully, Descript's Studio Sound steps in as a game-changer, using AI to transform your recordings into something that sounds l
Comments (0)
0/200
April 25, 2025
GaryThomas
0
In the ever-evolving world of web design, engaging your audience with dynamic content is crucial. One of the most effective ways to do this is through slideshows, which not only look great but also make information more digestible. In this tutorial, we'll dive into using Adobe Edge Animate to craft dynamic, responsive slideshows that will captivate your viewers on any device. From setting up your project to mastering advanced animations, we've got you covered.
Key Points to Remember
- Setting up a responsive document in Adobe Edge Animate.
- Importing and positioning images for the slideshow.
- Creating basic animations using Edge Animate timelines.
- Implementing navigation controls like next and back buttons.
- Adding interactivity with mouseover effects.
- Understanding easing functions for smoother animations.
- Ensuring compatibility across different browsers and devices.
- Optimizing performance for faster loading times.
Getting Started with Your Edge Animate Slideshow
Setting Up the Document
Creating an engaging slideshow starts with setting up your document in Adobe Edge Animate. You'll want to define the stage size and ensure it's responsive.
To get started, open Adobe Edge Animate and create a new file. You can do this by going to File > New or using the shortcut Ctrl+N on Windows or Cmd+N on Mac. This opens up a blank canvas, ready for you to start building your slideshow.
Next, set your stage size. In the Properties panel on the left, find the Stage section. Here, you can set the Width and Height in pixels—980x300 is a common choice for web slideshows, but feel free to adjust as needed.
To make your slideshow responsive, switch the Width to 100%. This way, your slideshow will scale to fit any screen size. Just click the pixel icon next to the Width field, change it to a percentage icon, and enter 100%. By default, the overflow is set to Hidden, keeping everything neatly within view.
Don't forget to save your project early and often. Go to File > Save As, name it something like "slideshow-tut.html", and be mindful of where you save it since renaming the HTML file later can be tricky.
Adding and Positioning Slides with Edge Animate
Importing Images
Once your document is set up, it's time to import your images. Edge Animate supports JPG, PNG, and GIF formats. You can import images by dragging and dropping them onto the stage, navigating to File > Import, or using the Library panel.
After importing, your images will appear in the Library panel on the right. From here, you can drag them onto the stage. For best organization, keep your images in a folder within the same directory as your project.
Assuming your images are prepped to fit your slideshow, position and size them using the Properties panel. To center them and avoid cutoffs, set the X and Y positioning to 0%, the height to auto, and the width to 70%. Then, adjust the style to transform-origin: 50% 50% for proper viewing. You can tweak these settings by clicking the pen icon next to the sizing, which opens a code editor where you can set the background size to 'auto' and positioning to percentages for more control.
Repeat this process to add more slides to your show.
Animating Your Slideshow
Animations are what make your slideshow come alive. Edge Animate's timeline-based system lets you create smooth transitions and engaging effects.
The timeline sits at the bottom of the Edge Animate interface, showing your animation frames and controlling element movements. To animate a slide, select it on the stage, and create a new keyframe on the timeline by clicking the Toggle Pin icon at your desired frame. For example, set the toggle at 0s and again at 0.75 seconds for a smooth flow, especially with easing options enabled.
Start with the slide off-screen to the right, and use an easing function like EaseOutQuad for a less robotic slide-in. Set the slide to fade in after 0.75 seconds from 0% of the screen. With multiple slides, you can stagger their entry by dragging them next to each other on the lower element bar.
To control slide transitions, insert a trigger to add a stop point. Select Insert Trigger followed by Stop. For additional slides, use the Duplicate option (D key) to create a copy, then adjust the name, image, and positioning. Remember, the goal is to allow time for each slide to slide in and out smoothly.
Additional Tips
When dealing with start and stop points, duplicating a prior version can solve many issues. This works because animations are set within elements, allowing them to coexist without odd coding requirements. Plus, once easing functions are set, they don't need reapplying for new versions.
How to Use Adobe Edge Animate for Dynamic Slideshows
Step-by-Step Guide to Creating a Slideshow
- Set Up Your Document:
- Open Edge Animate.
- Create a new file.
- Set the stage size (e.g., 980x300 pixels).
- Ensure responsiveness by setting width to 100%.
- Save your file.
- Import Images:
- Drag and drop images onto the stage or import them through File > Import.
- Position and size images appropriately.
- Animate Slides:
- Create keyframes on the timeline for each slide.
- Add transitions for smooth entry and exit.
- Apply easing functions for enhanced animation.
- Implement Navigation:
- Add next and back buttons using symbols.
- Attach JavaScript actions to the buttons for navigation.
- Test and Optimize:
- Preview your slideshow in different browsers.
- Optimize images for faster loading.
- Ensure responsiveness across devices.
Pros and Cons of Using Adobe Edge Animate
Pros
- Timeline-based animation: Makes it easy to create complex animations.
- HTML5 support: Creates content compatible with modern web browsers.
- Interactive elements: Allows the addition of buttons, rollovers, and forms.
- Code-free design: Designers can create animations without writing code.
Cons
- Discontinued support: Adobe no longer supports Edge Animate.
- Limited features: May not have all the features of modern animation tools.
- Performance issues: Animations can be resource-intensive, leading to performance issues.
- Steep learning curve: Can be difficult for beginners to learn.
FAQ
What is Adobe Edge Animate?
Adobe Edge Animate was a web design tool for creating interactive and animated content using HTML5, JavaScript, and CSS3. It was particularly useful for animations, banners, and slideshows without Flash.
Is Adobe Edge Animate still supported?
No, Adobe Edge Animate is no longer supported since 2015. However, it's still used for legacy projects or by designers who prefer its specific animation capabilities. Modern alternatives include Adobe Animate CC and other HTML5 animation tools.
What are the alternatives to Adobe Edge Animate?
Modern alternatives include Adobe Animate CC, Google Web Designer, Tumult Hype, GreenSock (GSAP), and CreateJS, all of which offer robust HTML5 animation capabilities.
How do I make my Edge Animate slideshow responsive?
To make your slideshow responsive, set the main stage width to 100% and use percentage values for positioning and sizing elements. Test across devices and browsers to ensure responsiveness.
Related Questions
How can I optimize my slideshow for faster loading times?
To optimize your slideshow for faster loading, consider image compression, code minification, browser caching, using a CDN, and implementing lazy loading techniques.
Can I add interactive elements to my Edge Animate slideshow?
Yes, you can add interactive elements like buttons, rollovers, forms, and external links using JavaScript actions in Edge Animate.
How do I ensure cross-browser compatibility for my Edge Animate slideshow?
Ensure cross-browser compatibility by testing on different browsers and devices, adhering to web standards, using vendor prefixes for CSS, and employing JavaScript frameworks to handle differences.
How do I embed an Edge Animate slideshow on my website?
To embed your slideshow, include the generated HTML, CSS, and JavaScript files in your web page. Copy the code and paste it into your website's HTML, ensuring the paths to your CSS and JavaScript files are correct.


 Deck Secures $12M to Use AI for Enhancing Website Functionality
Deck Secures $12 Million in Series A FundingDeck, a startup that boldly declares itself as the "Plaid for the rest of the internet," has successfully raised $12 million in a Series A funding round, just nine months after closing its seed financing. This news was shared exclusively with TechCrunch. T
Deck Secures $12M to Use AI for Enhancing Website Functionality
Deck Secures $12 Million in Series A FundingDeck, a startup that boldly declares itself as the "Plaid for the rest of the internet," has successfully raised $12 million in a Series A funding round, just nine months after closing its seed financing. This news was shared exclusively with TechCrunch. T
 EU mobilizes $200 billion in AI race against US and China
EU Announces €200 Billion Investment in AI to Compete with US and China
The European Union is set to invest a hefty €200 billion (approximately $206 billion) into artificial intelligence, aiming to keep pace with the US and China. This announcement came from EU Commission President Ursula von der L
EU mobilizes $200 billion in AI race against US and China
EU Announces €200 Billion Investment in AI to Compete with US and China
The European Union is set to invest a hefty €200 billion (approximately $206 billion) into artificial intelligence, aiming to keep pace with the US and China. This announcement came from EU Commission President Ursula von der L
 AI Enhances Audio Quality in Descript's Studio Sound Feature
In the era of digital content, the quality of your audio can make or break your message. Poor audio can distract your audience, making it tough for them to stay engaged. Thankfully, Descript's Studio Sound steps in as a game-changer, using AI to transform your recordings into something that sounds l
AI Enhances Audio Quality in Descript's Studio Sound Feature
In the era of digital content, the quality of your audio can make or break your message. Poor audio can distract your audience, making it tough for them to stay engaged. Thankfully, Descript's Studio Sound steps in as a game-changer, using AI to transform your recordings into something that sounds l
5 Easy Steps to Reclaim Your Online Data Privacy - Start Today
Is AI Diminishing Our Intelligence?