Home
HomeComfyUI Inpainting: The Complete Guide
ComfyUI provides sophisticated tools for image editing. This guide helps you master inpainting, a powerful technique for seamlessly editing and replacing image elements. Discover how to configure your workflow, apply advanced masking strategies, fix errors, and utilize differential diffusion for exceptional outcomes.
Key Points
Configuring ComfyUI for inpainting operations.
Working with essential nodes and impact packs.
Implementing the superior differential diffusion inpainting approach.
Understanding Gaussian blur mask functionality for smooth transitions.
Employing the SAM detector and Mask Editor for precise masking.
Calibrating confidence levels for accurate object selection during masking.
Effectively modifying prompts to alter object colors in images.
Identifying and resolving issues within inpainting workflows.
Optimizing inpainting parameters for high-quality image editing.
Getting Started with Inpainting in ComfyUI
Setting Up Your ComfyUI Environment
Before exploring advanced inpainting techniques, ensure your ComfyUI environment is properly configured. This involves installing required custom nodes and understanding the fundamental workflow structure. Inpainting enables you to smoothly modify images by replacing specific regions with new content, establishing it as an indispensable creative editing tool.
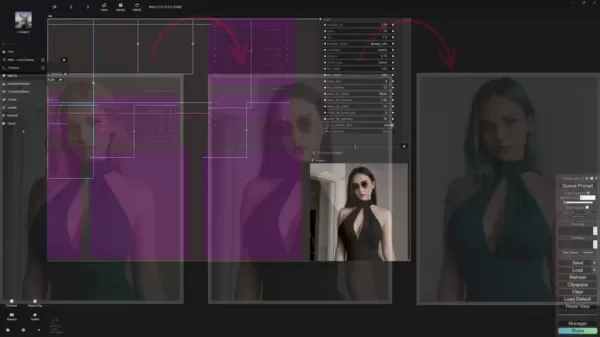
You'll require the Essentials and Impact Pack nodes. These custom components deliver crucial functionality and streamline the inpainting process within ComfyUI.
These can be downloaded from their respective GitHub repositories. For accelerated installation, the ComfyUI Manager is strongly recommended. This management tool simplifies the process of installing and updating custom nodes, ensuring you benefit from the latest features and fixes.
- ComfyUI Manager: A vital ComfyUI extension that optimizes custom node management. It enables straightforward installation, removal, disabling, and updating of nodes directly within the interface, boosting workflow productivity.
Patreon supporters can access pre-built workflows that load directly into ComfyUI. Utilize the 'missing notes' feature to automatically install any required components.
Once installation is complete, you're ready to establish your inpainting workflow.
Understanding the Inpainting Workflow
The ComfyUI inpainting workflow comprises several critical stages: loading the checkpoint model, encoding text prompts, loading the source image, creating masks, applying differential diffusion, and decoding the latent image. Each step proves essential for achieving professional inpainting outcomes.
- Loading the Checkpoint: Load your preferred Stable Diffusion checkpoint model, forming the foundation of your image generation process.
- Encoding Text Prompts: Utilize CLIP text encoding to define positive and negative prompts that direct content generation within masked regions.
- Loading the Image: Import the image you intend to edit, serving as the foundation for the inpainting procedure.
- Creating a Mask: Generate masks to designate areas requiring inpainting, instructing ComfyUI where to implement modifications.
- Differential Diffusion: This crucial phase enables seamless integration of new content with the existing image.
- Decoding the Latent Image: Decode the latent representation to produce the final rendered image.
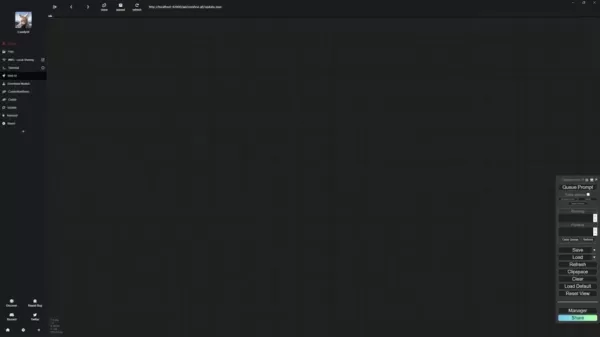
Begin setting up your inpainting workflow by creating fundamental nodes and establishing connections as illustrated. Start with a Load Checkpoint node to initialize the Stable Diffusion model for image generation.
Next, create two CLIP Text Encode (Prompt) nodes—one for positive instructions (describing desired inpainted content) and another for negative guidance (specifying elements to avoid). Now proceed to upload your image.
Advanced Masking Techniques for Precision Inpainting
Gaussian Blur Mask for Seamless Transitions
Achieving smooth transitions between original imagery and inpainted sections is vital for realistic outcomes. The Gaussian blur mask node softens mask edges, creating gradual transitions and minimizing harsh boundaries.
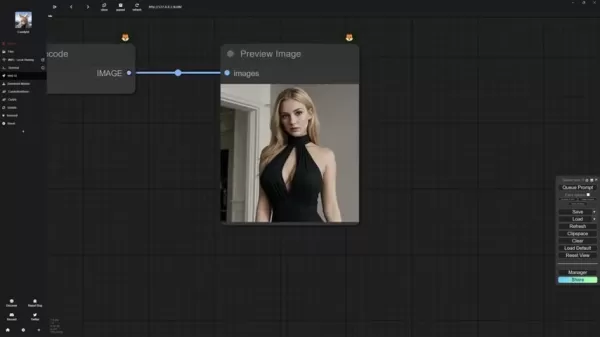
The differential diffusion inpainting method, which significantly outperforms traditional techniques, contributes substantially to these transitions.
The Gaussian Blur Mask node is indispensable for inpainting applications. It blurs mask peripheries and facilitates improved blending between original and modified image areas.
The implementation process involves:
- Generating the Gaussian blur mask.
- Creating a mask preview to visualize the blurred mask effect.
- Establishing an Inpaint Model Conditioning node that links to the K Sampler.
- Connecting all components into a unified network.
Once the node network is established, we can examine SAM functionality.
Using SAM Detector for Targeted Masking
The SAM (Segment Anything Model) detector offers sophisticated mask creation capabilities. It enables precise selection of specific image regions, making it perfect for targeted inpainting operations.

Let's begin with the SAM detector. This tool allows you to mask particular areas conveniently, eliminating extensive manual editing with the mask editor.
To operate the SAM detector:
- Left-click on image sections you wish to mask. SAM automatically detects these areas and generates corresponding masks.
- Adjust the confidence level using the provided slider. Higher confidence values increase recognition accuracy, while lower values might select broader regions like entire figures.
- Click Save to Node to store the mask. The mask editor remains available for subsequent adjustments.
Correcting Masking Errors with the Mask Editor
Despite advanced tools like the SAM detector, masking inaccuracies can occur. The Mask Editor permits manual correction of these issues, guaranteeing perfect alignment between masks and intended inpainting zones. Another masking creation option is the mask editor, which I typically employ to rectify imperfections in SAM-generated masks.
- After mask implementation, review for inaccuracies and launch the Mask Editor.
- Modify selection radius using the thickness parameter.
- Add or remove mask areas as necessary.
- Preserve modifications by selecting Save Nodes.
Step-by-Step Inpainting Guide
Changing the Color of Objects
Following mask completion, you can advance to modifying object colors within designated areas. This requires updating text prompts to reflect target colors and fine-tuning inpainting configurations to ensure natural color integration.
First, configure both Gaussian blur values to 50. Next, duplicate your original image creation prompt and adapt it to specify the new color for dresses or other objects. Now utilize the KSampler to preview your modifications.
Pricing
ComfyUI is free and open source!
ComfyUI operates as free open-source software, eliminating licensing costs for personal or commercial use. However, efficient operation typically requires investment in hardware resources such as capable GPUs.
Additionally, developer support through platforms like Patreon may provide access to exclusive content including pre-configured workflows and instructional materials.
Advantages and Disadvantages of Differential Diffusion Inpainting
Pros
Enhanced Inpainting Quality: Differential Diffusion delivers superior integration and more authentic outcomes compared to conventional inpainting approaches.
Accurate Masking: The SAM detector and Mask Editor provide exact control over masked regions, enabling precise edits.
Natural Transitions: Gaussian blur masks generate smoother blending between original images and inpainted sections.
Streamlined Workflow: The ComfyUI Manager simplifies custom node installation and management, improving operational efficiency.
Cons
Technical Complexity: Establishing and mastering ComfyUI's inpainting workflow presents challenges, particularly for novices.
Resource Demands: Inpainting operations can be computationally intensive, necessitating powerful graphics processors and ample memory.
Time Investment: Fine-tuning inpainting parameters and correcting imperfections can demand considerable time.
Custom Node Dependence: The workflow depends on custom nodes that may require ongoing updates and maintenance.
Key Features of ComfyUI for Image Inpainting
Main Features
ComfyUI delivers several critical capabilities that enhance the image inpainting experience:
- Node-Based Workflow: Provides adaptable and customizable operations for inpainting tasks.
- Custom Node Support: Enables integration of specialized nodes for expanded functionality.
- SAM Detector: Facilitates accurate masking of specific image regions.
- Mask Editor: Supports manual rectification of masking errors.
- Gaussian Blur Mask: Generates seamless transitions between original and modified areas.
- Differential Diffusion: Ensures excellent inpainting quality and integration.
Popular Use Cases for ComfyUI Image Inpainting
What can you do with Inpainting
ComfyUI's image inpainting capabilities prove valuable for:
- Object Removal: Eliminating unwanted elements from photographs.
- Image Repair: Restoring damaged or deteriorated image sections.
- Creative Editing: Introducing new components or altering existing ones.
- Background Replacement: Seamlessly substituting image backgrounds.
- Texture Editing: Modifying surface textures of objects within images.
Frequently Asked Questions about ComfyUI Inpainting
What is inpainting, and why is it useful?
Inpainting represents a technique for seamlessly editing and replacing image segments. It's beneficial for removing undesirable objects, repairing compromised areas, or adding new image elements. ComfyUI creates a versatile and robust environment for inpainting, enabling you to achieve premium results.
What are the essential nodes for inpainting in ComfyUI?
Critical nodes for ComfyUI inpainting include Load Checkpoint, CLIP Text Encode (Prompt), Load Image, Gaussian Blur Mask, Inpaint Model Conditioning, Differential Diffusion, K Sampler, and VAE Decode. These components collaborate to form the complete inpainting workflow.
How does the SAM detector improve the masking process?
The SAM detector enhances masking operations by enabling precise selection of specific image areas. This reduces manual editing requirements and ensures masks align perfectly with target regions.
What is the purpose of the Gaussian blur mask?
The Gaussian blur mask creates gradual transitions between original imagery and inpainted zones. It minimizes conspicuous edges and guarantees seamless incorporation of new content.
Related Questions About ComfyUI Inpainting
How do I troubleshoot common inpainting errors in ComfyUI?
Resolving typical inpainting errors in ComfyUI involves multiple approaches:Verify the mask: Confirm the mask accurately covers intended inpainting areas. Use the Mask Editor to correct any discrepancies.Refine prompts: Test different prompt variations to direct the image generation process. Ensure prompts specifically describe desired outcomes.Optimize parameters: Adjust inpainting settings like denoising strength and CFG scale to enhance results.Inspect nodes: Review connections and configurations throughout the workflow to ensure proper setup.Restart ComfyUI: Occasionally restarting the application can resolve unexpected errors or performance issues.
Related article
 DeepMind CEO Hassabis: I sleep six hours a day, usually feel energetic around 1 a.m.
Fortune recently featured an interview with Demis Hassabis, CEO of Google DeepMind, revealing his unconventional approach to rest and productivity. Hassabis disclosed that he sleeps very little, structuring his waking hours into two distinct work blo
OpenAI, Anthropic Vie for Market Share Despite Revenue Shortfalls
Despite recent reports suggesting OpenAI missed revenue targets, creating pressure on tech stocks this Tuesday, private AI lab investors remain resilient. Seasoned backers have confirmed they will not reduce investment despite negative media coverage
California AV Compliance: A New Era of Tickets, Geofences, and 1M Miles
Guident operates an AuveTech shuttle in South Florida, managing a four-mile route in West Palm Beach and a one-mile route in Boca Raton using its remote monitoring technology. | Credit: GuidentCalifornia is redefining the regulatory landscape for dri
Related Special Topic Recommendations
Music composition
DeepMind CEO Hassabis: I sleep six hours a day, usually feel energetic around 1 a.m.
Fortune recently featured an interview with Demis Hassabis, CEO of Google DeepMind, revealing his unconventional approach to rest and productivity. Hassabis disclosed that he sleeps very little, structuring his waking hours into two distinct work blo
OpenAI, Anthropic Vie for Market Share Despite Revenue Shortfalls
Despite recent reports suggesting OpenAI missed revenue targets, creating pressure on tech stocks this Tuesday, private AI lab investors remain resilient. Seasoned backers have confirmed they will not reduce investment despite negative media coverage
California AV Compliance: A New Era of Tickets, Geofences, and 1M Miles
Guident operates an AuveTech shuttle in South Florida, managing a four-mile route in West Palm Beach and a one-mile route in Boca Raton using its remote monitoring technology. | Credit: GuidentCalifornia is redefining the regulatory landscape for dri
Related Special Topic Recommendations
Music composition
 AI Stem Separation Tools for Remix Production, Sampling Prep, and Karaoke Masters
2026 Latest Best Top-rated AI Stem Separation Tools Curated for Remix Production, Sampling Prep, and Karaoke Masters. These powerful game-changing tools offer real-world tests to deliver precise audio isolation, boosting productivity significantly. XIX.AI provides a weekly updated free vs paid comparison guide to help you find the must-try solution that suits your needs. Explore now to unlock your AI edge.
 8 tools
 xix.ai
Data Analysis
AI SQL Copilots for Revenue Dashboards, Funnel Analysis, and Product Metrics
xix.ai
Data Analysis
AI SQL Copilots for Revenue Dashboards, Funnel Analysis, and Product Metrics
2026 Latest Best AI SQL Copilots Ranked Top-Rated! XIX.AI curates a powerful game-changing collection for weekly updated real-world tests. These must-try tools help you generate accurate revenue dashboards, analyze sales funnels, and track product metrics swiftly, boosting productivity massively. Explore now to Discover your perfect tool for data-driven decision making! 238 characters
9 tools
xix.ai
Music composition
Best AI Melody Writing Tools for Song Drafts
2026 Latest Best Top-Rated AI Melody Writing Tools for Song Drafts! XIX.AI has curated a highly powerful game-changing collection that goes through rigorous real-world tests to deliver the best writing experience. You can find detailed free vs paid comparisons, accurate rankings, and must-try options designed to help you create stunning song drafts effortlessly and boost your creative productivity significantly. Explore now to discover your perfect tool!
8 tools
xix.ai
chatbot
Best AI Conversation Trainer Tools for Interview Practice
2026 Latest Best Top-rated AI Conversation Trainer Tools for Interview Practice are here on XIX.AI! This curated collection features powerful, game-changing tools that go through rigorous real-world tests to deliver accurate feedback. You’ll find a free vs paid comparison and detailed rankings to help you choose the must-try option that boosts your confidence and skills. Explore now to Discover your perfect tool for interview success!
12 tools
xix.ai
Design & Art
Best AI Style Transfer Tools for Creative Experiments
2026 Latest Best Top-rated AI Style Transfer Tools for Creative Experiments! XIX.AI has curated a powerful, game-changing collection of must-try tools that deliver exceptional results through real-world tests and rigorous rankings. These top solutions help creatives boost productivity significantly by accelerating content creation and unlocking endless creative possibilities. Explore now to discover your perfect tool and start creating today!
9 tools
xix.ai
Comic Creation
Best AI Dialogue Bubble Tools for Visual Storytelling
2026 Latest Best Top-Rated AI Dialogue Bubble Tools for Visual Storytelling are here on XIX.AI! This curated collection features powerful, game-changing tools that help creators boost productivity and overcome creative bottlenecks. Get a free vs paid comparison, see real-world tests, and check the latest rankings to find the must-try solutions perfect for crafting engaging visual narratives. Explore now to discover your ideal tool!
10 tools
xix.ai

 Comments (2)
0/500
Comments (2)
0/500
![GregoryGreen]()
哇,这个ComfyUI的无缝修图教程写得真清晰!之前用其他工具总感觉遮罩处理不够智能,这个高级遮罩策略的部分特别实用👍不过AI修图现在越来越厉害,以后摄影师的后期工作会不会被完全替代啊?有点担心职业发展…总之先收藏学习!😄
![AndrewHernández]()
Wow, this guide came at the perfect time! I've struggled with getting clean inpainting results in ComfyUI, especially with hair details. The section on advanced masking is a lifesaver. Can't wait to experiment with layering multiple mask nodes to tackle more complex edits. So glad I bookmarked this! 🤯
ComfyUI provides sophisticated tools for image editing. This guide helps you master inpainting, a powerful technique for seamlessly editing and replacing image elements. Discover how to configure your workflow, apply advanced masking strategies, fix errors, and utilize differential diffusion for exceptional outcomes.
Key Points
Configuring ComfyUI for inpainting operations.
Working with essential nodes and impact packs.
Implementing the superior differential diffusion inpainting approach.
Understanding Gaussian blur mask functionality for smooth transitions.
Employing the SAM detector and Mask Editor for precise masking.
Calibrating confidence levels for accurate object selection during masking.
Effectively modifying prompts to alter object colors in images.
Identifying and resolving issues within inpainting workflows.
Optimizing inpainting parameters for high-quality image editing.
Getting Started with Inpainting in ComfyUI
Setting Up Your ComfyUI Environment
Before exploring advanced inpainting techniques, ensure your ComfyUI environment is properly configured. This involves installing required custom nodes and understanding the fundamental workflow structure. Inpainting enables you to smoothly modify images by replacing specific regions with new content, establishing it as an indispensable creative editing tool.
You'll require the Essentials and Impact Pack nodes. These custom components deliver crucial functionality and streamline the inpainting process within ComfyUI.
These can be downloaded from their respective GitHub repositories. For accelerated installation, the ComfyUI Manager is strongly recommended. This management tool simplifies the process of installing and updating custom nodes, ensuring you benefit from the latest features and fixes.
- ComfyUI Manager: A vital ComfyUI extension that optimizes custom node management. It enables straightforward installation, removal, disabling, and updating of nodes directly within the interface, boosting workflow productivity.
Patreon supporters can access pre-built workflows that load directly into ComfyUI. Utilize the 'missing notes' feature to automatically install any required components.
Once installation is complete, you're ready to establish your inpainting workflow.
Understanding the Inpainting Workflow
The ComfyUI inpainting workflow comprises several critical stages: loading the checkpoint model, encoding text prompts, loading the source image, creating masks, applying differential diffusion, and decoding the latent image. Each step proves essential for achieving professional inpainting outcomes.
- Loading the Checkpoint: Load your preferred Stable Diffusion checkpoint model, forming the foundation of your image generation process.
- Encoding Text Prompts: Utilize CLIP text encoding to define positive and negative prompts that direct content generation within masked regions.
- Loading the Image: Import the image you intend to edit, serving as the foundation for the inpainting procedure.
- Creating a Mask: Generate masks to designate areas requiring inpainting, instructing ComfyUI where to implement modifications.
- Differential Diffusion: This crucial phase enables seamless integration of new content with the existing image.
- Decoding the Latent Image: Decode the latent representation to produce the final rendered image.
Begin setting up your inpainting workflow by creating fundamental nodes and establishing connections as illustrated. Start with a Load Checkpoint node to initialize the Stable Diffusion model for image generation.
Next, create two CLIP Text Encode (Prompt) nodes—one for positive instructions (describing desired inpainted content) and another for negative guidance (specifying elements to avoid). Now proceed to upload your image.
Advanced Masking Techniques for Precision Inpainting
Gaussian Blur Mask for Seamless Transitions
Achieving smooth transitions between original imagery and inpainted sections is vital for realistic outcomes. The Gaussian blur mask node softens mask edges, creating gradual transitions and minimizing harsh boundaries.
The differential diffusion inpainting method, which significantly outperforms traditional techniques, contributes substantially to these transitions.
The Gaussian Blur Mask node is indispensable for inpainting applications. It blurs mask peripheries and facilitates improved blending between original and modified image areas.
The implementation process involves:
- Generating the Gaussian blur mask.
- Creating a mask preview to visualize the blurred mask effect.
- Establishing an Inpaint Model Conditioning node that links to the K Sampler.
- Connecting all components into a unified network.
Once the node network is established, we can examine SAM functionality.
Using SAM Detector for Targeted Masking
The SAM (Segment Anything Model) detector offers sophisticated mask creation capabilities. It enables precise selection of specific image regions, making it perfect for targeted inpainting operations.
Let's begin with the SAM detector. This tool allows you to mask particular areas conveniently, eliminating extensive manual editing with the mask editor.
To operate the SAM detector:
- Left-click on image sections you wish to mask. SAM automatically detects these areas and generates corresponding masks.
- Adjust the confidence level using the provided slider. Higher confidence values increase recognition accuracy, while lower values might select broader regions like entire figures.
- Click Save to Node to store the mask. The mask editor remains available for subsequent adjustments.
Correcting Masking Errors with the Mask Editor
Despite advanced tools like the SAM detector, masking inaccuracies can occur. The Mask Editor permits manual correction of these issues, guaranteeing perfect alignment between masks and intended inpainting zones. Another masking creation option is the mask editor, which I typically employ to rectify imperfections in SAM-generated masks.
- After mask implementation, review for inaccuracies and launch the Mask Editor.
- Modify selection radius using the thickness parameter.
- Add or remove mask areas as necessary.
- Preserve modifications by selecting Save Nodes.
Step-by-Step Inpainting Guide
Changing the Color of Objects
Following mask completion, you can advance to modifying object colors within designated areas. This requires updating text prompts to reflect target colors and fine-tuning inpainting configurations to ensure natural color integration.
First, configure both Gaussian blur values to 50. Next, duplicate your original image creation prompt and adapt it to specify the new color for dresses or other objects. Now utilize the KSampler to preview your modifications.
Pricing
ComfyUI is free and open source!
ComfyUI operates as free open-source software, eliminating licensing costs for personal or commercial use. However, efficient operation typically requires investment in hardware resources such as capable GPUs.
Additionally, developer support through platforms like Patreon may provide access to exclusive content including pre-configured workflows and instructional materials.
Advantages and Disadvantages of Differential Diffusion Inpainting
Pros
Enhanced Inpainting Quality: Differential Diffusion delivers superior integration and more authentic outcomes compared to conventional inpainting approaches.
Accurate Masking: The SAM detector and Mask Editor provide exact control over masked regions, enabling precise edits.
Natural Transitions: Gaussian blur masks generate smoother blending between original images and inpainted sections.
Streamlined Workflow: The ComfyUI Manager simplifies custom node installation and management, improving operational efficiency.
Cons
Technical Complexity: Establishing and mastering ComfyUI's inpainting workflow presents challenges, particularly for novices.
Resource Demands: Inpainting operations can be computationally intensive, necessitating powerful graphics processors and ample memory.
Time Investment: Fine-tuning inpainting parameters and correcting imperfections can demand considerable time.
Custom Node Dependence: The workflow depends on custom nodes that may require ongoing updates and maintenance.
Key Features of ComfyUI for Image Inpainting
Main Features
ComfyUI delivers several critical capabilities that enhance the image inpainting experience:
- Node-Based Workflow: Provides adaptable and customizable operations for inpainting tasks.
- Custom Node Support: Enables integration of specialized nodes for expanded functionality.
- SAM Detector: Facilitates accurate masking of specific image regions.
- Mask Editor: Supports manual rectification of masking errors.
- Gaussian Blur Mask: Generates seamless transitions between original and modified areas.
- Differential Diffusion: Ensures excellent inpainting quality and integration.
Popular Use Cases for ComfyUI Image Inpainting
What can you do with Inpainting
ComfyUI's image inpainting capabilities prove valuable for:
- Object Removal: Eliminating unwanted elements from photographs.
- Image Repair: Restoring damaged or deteriorated image sections.
- Creative Editing: Introducing new components or altering existing ones.
- Background Replacement: Seamlessly substituting image backgrounds.
- Texture Editing: Modifying surface textures of objects within images.
Frequently Asked Questions about ComfyUI Inpainting
What is inpainting, and why is it useful?
Inpainting represents a technique for seamlessly editing and replacing image segments. It's beneficial for removing undesirable objects, repairing compromised areas, or adding new image elements. ComfyUI creates a versatile and robust environment for inpainting, enabling you to achieve premium results.
What are the essential nodes for inpainting in ComfyUI?
Critical nodes for ComfyUI inpainting include Load Checkpoint, CLIP Text Encode (Prompt), Load Image, Gaussian Blur Mask, Inpaint Model Conditioning, Differential Diffusion, K Sampler, and VAE Decode. These components collaborate to form the complete inpainting workflow.
How does the SAM detector improve the masking process?
The SAM detector enhances masking operations by enabling precise selection of specific image areas. This reduces manual editing requirements and ensures masks align perfectly with target regions.
What is the purpose of the Gaussian blur mask?
The Gaussian blur mask creates gradual transitions between original imagery and inpainted zones. It minimizes conspicuous edges and guarantees seamless incorporation of new content.
Related Questions About ComfyUI Inpainting
How do I troubleshoot common inpainting errors in ComfyUI?
Resolving typical inpainting errors in ComfyUI involves multiple approaches:Verify the mask: Confirm the mask accurately covers intended inpainting areas. Use the Mask Editor to correct any discrepancies.Refine prompts: Test different prompt variations to direct the image generation process. Ensure prompts specifically describe desired outcomes.Optimize parameters: Adjust inpainting settings like denoising strength and CFG scale to enhance results.Inspect nodes: Review connections and configurations throughout the workflow to ensure proper setup.Restart ComfyUI: Occasionally restarting the application can resolve unexpected errors or performance issues.








 DeepMind CEO Hassabis: I sleep six hours a day, usually feel energetic around 1 a.m.
Fortune recently featured an interview with Demis Hassabis, CEO of Google DeepMind, revealing his unconventional approach to rest and productivity. Hassabis disclosed that he sleeps very little, structuring his waking hours into two distinct work blo
DeepMind CEO Hassabis: I sleep six hours a day, usually feel energetic around 1 a.m.
Fortune recently featured an interview with Demis Hassabis, CEO of Google DeepMind, revealing his unconventional approach to rest and productivity. Hassabis disclosed that he sleeps very little, structuring his waking hours into two distinct work blo
 OpenAI, Anthropic Vie for Market Share Despite Revenue Shortfalls
Despite recent reports suggesting OpenAI missed revenue targets, creating pressure on tech stocks this Tuesday, private AI lab investors remain resilient. Seasoned backers have confirmed they will not reduce investment despite negative media coverage
California AV Compliance: A New Era of Tickets, Geofences, and 1M Miles
Guident operates an AuveTech shuttle in South Florida, managing a four-mile route in West Palm Beach and a one-mile route in Boca Raton using its remote monitoring technology. | Credit: GuidentCalifornia is redefining the regulatory landscape for dri
OpenAI, Anthropic Vie for Market Share Despite Revenue Shortfalls
Despite recent reports suggesting OpenAI missed revenue targets, creating pressure on tech stocks this Tuesday, private AI lab investors remain resilient. Seasoned backers have confirmed they will not reduce investment despite negative media coverage
California AV Compliance: A New Era of Tickets, Geofences, and 1M Miles
Guident operates an AuveTech shuttle in South Florida, managing a four-mile route in West Palm Beach and a one-mile route in Boca Raton using its remote monitoring technology. | Credit: GuidentCalifornia is redefining the regulatory landscape for dri
2026 Latest Best Top-rated AI Stem Separation Tools Curated for Remix Production, Sampling Prep, and Karaoke Masters. These powerful game-changing tools offer real-world tests to deliver precise audio isolation, boosting productivity significantly. XIX.AI provides a weekly updated free vs paid comparison guide to help you find the must-try solution that suits your needs. Explore now to unlock your AI edge.
8 tools
xix.ai

2026 Latest Best AI SQL Copilots Ranked Top-Rated! XIX.AI curates a powerful game-changing collection for weekly updated real-world tests. These must-try tools help you generate accurate revenue dashboards, analyze sales funnels, and track product metrics swiftly, boosting productivity massively. Explore now to Discover your perfect tool for data-driven decision making! 238 characters
9 tools
xix.ai

2026 Latest Best Top-Rated AI Melody Writing Tools for Song Drafts! XIX.AI has curated a highly powerful game-changing collection that goes through rigorous real-world tests to deliver the best writing experience. You can find detailed free vs paid comparisons, accurate rankings, and must-try options designed to help you create stunning song drafts effortlessly and boost your creative productivity significantly. Explore now to discover your perfect tool!
8 tools
xix.ai

2026 Latest Best Top-rated AI Conversation Trainer Tools for Interview Practice are here on XIX.AI! This curated collection features powerful, game-changing tools that go through rigorous real-world tests to deliver accurate feedback. You’ll find a free vs paid comparison and detailed rankings to help you choose the must-try option that boosts your confidence and skills. Explore now to Discover your perfect tool for interview success!
12 tools
xix.ai

2026 Latest Best Top-rated AI Style Transfer Tools for Creative Experiments! XIX.AI has curated a powerful, game-changing collection of must-try tools that deliver exceptional results through real-world tests and rigorous rankings. These top solutions help creatives boost productivity significantly by accelerating content creation and unlocking endless creative possibilities. Explore now to discover your perfect tool and start creating today!
9 tools
xix.ai

2026 Latest Best Top-Rated AI Dialogue Bubble Tools for Visual Storytelling are here on XIX.AI! This curated collection features powerful, game-changing tools that help creators boost productivity and overcome creative bottlenecks. Get a free vs paid comparison, see real-world tests, and check the latest rankings to find the must-try solutions perfect for crafting engaging visual narratives. Explore now to discover your ideal tool!
10 tools
xix.ai

哇,这个ComfyUI的无缝修图教程写得真清晰!之前用其他工具总感觉遮罩处理不够智能,这个高级遮罩策略的部分特别实用👍不过AI修图现在越来越厉害,以后摄影师的后期工作会不会被完全替代啊?有点担心职业发展…总之先收藏学习!😄
Wow, this guide came at the perfect time! I've struggled with getting clean inpainting results in ComfyUI, especially with hair details. The section on advanced masking is a lifesaver. Can't wait to experiment with layering multiple mask nodes to tackle more complex edits. So glad I bookmarked this! 🤯