Master InDesign: Use Paste Into Feature for Streamlined Graphic Design

 April 28, 2025

 JoseLewis

 0
0
Adobe InDesign is a powerhouse for graphic designers, packed with features that can transform your layouts into works of art. One feature that's often underappreciated but incredibly powerful is the 'Paste Into' function. This tool allows you to drop images, text, or other objects right into a pre-existing shape or frame, automatically trimming and masking the content to fit perfectly. Whether you're putting together a notice board graphic or crafting a detailed magazine layout, getting the hang of 'Paste Into' can streamline your work and boost your creative output. Let's dive into how you can make the most of this feature.
Key Points
- The 'Paste Into' feature in InDesign lets you insert content directly into a chosen frame.
- It automatically adjusts the pasted content to match the frame's shape.
- This tool is perfect for creating intricate layouts and design effects efficiently.
- You can use it with images, text, and various other objects.
- Editing individual elements inside the frame is as simple as double-clicking within it.
Understanding the Paste Into Feature in InDesign
What is 'Paste Into'?
The 'Paste Into' command in Adobe InDesign enables you to place content—like images, text, or other objects—directly into a selected frame or shape. This action automatically masks the content, cropping it to fit seamlessly within the frame's boundaries. It's a non-destructive method, meaning your original content stays untouched; it's just displayed within the designated shape. This approach contrasts with manually adjusting an image's size and position, offering a more efficient and precise way to work. The 'Paste Into' feature is a fantastic tool for boosting your creative freedom and speeding up your design process.
Mastering the 'Paste Into' feature is a game-changer for graphic designers looking to enhance productivity and effectiveness. It's not just a shortcut; it's a way to ensure your designs maintain consistency and precision. By using 'Paste Into,' you can guarantee that your images and content perfectly align with your design framework, elevating the aesthetic appeal and professionalism of your layouts. To fully leverage this feature, it's crucial to understand its utility and how to implement it effectively.
Benefits of Using 'Paste Into'
Using 'Paste Into' in your InDesign projects comes with a host of benefits:
- Efficiency: Say goodbye to manually resizing and positioning images within frames. 'Paste Into' does it automatically, saving you a ton of time, especially when dealing with multiple images or complex shapes.
- Precision: It ensures your content fits the frame exactly, eliminating any guesswork and keeping your designs clean and professional. This is crucial when you need to stick to strict design guidelines.
- Non-Destructive Editing: Your original image or object remains intact, allowing you to revert to the original state or make adjustments without affecting the source file.
- Creative Flexibility: 'Paste Into' opens up avenues for creative masking and unique visual effects that might be trickier to achieve manually. You can place images into intricate shapes to create eye-catching designs.
- Workflow Streamlining: This feature simplifies your design process and reduces the steps needed to complete projects. It's particularly useful for projects with numerous images where maintaining a consistent appearance is key.
By effectively using this feature, graphic designers can focus more on the creative side of design and less on tedious manual adjustments. 'Paste Into' empowers designers to achieve both creative and efficient work with InDesign.
Step-by-Step Guide to Using 'Paste Into' in InDesign
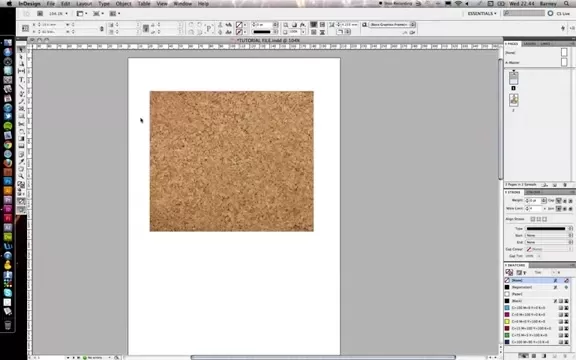
Placing a Background Image
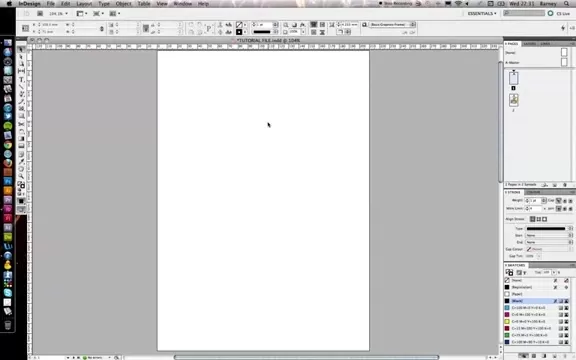
The first step is to place a background image, which will act as the primary frame for your other elements. This image not only sets the backdrop but also defines the shape and dimensions for the elements you'll paste into it. For our notice board graphic example, we'll use a corkboard image.
- Go to File > Place.
- Select the image you want to use as the background.
- Click and drag on your document to set the size and position of the image frame.
This image will serve as the container for other images, effectively cropping or masking anything you paste into it.
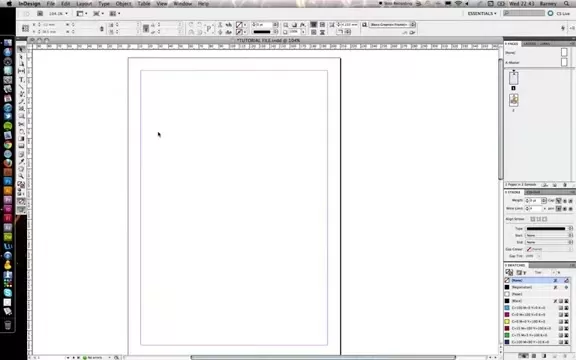
Creating Initial Image Frames
Next, you'll need to create the initial image frames or shapes that you'll 'paste into.' These frames will act as templates, defining how each image is cropped and displayed within your overall design.
- Use the Rectangle Frame Tool (or any other shape tool) to draw a frame over your background image.
- Adjust the size as needed.
These frames will house the smaller images you'll paste into them, creating the layered effect.
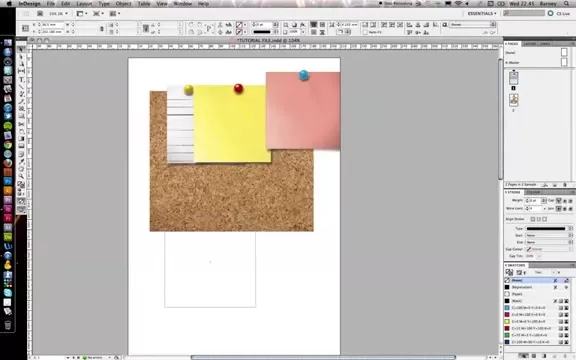
Copying the Source Images and Notes
If the three post-it notes aren't in their preferred positions, first decide on their layering and adjust their locations and angles. To make any changes, it's helpful to group these items together. Once they're set up, you can copy them by going to Edit > Copy.
Copy the items you'll paste in. Note that their locations are also copied. If you'd like, you can immediately delete them to make applying the 'Paste Into' feature easier.
Paste Into
With the grouped elements copied, the final step is to use the 'Paste Into' command to insert them into the background frame.
- Select the large background frame.
- Go to Edit > Paste Into.
This action will paste the smaller elements into the larger background frame, effectively cropping them to fit the shape.
Now, it will be layered on top of the background image, completing the visual effect.
Editing the Pasted Elements
The 'Paste Into' feature also allows for quick and easy edits to the positioning, size, and angles of elements like the source post-it notes. To edit these items, you need to select the master frame.
After selecting the master frame, you can select and edit any source elements within it.
Adobe InDesign Pricing
Subscription Options
Adobe InDesign is available through a subscription model as part of Adobe Creative Cloud. Here are the primary subscription options:
- InDesign Single App: This plan includes only InDesign and is perfect for users who primarily need InDesign for their work.
- Creative Cloud All Apps: This plan provides access to over 20 Adobe creative apps, including Photoshop, Illustrator, and more. It's a great option for designers who require a range of tools for different projects.
- Discounts for Students and Teachers: Adobe offers discounted rates for students and teachers, making it more accessible for educational purposes.
For the most current and detailed pricing, visit the Adobe Creative Cloud website.
Pros and Cons of Using InDesign's 'Paste Into' Feature
Pros
- Streamlined workflow for placing images into pre-existing frames.
- Ensures precise cropping and fitting of content.
- Non-destructive editing allows for easy adjustments.
- Quickly create layered effects and interesting visual designs.
- Maintains consistency and professionalism across layouts.
Cons
- Limited flexibility compared to clipping masks for dynamic adjustments.
- May require additional steps to adjust content positioning within the frame.
- Not ideal for scenarios requiring complex masking shapes or effects.
- Can be less intuitive for new users compared to basic image placement.
Core Features of Adobe InDesign
Key Capabilities
Adobe InDesign is packed with features designed to empower graphic designers. Some of its core capabilities include:
- Versatile Page Layout: Create layouts for print, web, and mobile, with tools for precise control over text and images.
- Typography: Access to Adobe Fonts and advanced typographic controls to create visually stunning text layouts.
- Integration with Adobe Creative Cloud: Seamlessly integrates with other Adobe apps like Photoshop and Illustrator.
- Interactive Documents: Create interactive PDFs, eBooks, and digital magazines with animations, videos, and more.
- Master Pages: Streamline your workflow with master pages for consistent design elements across multiple pages.
- Paste Into: Efficiently crop and mask objects by pasting them directly into shapes and frames, automatically fitting the content to the container.
- Liquid Layout: Adapt your designs for different page sizes and orientations effortlessly.
- Data Merge: Automate the creation of personalized documents such as business cards, letters, and catalogs.
These features make Adobe InDesign an essential tool for anyone serious about graphic design and layout.
Versatile Use Cases for Adobe InDesign
Real-World Applications
Adobe InDesign is used across various industries for numerous design projects. Here are some common use cases:
- Magazines and Catalogs: Create visually appealing layouts for magazines, catalogs, and brochures.
- Books and eBooks: Design and format books, both for print and digital distribution.
- Posters and Flyers: Produce eye-catching posters and flyers for marketing and advertising campaigns.
- Presentations: Develop professional presentations with consistent branding and visual elements.
- Newsletters: Design engaging email newsletters and print newsletters to keep your audience informed.
- Business Cards: Craft unique and professional business cards that leave a lasting impression.
- Annual Reports: Format comprehensive annual reports with detailed data and compelling visuals.
These use cases highlight the versatility and power of InDesign for creating professional-grade documents and designs.
Frequently Asked Questions
What is the primary benefit of using the 'Paste Into' feature in InDesign?
The primary benefit is that it automatically crops and masks content to fit precisely within a selected frame, saving time and ensuring a consistent look across your designs.
Can I edit the content after using the 'Paste Into' feature?
Yes, the 'Paste Into' feature is non-destructive. You can double-click within the frame to select and edit the pasted content.
Is Adobe InDesign available as a one-time purchase?
No, Adobe InDesign is available through a subscription model as part of Adobe Creative Cloud.
Which Adobe Creative Cloud plan is best for someone who only needs InDesign?
The InDesign Single App plan is the most cost-effective option for users who primarily need InDesign.
Where can I find the most up-to-date pricing information for Adobe InDesign?
Visit the Adobe Creative Cloud website for the most current pricing details.
Related Questions
How does 'Paste Into' compare to other masking techniques in InDesign?
InDesign offers several ways to mask images, but 'Paste Into' provides a unique combination of efficiency and precision. Traditional masking techniques often involve drawing a shape and then using the 'Clipping Mask' command, which requires multiple steps. 'Paste Into,' on the other hand, achieves the same effect in a single action, making it particularly useful when you need to quickly place several images into pre-defined shapes or frames. While clipping masks offer greater flexibility for adjusting the mask shape dynamically, 'Paste Into' shines in its simplicity and speed for scenarios where the frame shape is already established.
Another alternative is using object styles with predefined frame settings. This can be useful for creating consistent image containers across a document. However, 'Paste Into' allows you to apply different content to the same frame style without repetitive manual adjustments. Ultimately, the best approach depends on the specific requirements of your project, but understanding the strengths and limitations of each method can greatly enhance your design workflow.
Key Comparison Points:
- Speed and Efficiency: 'Paste Into' is generally faster for placing images into existing frames.
- Flexibility: Clipping masks offer more flexibility for adjusting the mask shape dynamically.
- Consistency: Object styles are ideal for maintaining uniform image containers.
- Non-Destructive Editing: All methods are non-destructive, allowing for easy modifications.
By knowing these distinctions, you can choose the masking technique that best fits your design needs and workflow.
Related article
 PixVerse AI Video Generator: Unleash Your Creative Potential
In today's fast-paced digital world, video content has taken the throne. Whether you're a seasoned marketer, an aspiring content creator, or just someone eager to share a story, the ability to craft high-quality videos is invaluable. That's where PixVerse AI steps in, offering a revolutionary platfo
Boost Your Earnings: Provide Travel Planning Services on Fiverr
Do you find joy in exploring new destinations and meticulously crafting travel itineraries? Why not transform that passion into a profitable venture by offering travel planning services on Fiverr? It's no secret that many people crave the excitement of travel but often find themselves short on time
Diving Deep into Hollow Sky's Dreamy Soundscapes: An Exploration
Discovering the Essence of Hollow Sky: A Musical JourneyHollow Sky isn't just another name in the music scene; it's an immersive experience that captivates listeners. With its haunting melodies intertwined with deeply introspective lyrics, Hollow Sky crafts an environment where fans can truly lose t
Comments (0)
0/200
PixVerse AI Video Generator: Unleash Your Creative Potential
In today's fast-paced digital world, video content has taken the throne. Whether you're a seasoned marketer, an aspiring content creator, or just someone eager to share a story, the ability to craft high-quality videos is invaluable. That's where PixVerse AI steps in, offering a revolutionary platfo
Boost Your Earnings: Provide Travel Planning Services on Fiverr
Do you find joy in exploring new destinations and meticulously crafting travel itineraries? Why not transform that passion into a profitable venture by offering travel planning services on Fiverr? It's no secret that many people crave the excitement of travel but often find themselves short on time
Diving Deep into Hollow Sky's Dreamy Soundscapes: An Exploration
Discovering the Essence of Hollow Sky: A Musical JourneyHollow Sky isn't just another name in the music scene; it's an immersive experience that captivates listeners. With its haunting melodies intertwined with deeply introspective lyrics, Hollow Sky crafts an environment where fans can truly lose t
Comments (0)
0/200
April 28, 2025
JoseLewis
0
Adobe InDesign is a powerhouse for graphic designers, packed with features that can transform your layouts into works of art. One feature that's often underappreciated but incredibly powerful is the 'Paste Into' function. This tool allows you to drop images, text, or other objects right into a pre-existing shape or frame, automatically trimming and masking the content to fit perfectly. Whether you're putting together a notice board graphic or crafting a detailed magazine layout, getting the hang of 'Paste Into' can streamline your work and boost your creative output. Let's dive into how you can make the most of this feature.
Key Points
- The 'Paste Into' feature in InDesign lets you insert content directly into a chosen frame.
- It automatically adjusts the pasted content to match the frame's shape.
- This tool is perfect for creating intricate layouts and design effects efficiently.
- You can use it with images, text, and various other objects.
- Editing individual elements inside the frame is as simple as double-clicking within it.
Understanding the Paste Into Feature in InDesign
What is 'Paste Into'?
The 'Paste Into' command in Adobe InDesign enables you to place content—like images, text, or other objects—directly into a selected frame or shape. This action automatically masks the content, cropping it to fit seamlessly within the frame's boundaries. It's a non-destructive method, meaning your original content stays untouched; it's just displayed within the designated shape. This approach contrasts with manually adjusting an image's size and position, offering a more efficient and precise way to work. The 'Paste Into' feature is a fantastic tool for boosting your creative freedom and speeding up your design process.
Mastering the 'Paste Into' feature is a game-changer for graphic designers looking to enhance productivity and effectiveness. It's not just a shortcut; it's a way to ensure your designs maintain consistency and precision. By using 'Paste Into,' you can guarantee that your images and content perfectly align with your design framework, elevating the aesthetic appeal and professionalism of your layouts. To fully leverage this feature, it's crucial to understand its utility and how to implement it effectively.
Benefits of Using 'Paste Into'
Using 'Paste Into' in your InDesign projects comes with a host of benefits:
- Efficiency: Say goodbye to manually resizing and positioning images within frames. 'Paste Into' does it automatically, saving you a ton of time, especially when dealing with multiple images or complex shapes.
- Precision: It ensures your content fits the frame exactly, eliminating any guesswork and keeping your designs clean and professional. This is crucial when you need to stick to strict design guidelines.
- Non-Destructive Editing: Your original image or object remains intact, allowing you to revert to the original state or make adjustments without affecting the source file.
- Creative Flexibility: 'Paste Into' opens up avenues for creative masking and unique visual effects that might be trickier to achieve manually. You can place images into intricate shapes to create eye-catching designs.
- Workflow Streamlining: This feature simplifies your design process and reduces the steps needed to complete projects. It's particularly useful for projects with numerous images where maintaining a consistent appearance is key.
By effectively using this feature, graphic designers can focus more on the creative side of design and less on tedious manual adjustments. 'Paste Into' empowers designers to achieve both creative and efficient work with InDesign.
Step-by-Step Guide to Using 'Paste Into' in InDesign
Placing a Background Image
The first step is to place a background image, which will act as the primary frame for your other elements. This image not only sets the backdrop but also defines the shape and dimensions for the elements you'll paste into it. For our notice board graphic example, we'll use a corkboard image.
- Go to File > Place.
- Select the image you want to use as the background.
- Click and drag on your document to set the size and position of the image frame.
This image will serve as the container for other images, effectively cropping or masking anything you paste into it.
Creating Initial Image Frames
Next, you'll need to create the initial image frames or shapes that you'll 'paste into.' These frames will act as templates, defining how each image is cropped and displayed within your overall design.
- Use the Rectangle Frame Tool (or any other shape tool) to draw a frame over your background image.
- Adjust the size as needed.
These frames will house the smaller images you'll paste into them, creating the layered effect.
Copying the Source Images and Notes
If the three post-it notes aren't in their preferred positions, first decide on their layering and adjust their locations and angles. To make any changes, it's helpful to group these items together. Once they're set up, you can copy them by going to Edit > Copy.
Copy the items you'll paste in. Note that their locations are also copied. If you'd like, you can immediately delete them to make applying the 'Paste Into' feature easier.
Paste Into
With the grouped elements copied, the final step is to use the 'Paste Into' command to insert them into the background frame.
- Select the large background frame.
- Go to Edit > Paste Into.
This action will paste the smaller elements into the larger background frame, effectively cropping them to fit the shape.
Now, it will be layered on top of the background image, completing the visual effect.
Editing the Pasted Elements
The 'Paste Into' feature also allows for quick and easy edits to the positioning, size, and angles of elements like the source post-it notes. To edit these items, you need to select the master frame.
After selecting the master frame, you can select and edit any source elements within it.
Adobe InDesign Pricing
Subscription Options
Adobe InDesign is available through a subscription model as part of Adobe Creative Cloud. Here are the primary subscription options:
- InDesign Single App: This plan includes only InDesign and is perfect for users who primarily need InDesign for their work.
- Creative Cloud All Apps: This plan provides access to over 20 Adobe creative apps, including Photoshop, Illustrator, and more. It's a great option for designers who require a range of tools for different projects.
- Discounts for Students and Teachers: Adobe offers discounted rates for students and teachers, making it more accessible for educational purposes.
For the most current and detailed pricing, visit the Adobe Creative Cloud website.
Pros and Cons of Using InDesign's 'Paste Into' Feature
Pros
- Streamlined workflow for placing images into pre-existing frames.
- Ensures precise cropping and fitting of content.
- Non-destructive editing allows for easy adjustments.
- Quickly create layered effects and interesting visual designs.
- Maintains consistency and professionalism across layouts.
Cons
- Limited flexibility compared to clipping masks for dynamic adjustments.
- May require additional steps to adjust content positioning within the frame.
- Not ideal for scenarios requiring complex masking shapes or effects.
- Can be less intuitive for new users compared to basic image placement.
Core Features of Adobe InDesign
Key Capabilities
Adobe InDesign is packed with features designed to empower graphic designers. Some of its core capabilities include:
- Versatile Page Layout: Create layouts for print, web, and mobile, with tools for precise control over text and images.
- Typography: Access to Adobe Fonts and advanced typographic controls to create visually stunning text layouts.
- Integration with Adobe Creative Cloud: Seamlessly integrates with other Adobe apps like Photoshop and Illustrator.
- Interactive Documents: Create interactive PDFs, eBooks, and digital magazines with animations, videos, and more.
- Master Pages: Streamline your workflow with master pages for consistent design elements across multiple pages.
- Paste Into: Efficiently crop and mask objects by pasting them directly into shapes and frames, automatically fitting the content to the container.
- Liquid Layout: Adapt your designs for different page sizes and orientations effortlessly.
- Data Merge: Automate the creation of personalized documents such as business cards, letters, and catalogs.
These features make Adobe InDesign an essential tool for anyone serious about graphic design and layout.
Versatile Use Cases for Adobe InDesign
Real-World Applications
Adobe InDesign is used across various industries for numerous design projects. Here are some common use cases:
- Magazines and Catalogs: Create visually appealing layouts for magazines, catalogs, and brochures.
- Books and eBooks: Design and format books, both for print and digital distribution.
- Posters and Flyers: Produce eye-catching posters and flyers for marketing and advertising campaigns.
- Presentations: Develop professional presentations with consistent branding and visual elements.
- Newsletters: Design engaging email newsletters and print newsletters to keep your audience informed.
- Business Cards: Craft unique and professional business cards that leave a lasting impression.
- Annual Reports: Format comprehensive annual reports with detailed data and compelling visuals.
These use cases highlight the versatility and power of InDesign for creating professional-grade documents and designs.
Frequently Asked Questions
What is the primary benefit of using the 'Paste Into' feature in InDesign?
The primary benefit is that it automatically crops and masks content to fit precisely within a selected frame, saving time and ensuring a consistent look across your designs.
Can I edit the content after using the 'Paste Into' feature?
Yes, the 'Paste Into' feature is non-destructive. You can double-click within the frame to select and edit the pasted content.
Is Adobe InDesign available as a one-time purchase?
No, Adobe InDesign is available through a subscription model as part of Adobe Creative Cloud.
Which Adobe Creative Cloud plan is best for someone who only needs InDesign?
The InDesign Single App plan is the most cost-effective option for users who primarily need InDesign.
Where can I find the most up-to-date pricing information for Adobe InDesign?
Visit the Adobe Creative Cloud website for the most current pricing details.
Related Questions
How does 'Paste Into' compare to other masking techniques in InDesign?
InDesign offers several ways to mask images, but 'Paste Into' provides a unique combination of efficiency and precision. Traditional masking techniques often involve drawing a shape and then using the 'Clipping Mask' command, which requires multiple steps. 'Paste Into,' on the other hand, achieves the same effect in a single action, making it particularly useful when you need to quickly place several images into pre-defined shapes or frames. While clipping masks offer greater flexibility for adjusting the mask shape dynamically, 'Paste Into' shines in its simplicity and speed for scenarios where the frame shape is already established.
Another alternative is using object styles with predefined frame settings. This can be useful for creating consistent image containers across a document. However, 'Paste Into' allows you to apply different content to the same frame style without repetitive manual adjustments. Ultimately, the best approach depends on the specific requirements of your project, but understanding the strengths and limitations of each method can greatly enhance your design workflow.
Key Comparison Points:
- Speed and Efficiency: 'Paste Into' is generally faster for placing images into existing frames.
- Flexibility: Clipping masks offer more flexibility for adjusting the mask shape dynamically.
- Consistency: Object styles are ideal for maintaining uniform image containers.
- Non-Destructive Editing: All methods are non-destructive, allowing for easy modifications.
By knowing these distinctions, you can choose the masking technique that best fits your design needs and workflow.


 PixVerse AI Video Generator: Unleash Your Creative Potential
In today's fast-paced digital world, video content has taken the throne. Whether you're a seasoned marketer, an aspiring content creator, or just someone eager to share a story, the ability to craft high-quality videos is invaluable. That's where PixVerse AI steps in, offering a revolutionary platfo
PixVerse AI Video Generator: Unleash Your Creative Potential
In today's fast-paced digital world, video content has taken the throne. Whether you're a seasoned marketer, an aspiring content creator, or just someone eager to share a story, the ability to craft high-quality videos is invaluable. That's where PixVerse AI steps in, offering a revolutionary platfo
 Boost Your Earnings: Provide Travel Planning Services on Fiverr
Do you find joy in exploring new destinations and meticulously crafting travel itineraries? Why not transform that passion into a profitable venture by offering travel planning services on Fiverr? It's no secret that many people crave the excitement of travel but often find themselves short on time
Boost Your Earnings: Provide Travel Planning Services on Fiverr
Do you find joy in exploring new destinations and meticulously crafting travel itineraries? Why not transform that passion into a profitable venture by offering travel planning services on Fiverr? It's no secret that many people crave the excitement of travel but often find themselves short on time
 Diving Deep into Hollow Sky's Dreamy Soundscapes: An Exploration
Discovering the Essence of Hollow Sky: A Musical JourneyHollow Sky isn't just another name in the music scene; it's an immersive experience that captivates listeners. With its haunting melodies intertwined with deeply introspective lyrics, Hollow Sky crafts an environment where fans can truly lose t
Diving Deep into Hollow Sky's Dreamy Soundscapes: An Exploration
Discovering the Essence of Hollow Sky: A Musical JourneyHollow Sky isn't just another name in the music scene; it's an immersive experience that captivates listeners. With its haunting melodies intertwined with deeply introspective lyrics, Hollow Sky crafts an environment where fans can truly lose t