Minecraft Village Exploration: Trading, Farming, and Resource Gathering

 May 6, 2025

 EricKing

 0
0
Exploring the Heart of Minecraft: Villages
Minecraft villages are more than just a collection of buildings; they're vibrant communities brimming with life and opportunities. Whether you're a seasoned player or just starting out, these villages offer a safe haven, a place to gather resources, and a chance to engage in lucrative trades. By understanding how to navigate and enhance these villages, you can turn them into a cornerstone of your Minecraft journey. From trading with villagers to farming crops and ensuring village safety, this guide will help you unlock the full potential of these bustling hubs.
Key Aspects of Village Life
- Efficient Trading: Get to know the different villager professions and their trade offers to snag valuable items like emeralds, enchanted books, and rare resources.
- Resource Management: Make the most of village farms to secure food and other resources, boosting your survival and progression.
- Village Defense: Learn how to safeguard villagers from threats like zombies and pillagers to keep the village thriving and your resources flowing.
- Building and Expansion: Discover how to grow and improve your village, making it a stronger, more functional base.
- Exploring Village Structures: Find and utilize key buildings like blacksmiths, churches, and libraries to uncover rare items and valuable resources.
- Utilizing Beds: Use village beds to skip the night and avoid the dangers lurking in the dark.
- Farming Techniques: Learn efficient ways to harvest crops, ensuring a steady supply of food.
Understanding Minecraft Villages
What is a Minecraft Village?
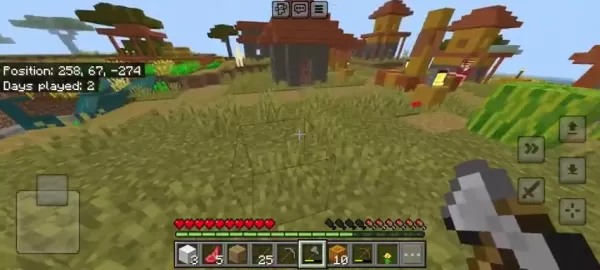
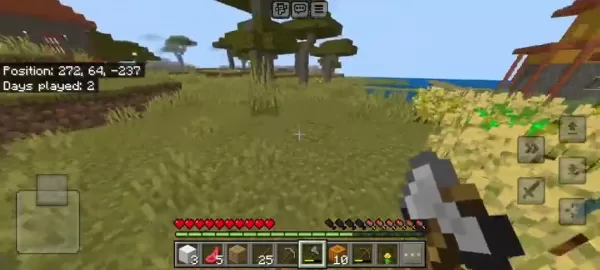
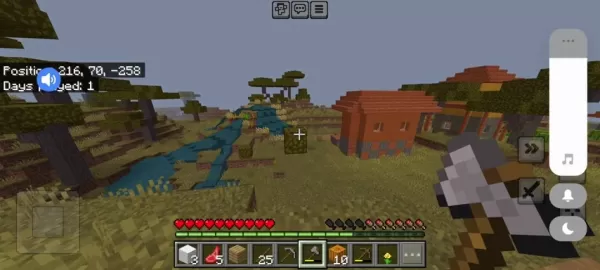
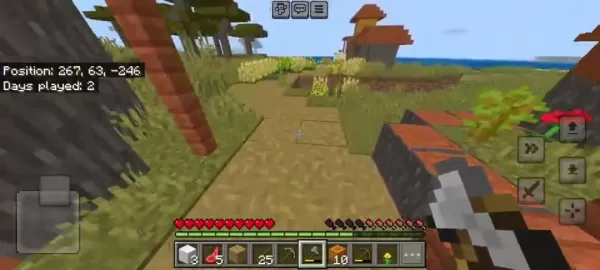
Minecraft villages are dynamic, procedurally generated hubs found across various biomes, offering a sanctuary filled with resources. Inhabited by villagers with unique professions, these settlements provide trading opportunities and essential supplies. From plains to snowy tundras, each biome's village offers distinct resources and challenges. Exploring these villages is key to early-game survival and long-term progression. Interacting with villagers can yield valuable items, including enchanted books, making these communities vital to any player's journey.
Villages are not just about trading; they're also a place to rest and recharge. Using beds found in village homes, you can skip the night and avoid hostile mobs. Moreover, villages often contain useful items like food, tools, and armor, making them invaluable for early adventures. The varied layouts and designs of villages make each one a unique exploration, encouraging players to delve deeper into each discovery.
Understanding Village Dynamics and Community
Population and Growth of Villages
The growth of a Minecraft village hinges on the number of available beds and villagers' willingness to breed. A village needs enough beds for all its residents, and villagers will only breed if there are more beds than villagers. Encouraging population growth involves providing additional beds and ensuring villagers have food like bread, carrots, or potatoes. Each villager needs at least 12 units of each food item to be willing to breed. Protecting villagers from threats like zombies and pillagers is crucial for maintaining and increasing the village population. Building defensive structures like walls and fences can keep these threats at bay, fostering a thriving community.
Expanding the village by building new homes or enlarging existing ones can provide more space for villagers, further promoting growth. Monitoring the village population and addressing issues like bed shortages or increased hostile mob activity ensures the village remains a self-sufficient hub supporting your Minecraft adventures.
Village Defenses: Walls, Golems, and More
Protecting a village in Minecraft involves a multi-faceted approach. Start by constructing walls and fences around the village perimeter using sturdy materials like stone bricks or cobblestone. These barriers keep hostile mobs out and villagers safe. Add gates or doors for easy access, and place torches or lanterns along the walls to deter mob spawning. Consider digging a moat filled with water or lava around the village to enhance security.
Active protection measures are equally important. Creating iron golems can provide automatic defense against hostile mobs. Strategically place these golems throughout the village for comprehensive protection. Setting up traps, like pits filled with lava or spikes, can eliminate threats before they reach the village. Enlist villagers in the defense effort by assigning them to guard posts and equipping them with weapons and armor. Stay vigilant, clear out any mobs that breach the defenses, and continuously improve the village's security to ensure its long-term safety.
How to Maximize Village Benefits
Step 1: Locating a Village
Finding a village is the first step to reaping its benefits. Villages can be found in plains, savanna, desert, taiga, and snowy tundra biomes. Keep an eye out for clusters of houses and villagers. Once you spot a village, approach it cautiously, as it may be occupied by hostile mobs. Clear any threats to ensure a safe entry and protect the villagers.
Step 2: Establishing Trade Relationships
After securing the village, start building trade relationships with villagers. Identify those with valuable professions like librarians, blacksmiths, and farmers. Regularly trade with them to level them up and unlock new, more beneficial trades. Keep an eye on item prices and seek out profitable exchanges. Emeralds are crucial for trading, so focus on acquiring them through farming or mining. Building these relationships takes time, but it's worth it for the valuable items and resources you can gain, like mending books and diamond armor.
Step 3: Optimizing Farm Output
Village farms are a sustainable source of food and resources. To maximize their output, ensure crops are well-lit and watered. Use torches or lanterns for light and create irrigation systems to keep the farmland moist. Expanding the farms can increase crop yields, and automating the harvesting process with pistons and observers can save time. Remember to replant crops after harvesting to maintain a continuous supply. Many villagers will also replant crops, helping sustain the village's resources.
Step 4: Protecting the Village
Villages are prone to attacks from hostile mobs like zombies and pillagers. Build walls and fences around the village to keep these threats out. Use torches or lanterns throughout the village to prevent mob spawning in well-lit areas. Creating iron golems can provide automatic defense against approaching mobs. Stay alert, clear out any mobs that breach the defenses, and repair any damage to maintain the village's safety.

Step 5: Expanding and Improving the Village
With a thriving village, consider expanding and enhancing it to create a more robust base. Build new homes to increase the population, construct additional farms for more crop yields, and create storage areas for resources. Add defensive structures like watchtowers and arrow slits to bolster the village's defenses. By improving the village, you create a self-sufficient and secure environment to support your long-term Minecraft adventures.
The Economic Value of Village Resources: Bartering with Villagers
Leveraging Trading for Maximum Profit
Trading with villagers can be highly profitable if you understand which resources to collect and which villagers to target. Farmers offer emeralds in exchange for crops like wheat, carrots, or potatoes, making them an early-game gem. Librarians trade enchanted books for emeralds, providing powerful enchantments for your tools, weapons, and armor. Tool smiths and weapon smiths offer valuable tools and weapons, while blacksmiths provide iron tools and armor, particularly useful in the early game stages.

Strategically trading with villagers helps you acquire essential resources and items, fostering a thriving village economy.
Trading with Villagers: Pros and Cons
Pros
- Access to Valuable Items: Villagers offer enchanted books, diamond tools, and rare resources that are hard to find otherwise.
- Emeralds as Currency: Trading provides a steady supply of emeralds, which can be used to purchase more valuable items.
- Leveling Up Villagers: Frequent trading levels up villagers, unlocking new and better trades.
- Village Economy: Trading contributes to a thriving, self-sufficient village economy.
Cons
- Limited Stock: Villagers have limited items available for trade, requiring you to wait for restocking.
- Fluctuating Prices: Item prices can change based on supply and demand, making it hard to predict costs.
- Vulnerability to Attacks: Villages can be attacked by hostile mobs, disrupting trading and harming villagers.
- Time-Consuming: Trading can be time-consuming, especially if you need to travel far or wait for restocking.
Core Activities in a Minecraft Village
Trading with Villagers
Trading is a fundamental activity in Minecraft villages, allowing you to exchange items for emeralds and other goods. Each villager has a profession that dictates their trade offers. Understanding these professions and offers is key to efficient trading. Emeralds are the currency of choice, used to buy enchanted books, tools, armor, and rare resources. To trade, simply approach a villager and interact with them to view their offers. Compare prices and seek out the best deals to make the most of your resources.
As you trade more, villagers level up, unlocking new and more valuable trades:
- Novice Level: Basic trades like crops for emeralds or paper for emeralds.
- Apprentice Level: Trades like gold for emeralds or enchanted books for emeralds.
- Journeyman Level: Includes book-to-emerald trades.
- Expert Level: Offers the most useful and expensive items.
- Master Level: Provides the best trades available.
Harvesting Farm Crops
Village farms offer various crops like wheat, carrots, potatoes, and beetroot, providing a sustainable source of food and resources. Harvesting these crops helps maintain your hunger levels and provides materials for crafting. To harvest, simply interact with fully grown plants, taking care not to destroy the farmland beneath them. Villagers often replant crops, ensuring a continuous supply.
Here are some common crops and their uses:
- Wheat: Used for crafting bread, cakes, and cookies, and for breeding cows, sheep, and chickens.
- Carrots: Eaten raw to restore hunger, used to breed rabbits and pigs, and to craft rabbit stew.
- Potatoes: Eaten raw in emergencies or cooked for baked potatoes, used to breed pigs.
- Beetroot: Eaten raw to restore hunger and used to craft beetroot soup.
Gathering Resources
Besides farms, villages contain structures like blacksmith workshops with furnaces, anvils, and chests containing iron tools or armor. Churches may have candles to harvest. These resources are crucial for crafting tools, weapons, and armor, enhancing your survival. Explore the village, interact with structures, and look for chests and containers holding valuable items. Crafting tables in some structures allow on-the-spot crafting. Always respect villagers and avoid damaging their property while gathering resources.

Utilizing Beds
Beds in Minecraft villages are essential for skipping the night and avoiding hostile mobs. Found inside villager homes, they're easy to spot with their bright colors. To use a bed, approach and interact with it during nighttime. Clear any nearby hostile mobs before sleeping, as they can prevent you from using the bed. Sleeping in a bed also resets your spawn point to the village, ensuring you respawn there if you die. This can be a significant advantage, allowing quick returns to the village for continued adventures.

Use Cases for a Prosperous Minecraft Village
Long-Term Survival Base
A well-established village can serve as a long-term survival base, offering a safe and resource-rich environment. By building defensive structures, you can protect the village and its inhabitants from hostile mobs. Farming the village's crops ensures a steady food supply, while trading with villagers provides materials for further development.
Resource Hub
Villages can act as resource hubs, offering access to various materials and items. Farms provide food and resources, blacksmiths offer tools and armor, and trading with villagers yields emeralds and other valuable goods. Beds allow you to skip the night, making the village a safe place to rest and recharge.
Trading Center
Villages are ideal trading centers, where you can exchange items with villagers for emeralds and other goods. Understanding villager professions and their trade offers maximizes your trading efficiency. Connecting villages via nether portals can make trading posts more accessible and convenient.
Frequently Asked Questions
How do I find a Minecraft village?
Minecraft villages are found in plains, savanna, desert, taiga, and snowy tundra biomes. Look for clusters of houses and villagers, as villages are usually visible from a distance due to their unique structures.
How do I trade with villagers?
To trade with villagers, approach them and interact to view their current offers. Pay attention to item prices and seek out profitable exchanges.
How do I protect my village from hostile mobs?
Protect your village by building walls and fences around the perimeter, using torches or lanterns to prevent mob spawning, and creating iron golems for automatic defense.
How can I maximize the benefits of Minecraft villages?
Maximize village benefits by establishing trade relationships, optimizing farm output, protecting the village from threats, and expanding and improving the village for self-sufficiency and security.
Related Questions
What are the different villager professions in Minecraft?
Minecraft villagers have various professions, each with unique trades and offers. Common professions include farmers, librarians, blacksmiths, butchers, cartographers, clerics, fishermen, fletchers, leatherworkers, shepherds, stone masons, and tool smiths. Understanding these professions and their trades is essential for efficient trading and resource acquisition.
Here's a breakdown of some useful villager professions:
Profession Useful Trades Librarian Enchanted books, bookshelves, glass Tool Smith Diamond tools, iron tools Weapon Smith Diamond weapons, iron weapons Armorer Diamond armor, iron armor Farmer Food, emeralds Fletcher Arrows, bows Shepherd Wool, beds Leatherworker Leather armor, saddles Stone Mason Stone bricks, terracotta Cleric Rotten flesh-to-emerald trades, redstone for emeralds
How do I create a golem to protect my village?
To create an iron golem for village protection, you'll need four iron blocks and one carved pumpkin. Arrange the iron blocks in a T shape, with one block at the bottom and three on top, then place the carved pumpkin on the center block. The iron golem will spawn and automatically defend your village. For a snow golem, stack two snow blocks and top them with a carved pumpkin. While less powerful, snow golems can still aid in defense by slowing down mobs with snowballs. Protecting your village is crucial for its long-term viability, ensuring you maintain access to valuable trades and resources.
Related article
 Google I/O 2025: How to watch and what the event schedule tells us
As the days grow longer and spring blooms burst into color, tech enthusiasts know it's time for the annual pilgrimage to the world of innovation—conference season. Among the most anticipated events is Google I/O, and it's right around the corner.When is Google I/O?Mark your calendars for May 20 and
Convert Videos to Text Effortlessly: No Typing Required
Ever found yourself in a situation where you need to transcribe a long video, but the thought of typing out every word is daunting? Whether it's a two-hour lecture or a critical business meeting recording, many of us face this challenge. But fear not! This article is here to introduce you to a hassl
Terminator Future War: Advanced Tech & Survival Strategies
The chilling vision of the Terminator future war, where humanity struggles against a relentless robotic enemy, continues to captivate and inspire strategic thinking. This blog delves into the advanced technology and desperate survival strategies that define this dystopian conflict. By exploring thes
Comments (0)
0/200
Google I/O 2025: How to watch and what the event schedule tells us
As the days grow longer and spring blooms burst into color, tech enthusiasts know it's time for the annual pilgrimage to the world of innovation—conference season. Among the most anticipated events is Google I/O, and it's right around the corner.When is Google I/O?Mark your calendars for May 20 and
Convert Videos to Text Effortlessly: No Typing Required
Ever found yourself in a situation where you need to transcribe a long video, but the thought of typing out every word is daunting? Whether it's a two-hour lecture or a critical business meeting recording, many of us face this challenge. But fear not! This article is here to introduce you to a hassl
Terminator Future War: Advanced Tech & Survival Strategies
The chilling vision of the Terminator future war, where humanity struggles against a relentless robotic enemy, continues to captivate and inspire strategic thinking. This blog delves into the advanced technology and desperate survival strategies that define this dystopian conflict. By exploring thes
Comments (0)
0/200
May 6, 2025
EricKing
0
Exploring the Heart of Minecraft: Villages
Minecraft villages are more than just a collection of buildings; they're vibrant communities brimming with life and opportunities. Whether you're a seasoned player or just starting out, these villages offer a safe haven, a place to gather resources, and a chance to engage in lucrative trades. By understanding how to navigate and enhance these villages, you can turn them into a cornerstone of your Minecraft journey. From trading with villagers to farming crops and ensuring village safety, this guide will help you unlock the full potential of these bustling hubs.
Key Aspects of Village Life
- Efficient Trading: Get to know the different villager professions and their trade offers to snag valuable items like emeralds, enchanted books, and rare resources.
- Resource Management: Make the most of village farms to secure food and other resources, boosting your survival and progression.
- Village Defense: Learn how to safeguard villagers from threats like zombies and pillagers to keep the village thriving and your resources flowing.
- Building and Expansion: Discover how to grow and improve your village, making it a stronger, more functional base.
- Exploring Village Structures: Find and utilize key buildings like blacksmiths, churches, and libraries to uncover rare items and valuable resources.
- Utilizing Beds: Use village beds to skip the night and avoid the dangers lurking in the dark.
- Farming Techniques: Learn efficient ways to harvest crops, ensuring a steady supply of food.
Understanding Minecraft Villages
What is a Minecraft Village?
Minecraft villages are dynamic, procedurally generated hubs found across various biomes, offering a sanctuary filled with resources. Inhabited by villagers with unique professions, these settlements provide trading opportunities and essential supplies. From plains to snowy tundras, each biome's village offers distinct resources and challenges. Exploring these villages is key to early-game survival and long-term progression. Interacting with villagers can yield valuable items, including enchanted books, making these communities vital to any player's journey.
Villages are not just about trading; they're also a place to rest and recharge. Using beds found in village homes, you can skip the night and avoid hostile mobs. Moreover, villages often contain useful items like food, tools, and armor, making them invaluable for early adventures. The varied layouts and designs of villages make each one a unique exploration, encouraging players to delve deeper into each discovery.
Understanding Village Dynamics and Community
Population and Growth of Villages
The growth of a Minecraft village hinges on the number of available beds and villagers' willingness to breed. A village needs enough beds for all its residents, and villagers will only breed if there are more beds than villagers. Encouraging population growth involves providing additional beds and ensuring villagers have food like bread, carrots, or potatoes. Each villager needs at least 12 units of each food item to be willing to breed. Protecting villagers from threats like zombies and pillagers is crucial for maintaining and increasing the village population. Building defensive structures like walls and fences can keep these threats at bay, fostering a thriving community.
Expanding the village by building new homes or enlarging existing ones can provide more space for villagers, further promoting growth. Monitoring the village population and addressing issues like bed shortages or increased hostile mob activity ensures the village remains a self-sufficient hub supporting your Minecraft adventures.
Village Defenses: Walls, Golems, and More
Protecting a village in Minecraft involves a multi-faceted approach. Start by constructing walls and fences around the village perimeter using sturdy materials like stone bricks or cobblestone. These barriers keep hostile mobs out and villagers safe. Add gates or doors for easy access, and place torches or lanterns along the walls to deter mob spawning. Consider digging a moat filled with water or lava around the village to enhance security.
Active protection measures are equally important. Creating iron golems can provide automatic defense against hostile mobs. Strategically place these golems throughout the village for comprehensive protection. Setting up traps, like pits filled with lava or spikes, can eliminate threats before they reach the village. Enlist villagers in the defense effort by assigning them to guard posts and equipping them with weapons and armor. Stay vigilant, clear out any mobs that breach the defenses, and continuously improve the village's security to ensure its long-term safety.
How to Maximize Village Benefits
Step 1: Locating a Village
Finding a village is the first step to reaping its benefits. Villages can be found in plains, savanna, desert, taiga, and snowy tundra biomes. Keep an eye out for clusters of houses and villagers. Once you spot a village, approach it cautiously, as it may be occupied by hostile mobs. Clear any threats to ensure a safe entry and protect the villagers.
Step 2: Establishing Trade Relationships
After securing the village, start building trade relationships with villagers. Identify those with valuable professions like librarians, blacksmiths, and farmers. Regularly trade with them to level them up and unlock new, more beneficial trades. Keep an eye on item prices and seek out profitable exchanges. Emeralds are crucial for trading, so focus on acquiring them through farming or mining. Building these relationships takes time, but it's worth it for the valuable items and resources you can gain, like mending books and diamond armor.
Step 3: Optimizing Farm Output
Village farms are a sustainable source of food and resources. To maximize their output, ensure crops are well-lit and watered. Use torches or lanterns for light and create irrigation systems to keep the farmland moist. Expanding the farms can increase crop yields, and automating the harvesting process with pistons and observers can save time. Remember to replant crops after harvesting to maintain a continuous supply. Many villagers will also replant crops, helping sustain the village's resources.
Step 4: Protecting the Village
Villages are prone to attacks from hostile mobs like zombies and pillagers. Build walls and fences around the village to keep these threats out. Use torches or lanterns throughout the village to prevent mob spawning in well-lit areas. Creating iron golems can provide automatic defense against approaching mobs. Stay alert, clear out any mobs that breach the defenses, and repair any damage to maintain the village's safety.
Step 5: Expanding and Improving the Village
With a thriving village, consider expanding and enhancing it to create a more robust base. Build new homes to increase the population, construct additional farms for more crop yields, and create storage areas for resources. Add defensive structures like watchtowers and arrow slits to bolster the village's defenses. By improving the village, you create a self-sufficient and secure environment to support your long-term Minecraft adventures.
The Economic Value of Village Resources: Bartering with Villagers
Leveraging Trading for Maximum Profit
Trading with villagers can be highly profitable if you understand which resources to collect and which villagers to target. Farmers offer emeralds in exchange for crops like wheat, carrots, or potatoes, making them an early-game gem. Librarians trade enchanted books for emeralds, providing powerful enchantments for your tools, weapons, and armor. Tool smiths and weapon smiths offer valuable tools and weapons, while blacksmiths provide iron tools and armor, particularly useful in the early game stages.
Strategically trading with villagers helps you acquire essential resources and items, fostering a thriving village economy.
Trading with Villagers: Pros and Cons
Pros
- Access to Valuable Items: Villagers offer enchanted books, diamond tools, and rare resources that are hard to find otherwise.
- Emeralds as Currency: Trading provides a steady supply of emeralds, which can be used to purchase more valuable items.
- Leveling Up Villagers: Frequent trading levels up villagers, unlocking new and better trades.
- Village Economy: Trading contributes to a thriving, self-sufficient village economy.
Cons
- Limited Stock: Villagers have limited items available for trade, requiring you to wait for restocking.
- Fluctuating Prices: Item prices can change based on supply and demand, making it hard to predict costs.
- Vulnerability to Attacks: Villages can be attacked by hostile mobs, disrupting trading and harming villagers.
- Time-Consuming: Trading can be time-consuming, especially if you need to travel far or wait for restocking.
Core Activities in a Minecraft Village
Trading with Villagers
Trading is a fundamental activity in Minecraft villages, allowing you to exchange items for emeralds and other goods. Each villager has a profession that dictates their trade offers. Understanding these professions and offers is key to efficient trading. Emeralds are the currency of choice, used to buy enchanted books, tools, armor, and rare resources. To trade, simply approach a villager and interact with them to view their offers. Compare prices and seek out the best deals to make the most of your resources.
As you trade more, villagers level up, unlocking new and more valuable trades:
- Novice Level: Basic trades like crops for emeralds or paper for emeralds.
- Apprentice Level: Trades like gold for emeralds or enchanted books for emeralds.
- Journeyman Level: Includes book-to-emerald trades.
- Expert Level: Offers the most useful and expensive items.
- Master Level: Provides the best trades available.
Harvesting Farm Crops
Village farms offer various crops like wheat, carrots, potatoes, and beetroot, providing a sustainable source of food and resources. Harvesting these crops helps maintain your hunger levels and provides materials for crafting. To harvest, simply interact with fully grown plants, taking care not to destroy the farmland beneath them. Villagers often replant crops, ensuring a continuous supply.
Here are some common crops and their uses:
- Wheat: Used for crafting bread, cakes, and cookies, and for breeding cows, sheep, and chickens.
- Carrots: Eaten raw to restore hunger, used to breed rabbits and pigs, and to craft rabbit stew.
- Potatoes: Eaten raw in emergencies or cooked for baked potatoes, used to breed pigs.
- Beetroot: Eaten raw to restore hunger and used to craft beetroot soup.
Gathering Resources
Besides farms, villages contain structures like blacksmith workshops with furnaces, anvils, and chests containing iron tools or armor. Churches may have candles to harvest. These resources are crucial for crafting tools, weapons, and armor, enhancing your survival. Explore the village, interact with structures, and look for chests and containers holding valuable items. Crafting tables in some structures allow on-the-spot crafting. Always respect villagers and avoid damaging their property while gathering resources.
Utilizing Beds
Beds in Minecraft villages are essential for skipping the night and avoiding hostile mobs. Found inside villager homes, they're easy to spot with their bright colors. To use a bed, approach and interact with it during nighttime. Clear any nearby hostile mobs before sleeping, as they can prevent you from using the bed. Sleeping in a bed also resets your spawn point to the village, ensuring you respawn there if you die. This can be a significant advantage, allowing quick returns to the village for continued adventures.
Use Cases for a Prosperous Minecraft Village
Long-Term Survival Base
A well-established village can serve as a long-term survival base, offering a safe and resource-rich environment. By building defensive structures, you can protect the village and its inhabitants from hostile mobs. Farming the village's crops ensures a steady food supply, while trading with villagers provides materials for further development.
Resource Hub
Villages can act as resource hubs, offering access to various materials and items. Farms provide food and resources, blacksmiths offer tools and armor, and trading with villagers yields emeralds and other valuable goods. Beds allow you to skip the night, making the village a safe place to rest and recharge.
Trading Center
Villages are ideal trading centers, where you can exchange items with villagers for emeralds and other goods. Understanding villager professions and their trade offers maximizes your trading efficiency. Connecting villages via nether portals can make trading posts more accessible and convenient.
Frequently Asked Questions
How do I find a Minecraft village?
Minecraft villages are found in plains, savanna, desert, taiga, and snowy tundra biomes. Look for clusters of houses and villagers, as villages are usually visible from a distance due to their unique structures.
How do I trade with villagers?
To trade with villagers, approach them and interact to view their current offers. Pay attention to item prices and seek out profitable exchanges.
How do I protect my village from hostile mobs?
Protect your village by building walls and fences around the perimeter, using torches or lanterns to prevent mob spawning, and creating iron golems for automatic defense.
How can I maximize the benefits of Minecraft villages?
Maximize village benefits by establishing trade relationships, optimizing farm output, protecting the village from threats, and expanding and improving the village for self-sufficiency and security.
Related Questions
What are the different villager professions in Minecraft?
Minecraft villagers have various professions, each with unique trades and offers. Common professions include farmers, librarians, blacksmiths, butchers, cartographers, clerics, fishermen, fletchers, leatherworkers, shepherds, stone masons, and tool smiths. Understanding these professions and their trades is essential for efficient trading and resource acquisition.
Here's a breakdown of some useful villager professions:
| Profession | Useful Trades |
|---|---|
| Librarian | Enchanted books, bookshelves, glass |
| Tool Smith | Diamond tools, iron tools |
| Weapon Smith | Diamond weapons, iron weapons |
| Armorer | Diamond armor, iron armor |
| Farmer | Food, emeralds |
| Fletcher | Arrows, bows |
| Shepherd | Wool, beds |
| Leatherworker | Leather armor, saddles |
| Stone Mason | Stone bricks, terracotta |
| Cleric | Rotten flesh-to-emerald trades, redstone for emeralds |
How do I create a golem to protect my village?
To create an iron golem for village protection, you'll need four iron blocks and one carved pumpkin. Arrange the iron blocks in a T shape, with one block at the bottom and three on top, then place the carved pumpkin on the center block. The iron golem will spawn and automatically defend your village. For a snow golem, stack two snow blocks and top them with a carved pumpkin. While less powerful, snow golems can still aid in defense by slowing down mobs with snowballs. Protecting your village is crucial for its long-term viability, ensuring you maintain access to valuable trades and resources.


 Google I/O 2025: How to watch and what the event schedule tells us
As the days grow longer and spring blooms burst into color, tech enthusiasts know it's time for the annual pilgrimage to the world of innovation—conference season. Among the most anticipated events is Google I/O, and it's right around the corner.When is Google I/O?Mark your calendars for May 20 and
Google I/O 2025: How to watch and what the event schedule tells us
As the days grow longer and spring blooms burst into color, tech enthusiasts know it's time for the annual pilgrimage to the world of innovation—conference season. Among the most anticipated events is Google I/O, and it's right around the corner.When is Google I/O?Mark your calendars for May 20 and
 Convert Videos to Text Effortlessly: No Typing Required
Ever found yourself in a situation where you need to transcribe a long video, but the thought of typing out every word is daunting? Whether it's a two-hour lecture or a critical business meeting recording, many of us face this challenge. But fear not! This article is here to introduce you to a hassl
Convert Videos to Text Effortlessly: No Typing Required
Ever found yourself in a situation where you need to transcribe a long video, but the thought of typing out every word is daunting? Whether it's a two-hour lecture or a critical business meeting recording, many of us face this challenge. But fear not! This article is here to introduce you to a hassl
 Terminator Future War: Advanced Tech & Survival Strategies
The chilling vision of the Terminator future war, where humanity struggles against a relentless robotic enemy, continues to captivate and inspire strategic thinking. This blog delves into the advanced technology and desperate survival strategies that define this dystopian conflict. By exploring thes
Terminator Future War: Advanced Tech & Survival Strategies
The chilling vision of the Terminator future war, where humanity struggles against a relentless robotic enemy, continues to captivate and inspire strategic thinking. This blog delves into the advanced technology and desperate survival strategies that define this dystopian conflict. By exploring thes