AI Inpainting Mastery: FluxDev Techniques for Flawless Image Editing
In the dynamic world of AI-powered image editing, inpainting emerges as a transformative technique. This guide explores a refined inpainting process using the FluxDev model, empowering you to achieve precise, high-quality image enhancements.
Key Points
Discover the benefits of the Flux inpainting workflow for targeted image adjustments.
Learn to leverage ControlNet for enhanced environmental understanding.
Master mask creation and refinement for seamless edit integration.
Explore advanced prompting strategies to steer AI generation.
Understand the role of mask blurring and denoising for smooth blending.
Compare Flux inpainting with SDXL for informed workflow choices.
Enhance skills in refining AI inpainting results.
Introduction to AI Inpainting with FluxDev Model
What is AI Inpainting?
AI inpainting is an advanced image editing method that uses artificial intelligence to reconstruct missing or unwanted image sections.
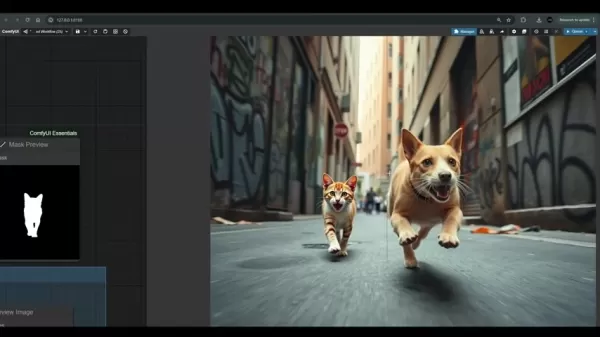
Unlike conventional techniques like cloning or patching, AI inpainting algorithms evaluate surrounding areas to generate content that blends seamlessly with the original image, delivering natural and visually appealing results.
The FluxDev model’s tailored inpainting workflow excels in making precise changes to specific, often small, image regions. It prioritizes high-quality outputs, ensuring edits align with the original image’s style and context. This approach is ideal for tasks like removing imperfections, adding subtle details, or correcting minor flaws while preserving the image’s overall aesthetic.
Why Choose FluxDev Model for Inpainting?
Despite potential commercial use restrictions, the FluxDev model shines in specific inpainting applications due to its adaptability and precise control. Key advantages include:
- Precision Editing: Allows detailed modifications while maintaining image integrity.
- Contextual Intelligence: Pairs effectively with ControlNet for improved perspective and context awareness.
- Seamless Blending: Ensures edited areas merge flawlessly with the original image.
Key Differences: FluxDev Model vs. SDXL Inpainting
ControlNet Integration and Text Prompts
Both FluxDev and SDXL deliver robust inpainting capabilities, but their workflows differ in critical ways.
Feature FluxDev Model SDXL Inpainting ControlNet Lacks direct support Supports ControlNet for enhanced environmental context Text Prompts Enables direct text-based prompts Limited text prompt functionality Commercial Use Subject to usage restrictions Typically offers more flexible commercial terms Integration Blends edits seamlessly with the original image May struggle with perfect blending
Step-by-Step Guide: Inpainting with FluxDev in ComfyUI
Step 1: Loading the Image and Defining the Mask
Begin by importing the target image into ComfyUI using the 'Load Image' node, which supports inpainting workflows. Then, mark the areas for modification.
- Activate Masking: Right-click and select ‘Choose File to Upload’ to draw directly on the image, creating a mask for targeted edits.
- Adjust Mask Settings: Access the editor window, use the color negative button, and fine-tune the mask thickness.
Step 2: Refining the Mask
Next, refine the mask to align with the image’s editing needs.
- Mask Cropping: Use cropping tools to perfect the mask’s boundaries.
- Image Resizing: Adjust the image size as needed.
- VAE Encoding: Process the image with VAE and apply a latent noise mask.
Step 3: Preparing Models and Crafting Prompts
Configure the FluxDev model, CLIP, VAE, and prompts clearly, avoiding overly complex instructions.
- Model Selection: Load all required diffusion models.
- Refined Prompts: Craft precise, specific prompts to guide the inpainting process.
Step 4: Configuring Key Parameters
Set critical parameters to ensure the new content integrates naturally with the image’s existing pixels.
- Blur Adjustment: Choose an appropriate blur level.
- Denoise Settings: Adjust denoising based on proximity to the original image.
Step 5: Executing the Workflow in ComfyUI
Once masks, prompts, and parameters are finalized, run the inpainting process.
- Start Processing: Click the 'Queue Prompt' button to process the image.
- Review Results: Inspect the output, noting that results are for personal use only.
Pricing and Availability
FluxDev Model Pricing
Pricing for the FluxDev model varies by platform. Always review licensing restrictions before starting your project.
Flux Inpainting Pros and Cons
Pros
Advanced Functionality: Offers precise selection tools and ControlNet integration.
Detail-Oriented Edits: Enables modifications to small areas with high accuracy.
Quality Retention: Preserves the original image’s aesthetic integrity.
Cons
Learning Curve: Requires familiarity with ComfyUI.
Complexity: Involves numerous prompts and settings, demanding foundational knowledge.
Licensing Limits: Commercial use may be restricted; verify terms before use.
Core Features of Flux Inpainting Workflow
Precision Masking and Editing
Provides tools for accurate selection, enabling targeted image adjustments.
ControlNet Integration
Enhances AI clarity through ControlNet, improving prompt-driven edits.
Use Cases for AI Inpainting
Product Imagery
Flux enhances product visuals, such as updating text on a white jar to a modern, compelling phrase.
Seamless Texture Generation
AI delivers high-quality, blurred textures for seamless image enhancements.
FAQ
What are the key differences between Flux and SDXL inpainting?
ControlNet support, text prompt capabilities, and commercial use restrictions are primary distinctions.
What is a mask crop region node?
The mask crop region node defines the dimensions used in the workflow, providing a clear view of the image’s construction process.
Related Questions
Can I use both SDXL inpainting workflow and Flux?
Both workflows are adaptable, but Flux offers greater functionality and a broader range of tools, such as text-based prompting, for enhanced image editing.
Related article
 Amazon Introduces AI-Powered Audio Summaries for Enhanced Shopping Experience
Amazon is piloting AI-generated audio product summaries on select item pages, the company revealed Wednesday. These summaries, narrated by Amazon’s “AI-driven shopping advisors,” highlight key product
 AI Data Centers May Cost $200B by 2030, Strain Power Grids
AI training and operation data centers could soon house millions of chips, cost hundreds of billions, and demand power equivalent to a major city’s grid if trends persist.A new study from Georgetown,
 AI-Driven 3D Wine Glass Creation in Blender
3D modeling can be streamlined with AI, making it faster and more accessible. This guide demonstrates how to craft a 3D wine glass model in Blender using a 2D image and ChatGPT. By simplifying traditi
Comments (0)
0/200
In the dynamic world of AI-powered image editing, inpainting emerges as a transformative technique. This guide explores a refined inpainting process using the FluxDev model, empowering you to achieve precise, high-quality image enhancements.
Key Points
Discover the benefits of the Flux inpainting workflow for targeted image adjustments.
Learn to leverage ControlNet for enhanced environmental understanding.
Master mask creation and refinement for seamless edit integration.
Explore advanced prompting strategies to steer AI generation.
Understand the role of mask blurring and denoising for smooth blending.
Compare Flux inpainting with SDXL for informed workflow choices.
Enhance skills in refining AI inpainting results.
Introduction to AI Inpainting with FluxDev Model
What is AI Inpainting?
AI inpainting is an advanced image editing method that uses artificial intelligence to reconstruct missing or unwanted image sections.

Unlike conventional techniques like cloning or patching, AI inpainting algorithms evaluate surrounding areas to generate content that blends seamlessly with the original image, delivering natural and visually appealing results.
The FluxDev model’s tailored inpainting workflow excels in making precise changes to specific, often small, image regions. It prioritizes high-quality outputs, ensuring edits align with the original image’s style and context. This approach is ideal for tasks like removing imperfections, adding subtle details, or correcting minor flaws while preserving the image’s overall aesthetic.
Why Choose FluxDev Model for Inpainting?
Despite potential commercial use restrictions, the FluxDev model shines in specific inpainting applications due to its adaptability and precise control. Key advantages include:
- Precision Editing: Allows detailed modifications while maintaining image integrity.
- Contextual Intelligence: Pairs effectively with ControlNet for improved perspective and context awareness.
- Seamless Blending: Ensures edited areas merge flawlessly with the original image.
Key Differences: FluxDev Model vs. SDXL Inpainting
ControlNet Integration and Text Prompts
Both FluxDev and SDXL deliver robust inpainting capabilities, but their workflows differ in critical ways.
| Feature | FluxDev Model | SDXL Inpainting |
|---|---|---|
| ControlNet | Lacks direct support | Supports ControlNet for enhanced environmental context |
| Text Prompts | Enables direct text-based prompts | Limited text prompt functionality |
| Commercial Use | Subject to usage restrictions | Typically offers more flexible commercial terms |
| Integration | Blends edits seamlessly with the original image | May struggle with perfect blending |
Step-by-Step Guide: Inpainting with FluxDev in ComfyUI
Step 1: Loading the Image and Defining the Mask
Begin by importing the target image into ComfyUI using the 'Load Image' node, which supports inpainting workflows. Then, mark the areas for modification.
- Activate Masking: Right-click and select ‘Choose File to Upload’ to draw directly on the image, creating a mask for targeted edits.
- Adjust Mask Settings: Access the editor window, use the color negative button, and fine-tune the mask thickness.
Step 2: Refining the Mask
Next, refine the mask to align with the image’s editing needs.
- Mask Cropping: Use cropping tools to perfect the mask’s boundaries.
- Image Resizing: Adjust the image size as needed.
- VAE Encoding: Process the image with VAE and apply a latent noise mask.
Step 3: Preparing Models and Crafting Prompts
Configure the FluxDev model, CLIP, VAE, and prompts clearly, avoiding overly complex instructions.
- Model Selection: Load all required diffusion models.
- Refined Prompts: Craft precise, specific prompts to guide the inpainting process.
Step 4: Configuring Key Parameters
Set critical parameters to ensure the new content integrates naturally with the image’s existing pixels.
- Blur Adjustment: Choose an appropriate blur level.
- Denoise Settings: Adjust denoising based on proximity to the original image.
Step 5: Executing the Workflow in ComfyUI
Once masks, prompts, and parameters are finalized, run the inpainting process.
- Start Processing: Click the 'Queue Prompt' button to process the image.
- Review Results: Inspect the output, noting that results are for personal use only.
Pricing and Availability
FluxDev Model Pricing
Pricing for the FluxDev model varies by platform. Always review licensing restrictions before starting your project.
Flux Inpainting Pros and Cons
Pros
Advanced Functionality: Offers precise selection tools and ControlNet integration.
Detail-Oriented Edits: Enables modifications to small areas with high accuracy.
Quality Retention: Preserves the original image’s aesthetic integrity.
Cons
Learning Curve: Requires familiarity with ComfyUI.
Complexity: Involves numerous prompts and settings, demanding foundational knowledge.
Licensing Limits: Commercial use may be restricted; verify terms before use.
Core Features of Flux Inpainting Workflow
Precision Masking and Editing
Provides tools for accurate selection, enabling targeted image adjustments.
ControlNet Integration
Enhances AI clarity through ControlNet, improving prompt-driven edits.
Use Cases for AI Inpainting
Product Imagery
Flux enhances product visuals, such as updating text on a white jar to a modern, compelling phrase.
Seamless Texture Generation
AI delivers high-quality, blurred textures for seamless image enhancements.
FAQ
What are the key differences between Flux and SDXL inpainting?
ControlNet support, text prompt capabilities, and commercial use restrictions are primary distinctions.
What is a mask crop region node?
The mask crop region node defines the dimensions used in the workflow, providing a clear view of the image’s construction process.
Related Questions
Can I use both SDXL inpainting workflow and Flux?
Both workflows are adaptable, but Flux offers greater functionality and a broader range of tools, such as text-based prompting, for enhanced image editing.
 Amazon Introduces AI-Powered Audio Summaries for Enhanced Shopping Experience
Amazon is piloting AI-generated audio product summaries on select item pages, the company revealed Wednesday. These summaries, narrated by Amazon’s “AI-driven shopping advisors,” highlight key product
 AI Data Centers May Cost $200B by 2030, Strain Power Grids
AI training and operation data centers could soon house millions of chips, cost hundreds of billions, and demand power equivalent to a major city’s grid if trends persist.A new study from Georgetown,
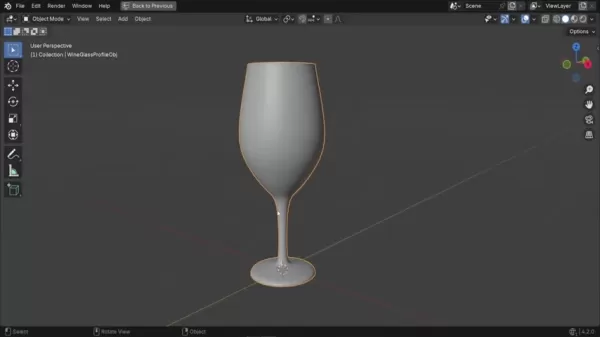 AI-Driven 3D Wine Glass Creation in Blender
3D modeling can be streamlined with AI, making it faster and more accessible. This guide demonstrates how to craft a 3D wine glass model in Blender using a 2D image and ChatGPT. By simplifying traditi
