


 Home
HomeAI Image Inpainting: Revitalize and Improve Your Building Photos
In our increasingly digital world, the ability to preserve and enhance our visual history has become more accessible than ever. AI image inpainting technology stands out as a powerful tool for breathing new life into old photographs of buildings and landmarks, or for seamlessly erasing unwanted elements from architectural images. This tech not only revitalizes personal memories but also elevates professional visuals. Let's dive into the workings of AI image inpainting and explore how you can use it to enhance your building photography.
Understanding AI Image Inpainting
What is AI Image Inpainting?
AI image inpainting is a cutting-edge technique that uses artificial intelligence to fill in or reconstruct missing or damaged sections of an image. Unlike the old-school methods that might just blur or replicate nearby pixels, AI inpainting dives deep into the surrounding context and semantic information to create a realistic and seamless addition to the image. This makes it a go-to tool for photo restoration, object removal, and creative edits.
The tech behind this is typically powered by deep learning models, such as convolutional neural networks (CNNs) or generative adversarial networks (GANs). These models are trained on massive image datasets, allowing them to understand and replicate real-world patterns, textures, and structures. When faced with a damaged or incomplete image, the AI can conjure up what the missing parts should look like, based on its learned knowledge, resulting in more accurate and visually pleasing outcomes than traditional techniques.
The process generally starts with selecting the area to be inpainted using a mask or drawing tool. The AI then examines the surrounding pixels to understand the context and generate new content that blends seamlessly with the existing image. Many AI inpainting tools also let you tweak parameters like detail level, texture, and color to refine the results.
The advent of AI image inpainting has unlocked new avenues for photographers, artists, and anyone keen on enhancing or restoring their visual content. Whether you're an architect aiming to clean up a building photo or a hobbyist trying to revive a cherished family picture, AI inpainting offers powerful, user-friendly tools to help you achieve your goals.
Exploring AI Image Inpainting Features
Drawing Modes: Brush vs. Rectangle
AI inpainting tools often come with different drawing modes, like 'Brush' and 'Rectangle,' to give you flexibility in choosing the area to be inpainted. The 'Brush' mode is perfect for dealing with irregular shapes and fine details, while the 'Rectangle' mode is better suited for larger, more uniform areas.
Using the Brush Mode, you can paint over the specific areas you want to restore or remove. This is especially handy for complex shapes or when you need precision. You can adjust the brush size to match the detail level you're aiming for.
On the other hand, the Rectangle Mode allows you to quickly select rectangular regions. This is ideal for removing larger objects or restoring sections of a building with a more uniform shape. It's a faster option for areas that don't require intricate masking.
Choosing the right drawing mode can significantly affect the quality of your inpainting results. It's worth experimenting with both to find what works best for your specific needs.
Adjusting Brush Size
The size of the brush is a key factor in the inpainting process. A smaller brush enables more precise work, allowing you to carefully outline the areas you want to restore or remove. This is particularly useful for fine details or complex shapes. With a smaller brush, you can accurately trace the edges of the damaged area, ensuring the AI algorithm focuses only on the intended region.
Conversely, a larger brush can cover larger areas quickly, making it ideal for removing larger objects or restoring sections of a building with a more uniform shape. While this can save time, it's important to be cautious not to include unwanted areas in the mask, as this can lead to less desirable results.
Adjusting the brush size is a crucial skill in AI image inpainting. Experiment with different sizes to see what works best for your specific needs. Precision is key, especially when dealing with intricate details or complex shapes.
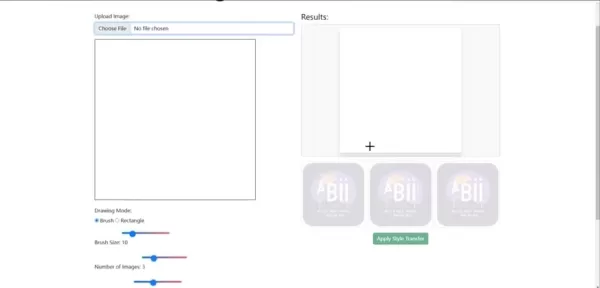
Number of Images and Inference Steps
Some AI inpainting tools let you control the number of images generated and the number of inference steps used. The number of images refers to the different variations the AI generates for the inpainted area, which can be helpful if you want to explore different options and choose the best fit.
The number of inference steps determines the level of detail and refinement in the inpainting process. More steps usually lead to more accurate and realistic results, but they take longer to process. Fewer steps can be quicker but might result in a less detailed or refined outcome.
Playing around with these parameters can help you achieve the best results for your images and needs. Remember, the optimal settings can vary based on the complexity of the image and the type of inpainting task you're performing.
Step-by-Step Guide: Using AI Image Inpainting for Buildings
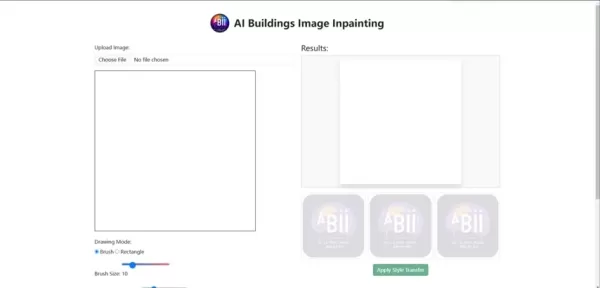
Step 1: Uploading Your Image
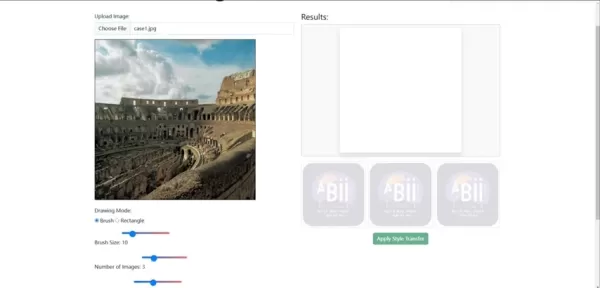
The first step is to upload the image of the building you want to restore or enhance. Most AI inpainting tools have a simple interface for uploading images. Look for a 'Choose File' button or similar option to select your image. Make sure the image is of good quality, as higher resolution images generally yield better results.
Once uploaded, the tool will display the image on the screen.
Take a moment to review the image and identify the areas you want to inpaint or restore. Zoom in if necessary to get a closer look at the details and plan your approach. This will help you achieve the best possible outcome.
Step 2: Drawing a Mask Over the Area to be Restored
After uploading the image, the next step is to define the area that needs inpainting by drawing a mask over it. AI inpainting tools usually offer different drawing modes, such as 'Brush' and 'Rectangle,' to give you flexibility. The 'Brush' mode is great for irregular shapes and fine details, while the 'Rectangle' mode is better for larger, more uniform areas.
Adjust the brush size to fit the area you're masking. A smaller brush is better for precise work, while a larger one can cover larger areas quickly.
Carefully outline the part of the building you want to restore or the object you want to remove. Make sure the mask covers the entire area to prevent any artifacts or inconsistencies in the final result.
The accuracy of the mask is crucial for a seamless inpainting result. Take your time and double-check the edges of the mask to ensure they align with the contours of the building or object. Most tools also have an 'Undo' function, so you can easily correct any mistakes.
Step 3: Apply the Style Transfer
Once the mask is drawn, it's time to apply the inpainting algorithm. Most tools have a button labeled 'Apply Style Transfer' or something similar. Clicking this initiates the AI process, where the algorithm analyzes the surrounding context and generates new content to fill the masked area. Be patient; processing time can vary based on image size and task complexity.
During this process, the AI examines the surrounding pixels, textures, and patterns to create a seamless blend between the original image and the generated content. It aims to match the colors, lighting, and architectural style of the building to create a realistic result, making it appear as if the inpainted area was always part of the original image.
Once complete, the tool will display the result on the screen. Take a moment to review the output and see if it meets your expectations. If not, you can always adjust the mask or fine-tune the AI algorithm's parameters.
Step 4: Reviewing the Results
After applying the style transfer, carefully review the results. Look for any inconsistencies or artifacts, paying close attention to edges, textures, and lighting. If you notice any issues, refine the mask and re-apply the style transfer.
Many AI inpainting tools offer multiple results, allowing you to choose the best one. Experiment with different options to find the most seamless and realistic restoration. You can also adjust parameters like brush size and inference steps to fine-tune the process.
Once satisfied with the results, you can download the enhanced image and use it for your desired purpose. Share it with others or use it for professional architectural projects.
Pros and Cons of Using AI Image Inpainting
Pros
- Seamless Restoration: AI inpainting can restore damaged areas in building photos seamlessly by analyzing the surrounding context and generating realistic content.
- Time-Saving: AI-powered tools automate the restoration process, saving significant time compared to manual methods.
- User-Friendly: Many AI inpainting tools have intuitive interfaces, making them accessible to users without extensive image editing experience.
- Versatile Application: AI inpainting can be used for various purposes, including restoring old photos, removing unwanted objects, and enhancing architectural images.
- Multiple Results: Some AI tools provide multiple restoration options, allowing users to choose the best outcome.
Cons
- Quality Dependency: The quality of the restoration depends on the complexity of the damage and the quality of the original image.
- Potential Artifacts: In some cases, AI inpainting may produce noticeable artifacts or inconsistencies in the restored area.
- Processing Time: The processing time can vary depending on the size and complexity of the image, as well as the capabilities of the AI tool.
- Cost: Some advanced AI inpainting tools may require a subscription or one-time purchase.
- Limited Control: Users may have limited control over the AI's decision-making process, which can affect the final outcome.
Frequently Asked Questions About AI Image Inpainting
What types of images work best with AI image inpainting?
AI image inpainting generally works well with a wide range of images, but it excels with images that have clear structures and patterns. For instance, images of buildings, landscapes, and objects with well-defined shapes are often easier for the AI to analyze and reconstruct. The quality of the original image is crucial, with higher resolution images typically yielding better results due to the additional detail they provide. However, AI inpainting can also handle more complex images with intricate textures or patterns, though it may require experimenting with different parameters to achieve the desired outcome. It's worth noting that AI inpainting might not be ideal for all types of images, especially those with significant noise or distortion, as these can be challenging for the AI to process effectively.
Is AI image inpainting difficult to learn?
One of the best aspects of AI image inpainting is its growing user-friendliness. Many tools are designed with intuitive interfaces, making them accessible even to those without prior image editing or AI experience. These tools often come with clear instructions and helpful tips to guide you through the process.
However, like any new skill, there's a learning curve. It may take some time to become familiar with the different features and parameters of the AI inpainting tool. Experimenting with various settings and practicing on different images can help you hone your skills and achieve better results. There are plenty of online tutorials and resources available to help you grasp the basics of AI image inpainting and master more advanced techniques.
Can AI image inpainting remove unwanted objects from photos?
Yes, AI image inpainting is an excellent tool for removing unwanted objects from photos. Simply select the object you want to remove using a mask or drawing tool, and the AI algorithm will seamlessly fill the area with content that matches the surrounding environment. This can be particularly useful for cleaning up architectural photos by removing distractions like power lines, signs, or people. The AI analyzes the surrounding pixels, textures, and patterns to create a realistic and seamless result.
However, the success of object removal depends on the complexity of the image and the size of the object. Removing larger objects or those surrounded by intricate details may be more challenging and require more fine-tuning. In some cases, combining AI inpainting with other image editing techniques might be necessary to achieve the desired outcome.
Related article
 Ali's Large Model Push: Qwen Digital Human Debuts, Core Ecosystem Integrates
As the AI competition moves into the application layer phase, Alibaba has made a key move by integrating its AI ecosystems. On April 22, Alibaba officially unveiled a unified AI digital persona named 'Qwen Xiaojiuwo,' which gives Tongyi Qianwen a mor
Alibaba Q4 Fiscal 2026 Report: AI Revenue Surges, BaiLian Platform ARR Tops 10 Billion Yuan
Alibaba Group today released its Q4 and full-year 2026 financial results, indicating that its AI-driven cloud business is experiencing explosive growth. The report shows that revenue for the fourth fiscal quarter reached 243.38 billion yuan, up 11% y
Elon Musk Loses Lawsuit Against Sam Altman and OpenAI
Elon Musk's assertion that OpenAI's co-founders wronged him collapsed when nine California jurors unanimously ruled that his lawsuits were filed too late.Musk alleged that Sam Altman, Greg Brockman, OpenAI, and Microsoft "stole a charity" by establis
Related Special Topic Recommendations
chatbot
Ali's Large Model Push: Qwen Digital Human Debuts, Core Ecosystem Integrates
As the AI competition moves into the application layer phase, Alibaba has made a key move by integrating its AI ecosystems. On April 22, Alibaba officially unveiled a unified AI digital persona named 'Qwen Xiaojiuwo,' which gives Tongyi Qianwen a mor
Alibaba Q4 Fiscal 2026 Report: AI Revenue Surges, BaiLian Platform ARR Tops 10 Billion Yuan
Alibaba Group today released its Q4 and full-year 2026 financial results, indicating that its AI-driven cloud business is experiencing explosive growth. The report shows that revenue for the fourth fiscal quarter reached 243.38 billion yuan, up 11% y
Elon Musk Loses Lawsuit Against Sam Altman and OpenAI
Elon Musk's assertion that OpenAI's co-founders wronged him collapsed when nine California jurors unanimously ruled that his lawsuits were filed too late.Musk alleged that Sam Altman, Greg Brockman, OpenAI, and Microsoft "stole a charity" by establis
Related Special Topic Recommendations
chatbot
 AI Multi-Agent Orchestrators: Design Complex Automated Workflows through Natural Language
2026 Latest: Discover the best AI multi-agent orchestrators to design complex automated workflows through natural language. Our curated list features top-rated, powerful platforms for seamless task automation and intelligent process management. Compare free vs paid options with real-world insights. Unlock your AI edge with XIX.AI's expert weekly updated rankings.
 10 tools
 xix.ai
Image editing
Best AI Noise Reduction Software: Remove Grain & Artifacts from Low-Light Night Photography
xix.ai
Image editing
Best AI Noise Reduction Software: Remove Grain & Artifacts from Low-Light Night Photography
Discover the 2026 best AI noise reduction software for low-light night photography. Our top-rated, curated list compares free vs paid tools, featuring real-world tests and weekly updated rankings. Remove grain & artifacts effortlessly. Unlock your AI edge at XIX.AI.
10 tools
xix.ai
chatbot
Best Custom AI Girlfriend Generators: Design Unique Personalities, Hobbies, and Backstories
Discover the 2026 best custom AI girlfriend generators on XIX.AI. Explore our top-rated, curated list for designing unique personalities, hobbies, and deep backstories. Compare free vs paid options with real-world insights. Unlock your perfect creative companion today.
10 tools
xix.ai
Productivity
AI Architecture Designers: Build Scalable System Architectures Using Natural Language
Discover the 2026 best AI architecture design tools on XIX.AI. Our curated, top-rated list features powerful, game-changing solutions to build scalable system architectures using natural language. Compare free vs paid options with real-world insights. Unlock your AI edge and streamline development today.
10 tools
xix.ai
Comic Creation
AI Character Profile Creators: Generate Detailed Backstories & Visual Refs for Manga Leads
2026 Latest Best AI Character Profile Creators: Discover top-rated tools to generate detailed backstories and visual references for your manga leads. Our curated, weekly-updated list compares free vs paid options based on real-world tests. Find powerful, game-changing solutions to craft compelling characters and streamline your creative workflow. Explore the rankings on XIX.AI and unlock your perfect storytelling ally today.
10 tools
xix.ai
Health & Wellness
AI Pregnancy Copilots: Generate Safe Trimester-by-Trimester Workout & Nutrition Plans
Discover the 2026 best AI pregnancy copilots for safe, personalized trimester-by-trimester workout and nutrition plans. Get top-rated, curated recommendations with free vs paid comparisons and real-world insights. Unlock your healthiest pregnancy journey with XIX.AI's expert guide. Explore now.
10 tools
xix.ai

 Comments (5)
0/500
Comments (5)
0/500
![TerryHernández]()
Die Idee, alte Gebäudefotos mit KI zu restaurieren, ist faszinierend! Früher war das eine mühsame Arbeit für Experten. Jetzt kann fast jeder seine Familienerinnerungen oder historischen Aufnahmen digital auffrischen. Ich frage mich, ob diese Technik auch bei stark beschädigten Bildern funktioniert, bei denen ganze Teile fehlen. Auf jeden Fall ein tolles Werkzeug für Hobbyhistoriker und Architekturfans! 🏛️✨
![StevenNelson]()
昔の写真修正ってプロ頼みだけど、これなら自分で古い家の写真のひび割れや汚れを消せそう!でもアーティストが描いた元の意図をAIが勝手に変えちゃうのはちょっと怖いかも…使い方には気をつけないとね。🏛️
![RichardJohnson]()
오래된 건물 사진을 AI로 복원하는 기술 진짜 신기하네요. 저희 할아버지께서 운영하신 옛 가게 사진도 이렇게 복원해드리고 싶은데... 혹시 스마트폰 앱으로도 이런 기능 사용할 수 있을까요? 😊
![MarkGarcia]()
This AI inpainting stuff is wild! I tried it on my grandpa’s old house photo, and it’s like the cracks vanished. Kinda makes you wonder if we’re editing reality too far, no? 😅
![FrankJohnson]()
This AI inpainting stuff is wild! I tried it on an old photo of my grandpa’s house, and it’s like time travel in a click. Fixed the cracks and even added some greenery. Kinda makes you wonder if we’re restoring history or just making it up? 😄
In our increasingly digital world, the ability to preserve and enhance our visual history has become more accessible than ever. AI image inpainting technology stands out as a powerful tool for breathing new life into old photographs of buildings and landmarks, or for seamlessly erasing unwanted elements from architectural images. This tech not only revitalizes personal memories but also elevates professional visuals. Let's dive into the workings of AI image inpainting and explore how you can use it to enhance your building photography.
Understanding AI Image Inpainting
What is AI Image Inpainting?
AI image inpainting is a cutting-edge technique that uses artificial intelligence to fill in or reconstruct missing or damaged sections of an image. Unlike the old-school methods that might just blur or replicate nearby pixels, AI inpainting dives deep into the surrounding context and semantic information to create a realistic and seamless addition to the image. This makes it a go-to tool for photo restoration, object removal, and creative edits.
The tech behind this is typically powered by deep learning models, such as convolutional neural networks (CNNs) or generative adversarial networks (GANs). These models are trained on massive image datasets, allowing them to understand and replicate real-world patterns, textures, and structures. When faced with a damaged or incomplete image, the AI can conjure up what the missing parts should look like, based on its learned knowledge, resulting in more accurate and visually pleasing outcomes than traditional techniques.
The process generally starts with selecting the area to be inpainted using a mask or drawing tool. The AI then examines the surrounding pixels to understand the context and generate new content that blends seamlessly with the existing image. Many AI inpainting tools also let you tweak parameters like detail level, texture, and color to refine the results.
The advent of AI image inpainting has unlocked new avenues for photographers, artists, and anyone keen on enhancing or restoring their visual content. Whether you're an architect aiming to clean up a building photo or a hobbyist trying to revive a cherished family picture, AI inpainting offers powerful, user-friendly tools to help you achieve your goals.
Exploring AI Image Inpainting Features
Drawing Modes: Brush vs. Rectangle
AI inpainting tools often come with different drawing modes, like 'Brush' and 'Rectangle,' to give you flexibility in choosing the area to be inpainted. The 'Brush' mode is perfect for dealing with irregular shapes and fine details, while the 'Rectangle' mode is better suited for larger, more uniform areas.
Using the Brush Mode, you can paint over the specific areas you want to restore or remove. This is especially handy for complex shapes or when you need precision. You can adjust the brush size to match the detail level you're aiming for.
On the other hand, the Rectangle Mode allows you to quickly select rectangular regions. This is ideal for removing larger objects or restoring sections of a building with a more uniform shape. It's a faster option for areas that don't require intricate masking.
Choosing the right drawing mode can significantly affect the quality of your inpainting results. It's worth experimenting with both to find what works best for your specific needs.
Adjusting Brush Size
The size of the brush is a key factor in the inpainting process. A smaller brush enables more precise work, allowing you to carefully outline the areas you want to restore or remove. This is particularly useful for fine details or complex shapes. With a smaller brush, you can accurately trace the edges of the damaged area, ensuring the AI algorithm focuses only on the intended region.
Conversely, a larger brush can cover larger areas quickly, making it ideal for removing larger objects or restoring sections of a building with a more uniform shape. While this can save time, it's important to be cautious not to include unwanted areas in the mask, as this can lead to less desirable results.
Adjusting the brush size is a crucial skill in AI image inpainting. Experiment with different sizes to see what works best for your specific needs. Precision is key, especially when dealing with intricate details or complex shapes.
Number of Images and Inference Steps
Some AI inpainting tools let you control the number of images generated and the number of inference steps used. The number of images refers to the different variations the AI generates for the inpainted area, which can be helpful if you want to explore different options and choose the best fit.
The number of inference steps determines the level of detail and refinement in the inpainting process. More steps usually lead to more accurate and realistic results, but they take longer to process. Fewer steps can be quicker but might result in a less detailed or refined outcome.
Playing around with these parameters can help you achieve the best results for your images and needs. Remember, the optimal settings can vary based on the complexity of the image and the type of inpainting task you're performing.
Step-by-Step Guide: Using AI Image Inpainting for Buildings
Step 1: Uploading Your Image
The first step is to upload the image of the building you want to restore or enhance. Most AI inpainting tools have a simple interface for uploading images. Look for a 'Choose File' button or similar option to select your image. Make sure the image is of good quality, as higher resolution images generally yield better results.
Once uploaded, the tool will display the image on the screen.
Take a moment to review the image and identify the areas you want to inpaint or restore. Zoom in if necessary to get a closer look at the details and plan your approach. This will help you achieve the best possible outcome.
Step 2: Drawing a Mask Over the Area to be Restored
After uploading the image, the next step is to define the area that needs inpainting by drawing a mask over it. AI inpainting tools usually offer different drawing modes, such as 'Brush' and 'Rectangle,' to give you flexibility. The 'Brush' mode is great for irregular shapes and fine details, while the 'Rectangle' mode is better for larger, more uniform areas.
Adjust the brush size to fit the area you're masking. A smaller brush is better for precise work, while a larger one can cover larger areas quickly.
Carefully outline the part of the building you want to restore or the object you want to remove. Make sure the mask covers the entire area to prevent any artifacts or inconsistencies in the final result.
The accuracy of the mask is crucial for a seamless inpainting result. Take your time and double-check the edges of the mask to ensure they align with the contours of the building or object. Most tools also have an 'Undo' function, so you can easily correct any mistakes.
Step 3: Apply the Style Transfer
Once the mask is drawn, it's time to apply the inpainting algorithm. Most tools have a button labeled 'Apply Style Transfer' or something similar. Clicking this initiates the AI process, where the algorithm analyzes the surrounding context and generates new content to fill the masked area. Be patient; processing time can vary based on image size and task complexity.
During this process, the AI examines the surrounding pixels, textures, and patterns to create a seamless blend between the original image and the generated content. It aims to match the colors, lighting, and architectural style of the building to create a realistic result, making it appear as if the inpainted area was always part of the original image.
Once complete, the tool will display the result on the screen. Take a moment to review the output and see if it meets your expectations. If not, you can always adjust the mask or fine-tune the AI algorithm's parameters.
Step 4: Reviewing the Results
After applying the style transfer, carefully review the results. Look for any inconsistencies or artifacts, paying close attention to edges, textures, and lighting. If you notice any issues, refine the mask and re-apply the style transfer.
Many AI inpainting tools offer multiple results, allowing you to choose the best one. Experiment with different options to find the most seamless and realistic restoration. You can also adjust parameters like brush size and inference steps to fine-tune the process.
Once satisfied with the results, you can download the enhanced image and use it for your desired purpose. Share it with others or use it for professional architectural projects.
Pros and Cons of Using AI Image Inpainting
Pros
- Seamless Restoration: AI inpainting can restore damaged areas in building photos seamlessly by analyzing the surrounding context and generating realistic content.
- Time-Saving: AI-powered tools automate the restoration process, saving significant time compared to manual methods.
- User-Friendly: Many AI inpainting tools have intuitive interfaces, making them accessible to users without extensive image editing experience.
- Versatile Application: AI inpainting can be used for various purposes, including restoring old photos, removing unwanted objects, and enhancing architectural images.
- Multiple Results: Some AI tools provide multiple restoration options, allowing users to choose the best outcome.
Cons
- Quality Dependency: The quality of the restoration depends on the complexity of the damage and the quality of the original image.
- Potential Artifacts: In some cases, AI inpainting may produce noticeable artifacts or inconsistencies in the restored area.
- Processing Time: The processing time can vary depending on the size and complexity of the image, as well as the capabilities of the AI tool.
- Cost: Some advanced AI inpainting tools may require a subscription or one-time purchase.
- Limited Control: Users may have limited control over the AI's decision-making process, which can affect the final outcome.
Frequently Asked Questions About AI Image Inpainting
What types of images work best with AI image inpainting?
AI image inpainting generally works well with a wide range of images, but it excels with images that have clear structures and patterns. For instance, images of buildings, landscapes, and objects with well-defined shapes are often easier for the AI to analyze and reconstruct. The quality of the original image is crucial, with higher resolution images typically yielding better results due to the additional detail they provide. However, AI inpainting can also handle more complex images with intricate textures or patterns, though it may require experimenting with different parameters to achieve the desired outcome. It's worth noting that AI inpainting might not be ideal for all types of images, especially those with significant noise or distortion, as these can be challenging for the AI to process effectively.
Is AI image inpainting difficult to learn?
One of the best aspects of AI image inpainting is its growing user-friendliness. Many tools are designed with intuitive interfaces, making them accessible even to those without prior image editing or AI experience. These tools often come with clear instructions and helpful tips to guide you through the process.
However, like any new skill, there's a learning curve. It may take some time to become familiar with the different features and parameters of the AI inpainting tool. Experimenting with various settings and practicing on different images can help you hone your skills and achieve better results. There are plenty of online tutorials and resources available to help you grasp the basics of AI image inpainting and master more advanced techniques.
Can AI image inpainting remove unwanted objects from photos?
Yes, AI image inpainting is an excellent tool for removing unwanted objects from photos. Simply select the object you want to remove using a mask or drawing tool, and the AI algorithm will seamlessly fill the area with content that matches the surrounding environment. This can be particularly useful for cleaning up architectural photos by removing distractions like power lines, signs, or people. The AI analyzes the surrounding pixels, textures, and patterns to create a realistic and seamless result.
However, the success of object removal depends on the complexity of the image and the size of the object. Removing larger objects or those surrounded by intricate details may be more challenging and require more fine-tuning. In some cases, combining AI inpainting with other image editing techniques might be necessary to achieve the desired outcome.


 Ali's Large Model Push: Qwen Digital Human Debuts, Core Ecosystem Integrates
As the AI competition moves into the application layer phase, Alibaba has made a key move by integrating its AI ecosystems. On April 22, Alibaba officially unveiled a unified AI digital persona named 'Qwen Xiaojiuwo,' which gives Tongyi Qianwen a mor
Ali's Large Model Push: Qwen Digital Human Debuts, Core Ecosystem Integrates
As the AI competition moves into the application layer phase, Alibaba has made a key move by integrating its AI ecosystems. On April 22, Alibaba officially unveiled a unified AI digital persona named 'Qwen Xiaojiuwo,' which gives Tongyi Qianwen a mor
 Alibaba Q4 Fiscal 2026 Report: AI Revenue Surges, BaiLian Platform ARR Tops 10 Billion Yuan
Alibaba Group today released its Q4 and full-year 2026 financial results, indicating that its AI-driven cloud business is experiencing explosive growth. The report shows that revenue for the fourth fiscal quarter reached 243.38 billion yuan, up 11% y
Alibaba Q4 Fiscal 2026 Report: AI Revenue Surges, BaiLian Platform ARR Tops 10 Billion Yuan
Alibaba Group today released its Q4 and full-year 2026 financial results, indicating that its AI-driven cloud business is experiencing explosive growth. The report shows that revenue for the fourth fiscal quarter reached 243.38 billion yuan, up 11% y
 Elon Musk Loses Lawsuit Against Sam Altman and OpenAI
Elon Musk's assertion that OpenAI's co-founders wronged him collapsed when nine California jurors unanimously ruled that his lawsuits were filed too late.Musk alleged that Sam Altman, Greg Brockman, OpenAI, and Microsoft "stole a charity" by establis
Elon Musk Loses Lawsuit Against Sam Altman and OpenAI
Elon Musk's assertion that OpenAI's co-founders wronged him collapsed when nine California jurors unanimously ruled that his lawsuits were filed too late.Musk alleged that Sam Altman, Greg Brockman, OpenAI, and Microsoft "stole a charity" by establis
2026 Latest: Discover the best AI multi-agent orchestrators to design complex automated workflows through natural language. Our curated list features top-rated, powerful platforms for seamless task automation and intelligent process management. Compare free vs paid options with real-world insights. Unlock your AI edge with XIX.AI's expert weekly updated rankings.
10 tools
xix.ai
Discover the 2026 best AI noise reduction software for low-light night photography. Our top-rated, curated list compares free vs paid tools, featuring real-world tests and weekly updated rankings. Remove grain & artifacts effortlessly. Unlock your AI edge at XIX.AI.
10 tools
xix.ai
Discover the 2026 best custom AI girlfriend generators on XIX.AI. Explore our top-rated, curated list for designing unique personalities, hobbies, and deep backstories. Compare free vs paid options with real-world insights. Unlock your perfect creative companion today.
10 tools
xix.ai

Discover the 2026 best AI architecture design tools on XIX.AI. Our curated, top-rated list features powerful, game-changing solutions to build scalable system architectures using natural language. Compare free vs paid options with real-world insights. Unlock your AI edge and streamline development today.
10 tools
xix.ai

2026 Latest Best AI Character Profile Creators: Discover top-rated tools to generate detailed backstories and visual references for your manga leads. Our curated, weekly-updated list compares free vs paid options based on real-world tests. Find powerful, game-changing solutions to craft compelling characters and streamline your creative workflow. Explore the rankings on XIX.AI and unlock your perfect storytelling ally today.
10 tools
xix.ai

Discover the 2026 best AI pregnancy copilots for safe, personalized trimester-by-trimester workout and nutrition plans. Get top-rated, curated recommendations with free vs paid comparisons and real-world insights. Unlock your healthiest pregnancy journey with XIX.AI's expert guide. Explore now.
10 tools
xix.ai

Die Idee, alte Gebäudefotos mit KI zu restaurieren, ist faszinierend! Früher war das eine mühsame Arbeit für Experten. Jetzt kann fast jeder seine Familienerinnerungen oder historischen Aufnahmen digital auffrischen. Ich frage mich, ob diese Technik auch bei stark beschädigten Bildern funktioniert, bei denen ganze Teile fehlen. Auf jeden Fall ein tolles Werkzeug für Hobbyhistoriker und Architekturfans! 🏛️✨
昔の写真修正ってプロ頼みだけど、これなら自分で古い家の写真のひび割れや汚れを消せそう!でもアーティストが描いた元の意図をAIが勝手に変えちゃうのはちょっと怖いかも…使い方には気をつけないとね。🏛️
오래된 건물 사진을 AI로 복원하는 기술 진짜 신기하네요. 저희 할아버지께서 운영하신 옛 가게 사진도 이렇게 복원해드리고 싶은데... 혹시 스마트폰 앱으로도 이런 기능 사용할 수 있을까요? 😊
This AI inpainting stuff is wild! I tried it on my grandpa’s old house photo, and it’s like the cracks vanished. Kinda makes you wonder if we’re editing reality too far, no? 😅
This AI inpainting stuff is wild! I tried it on an old photo of my grandpa’s house, and it’s like time travel in a click. Fixed the cracks and even added some greenery. Kinda makes you wonder if we’re restoring history or just making it up? 😄


