


 Home
HomeStep-by-Step Guide to AI Fly Tying: Crafting the Perfect Fly
Tying the Future: How to Create an AI-Designed Fly Pattern
Fly tying has always been a blend of tradition, skill, and creativity—passed down through generations of anglers who refine their patterns through trial and error. But what happens when we introduce artificial intelligence into the mix? Can a machine really design a better fly?
In this guide, we’ll explore how to tie a fly pattern generated by AI, merging classic techniques with cutting-edge technology. Whether you're a seasoned tier or just starting out, this step-by-step tutorial will help you craft a fly that’s not only visually stunning but also deadly effective on the water.
Why Use AI for Fly Design?
Fly fishing is an ever-evolving sport, and while traditional patterns have proven their worth, AI offers a fresh perspective. By analyzing countless successful fly designs and fish behavior data, AI can generate patterns optimized for specific conditions—sometimes even suggesting unconventional materials or color combinations that might never occur to a human tier.
The real question is: Could an AI-designed fly be so effective that it gets banned?
That’s the kind of pattern we’re after—one that looks natural, moves convincingly, and triggers aggressive strikes from even the wariest trout.

Materials You’ll Need
Before we dive into the tying process, let’s gather the essentials. The AI’s suggested pattern relies on a mix of natural and synthetic materials to create a lifelike, durable fly.
Core Materials:
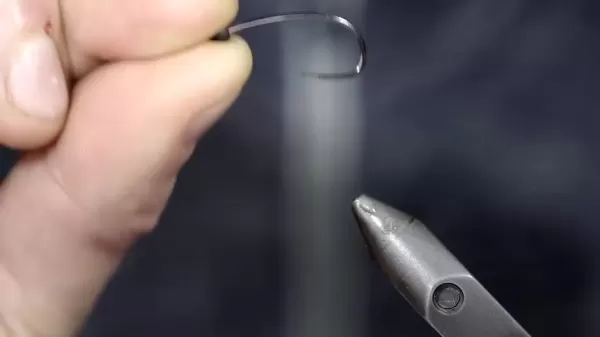
- Hook: Curved nymph hook (size 12-16)
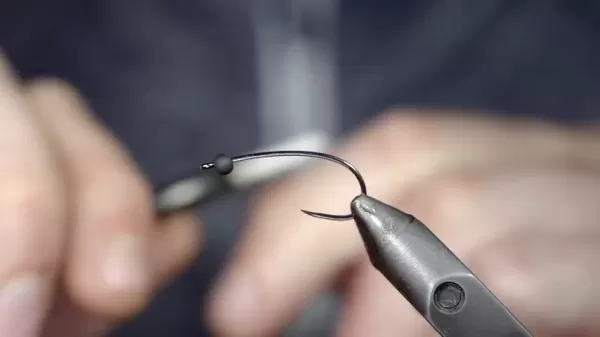
- Bead: Matte black (for weight and realism)
- Thread: Black (strong and reliable)
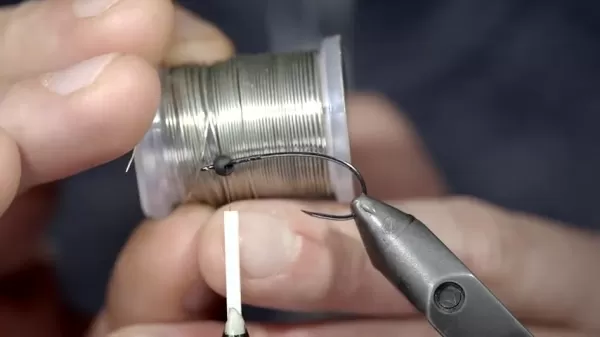
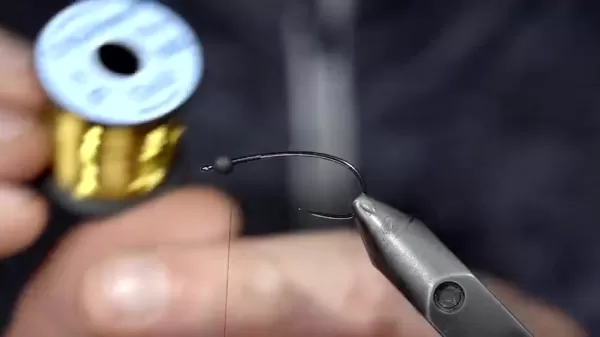
- Wire: Lead-free wire & gold wire (for ribbing and durability)
- CDC Feathers (Tan): Creates a lifelike tail
- Pheasant Tail Fibers: Adds texture and movement
- Lateral Flash: Subtle shimmer to mimic natural insects
- Thin Skin (Green): For a segmented body effect
- Ostrich Herl (Brown): Builds body bulk
- Peacock Herl: Adds natural iridescence
- Mallard Flank Feathers: Enhances the wet-fly profile
- Grizzly Saddle Hackle: For added wing definition
Essential Tools:
- Vise: Keeps your hook steady
- Bobbin Holder: For smooth thread control
- Fine-Tipped Scissors: Precision trimming
- Whip Finisher: Secures your thread neatly
- Hackle Pliers: Helps wrap feathers evenly
Step-by-Step Tying Guide
1. Setting the Foundation: Bead & Thread
Start by sliding a matte black bead onto your curved nymph hook. Secure it in place with tight wraps of black thread behind the bead. Snip any excess thread for a clean base.
2. Adding Weight & Stability: Lead-Free Wire
Wrap lead-free wire around the hook shank to reinforce the bead’s position and add a bit of sink rate. Trim the excess and ensure a smooth, streamlined profile.
3. Creating a Hotspot: Gold Wire Ribbing
Gold wire isn’t just for looks—it acts as a trigger point for trout. Secure a small section near the bend of the hook and wrap it forward in tight spirals.
4. Building the Tail: CDC & Pheasant Tail
Blend tan CDC feathers with pheasant tail fibers for a natural, flowing tail. Secure them at the hook’s bend, ensuring they splay outward for lifelike movement.
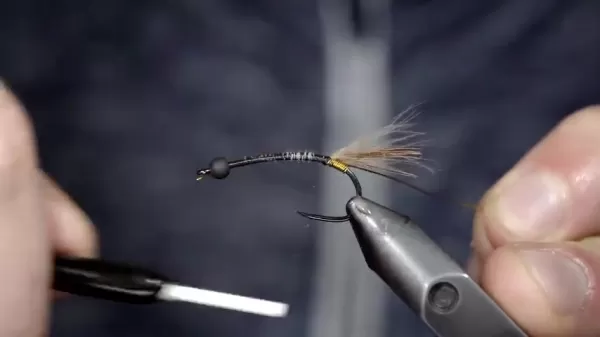
5. Adding Flash: Lateral Lace
A touch of lateral flash mimics the reflective properties of real insects. Tie it in alongside the tail for subtle underwater sparkle.
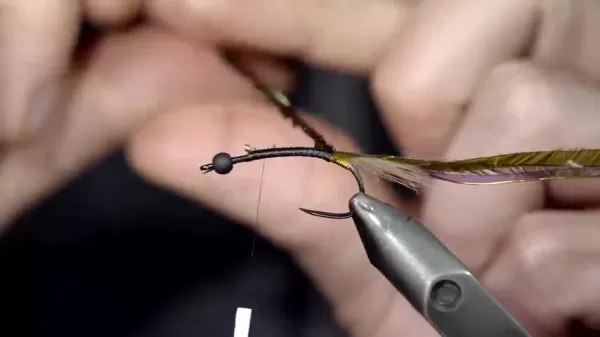
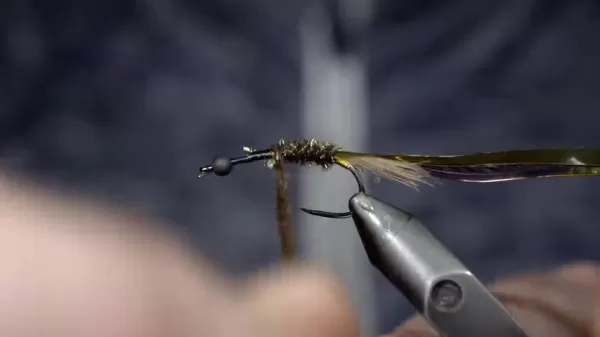
6. Crafting the Body: Thin Skin & Ostrich Herl
Loop green thin skin over the hook to create segmentation, then wrap brown ostrich herl forward to bulk up the body. Follow with peacock herl for extra shimmer.
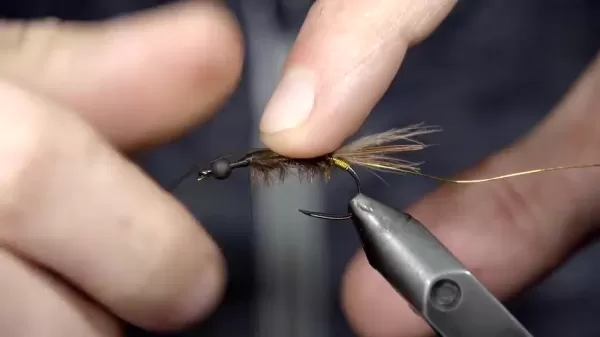
7. Finishing Touches: Wing & Head
Add mallard flank and grizzly saddle hackle for wing definition. Once everything is secured, build a neat thread head and whip-finish for durability.
Pros & Cons of the AI Fly
✔️ Pros:
- Highly realistic – Mimics natural insect movement
- Durable construction – Built to last multiple fish
- Versatile – Works in various trout waters
- Innovative design – AI-driven efficiency
❌ Cons:
- Material-heavy – Some components may be hard to find
- Time-consuming – Not the fastest tie for beginners
- Effectiveness varies – Depends on local trout behavior
FAQs
Q: Can I substitute materials if I don’t have the exact ones?
Absolutely! Synthetic dubbing can replace natural fibers, and different wire colors can be used—just keep the overall profile similar.
Q: Why use a curved nymph hook?
The curve mimics the natural posture of aquatic insects, making the fly more convincing.
Q: Does the bead really help?
Yes! It adds weight for deeper presentations and enhances the fly’s sink rate.
Final Thoughts
AI might not replace the art of fly tying, but it certainly pushes the boundaries of what’s possible. This pattern blends tradition with innovation, resulting in a fly that’s both beautiful and effective. Give it a try—you might just find your new secret weapon on the water.
Tight lines! 🎣
Related article
 Anthropic's experimental AI Claude completes negotiations and transactions in e-commerce test
As artificial intelligence advances rapidly, Anthropic quietly rolled out an internal experiment called "Project Deal" last Friday, showcasing AI's potential in e-commerce. The experiment had its AI model Claude autonomously handle buying, selling, a
DeepSeek Code poised for launch
As AI technology accelerates, DeepSeek is at a thrilling juncture. The AI company recently revealed it has secured over 70 billion yuan in funding. Leadership has emphasized a commitment to groundbreaking AI research over immediate commercial gains.
Musk’s Grok: 1.5 Trillion Parameters and Cursor Code Absorption—Game Changer or Bluff?
Elon Musk is finally making a move.In the AI programming race, OpenAI and Anthropic are accelerating, while xAI appears to be lagging. Musk has often stated his aim to rival Claude, yet despite multiple updates to the Grok4.X series, the results look
Related Special Topic Recommendations
Business
Anthropic's experimental AI Claude completes negotiations and transactions in e-commerce test
As artificial intelligence advances rapidly, Anthropic quietly rolled out an internal experiment called "Project Deal" last Friday, showcasing AI's potential in e-commerce. The experiment had its AI model Claude autonomously handle buying, selling, a
DeepSeek Code poised for launch
As AI technology accelerates, DeepSeek is at a thrilling juncture. The AI company recently revealed it has secured over 70 billion yuan in funding. Leadership has emphasized a commitment to groundbreaking AI research over immediate commercial gains.
Musk’s Grok: 1.5 Trillion Parameters and Cursor Code Absorption—Game Changer or Bluff?
Elon Musk is finally making a move.In the AI programming race, OpenAI and Anthropic are accelerating, while xAI appears to be lagging. Musk has often stated his aim to rival Claude, yet despite multiple updates to the Grok4.X series, the results look
Related Special Topic Recommendations
Business
 Best AI Recruiting Tools: Screen Resumes & Automate Candidate Interview Scheduling
Discover the 2026 latest top-rated AI recruiting tools on XIX.AI. Our curated list features powerful, game-changing solutions for screening resumes and automating candidate interview scheduling. Compare free vs paid options with real-world tests and weekly updated rankings. Find your perfect hiring assistant and streamline your recruitment today!
 10 tools
 xix.ai
Productivity
AI Personal Wellness & Focus Coaches: Manage Burnout & Boost Mental Energy Levels
xix.ai
Productivity
AI Personal Wellness & Focus Coaches: Manage Burnout & Boost Mental Energy Levels
Discover the 2026 best AI personal wellness and focus coaches on XIX.AI. Our curated rankings feature top-rated, game-changing tools to manage burnout and boost mental energy. Compare free vs paid options with real-world insights. Unlock your path to peak productivity and well-being today.
10 tools
xix.ai
chatbot
Top-Rated AI Romantic Chatbots: Build Long-Term Relationships with Consistent Personalities
Discover the 2026 latest top-rated AI romantic chatbots for building genuine, long-term connections. Our curated list features powerful, consistent personalities, free vs paid comparisons, and real-world tests. Find your perfect companion and start building today at XIX.AI.
10 tools
xix.ai
Education and Learning
Best AI Data Science Mentors: Master SQL, Pandas & Machine Learning Workflows
Discover the 2026 best AI data science mentors to master SQL, Pandas & ML workflows. Explore our top-rated, curated selection at XIX.AI for powerful, game-changing guidance. Compare free vs paid options with real-world insights. Unlock your data science mastery today.
10 tools
xix.ai
chatbot
Best AI Flirting & Conversation Trainers: Improve Social Charisma and Confidence in Real-Time
Discover the 2026 best AI flirting and conversation trainers on XIX.AI. Our curated, top-rated selection helps you build social charisma and confidence in real-time. Explore must-try, game-changing tools with free vs paid comparisons and weekly updated rankings. Unlock your social edge today.
10 tools
xix.ai
code
Best AI Tools for Automated Unit Testing: Generate Jest, PyTest & JUnit Test Cases in One Click
Discover the 2026 latest top-rated AI tools for automated unit testing. Our curated selection features powerful, game-changing solutions to generate Jest, PyTest & JUnit test cases instantly. Compare free vs paid options with real-world tests and weekly updated rankings on XIX.AI. Unlock your AI edge and boost development productivity today.
10 tools
xix.ai

 Comments (5)
0/500
Comments (5)
0/500
![AlbertGarcía]()
Interessant, wie KI selbst in so traditionelle Handwerke wie das Fliegenbinden Einzug hält. Die Idee, Algorithmen Muster entwerfen zu lassen, finde ich faszinierend, aber ich frage mich, ob die 'perfekte' Fliege dann nicht etwas von ihrer Seele verliert. Vielleicht ist der Prozess des Ausprobierens ja genau das, was es ausmacht? 🎣
![ChristopherBrown]()
這概念超酷的!但AI設計的毛鉤真的能釣到魚嗎?傳統工藝被數位化感覺有點矛盾,不過老釣手們大概會邊罵邊偷偷試用吧🤔
![NicholasCarter]()
This AI fly tying guide is mind-blowing! I never thought tech could blend so well with such a traditional craft. Excited to try designing my own fly patterns with AI—hope it doesn’t outfish me! 🎣
![WalterBaker]()
Whoa, AI designing fishing flies? That's wild! I wonder if it can outsmart the trout like my grandpa's old patterns did. 🤔 Cool read!
![RalphThomas]()
This AI fly tying guide is wild! I never thought tech could jazz up something as old-school as fishing. The step-by-step is super clear, but I’m curious—can AI really outdo a seasoned angler’s intuition? 🤔 Excited to try this out next weekend!
Tying the Future: How to Create an AI-Designed Fly Pattern
Fly tying has always been a blend of tradition, skill, and creativity—passed down through generations of anglers who refine their patterns through trial and error. But what happens when we introduce artificial intelligence into the mix? Can a machine really design a better fly?
In this guide, we’ll explore how to tie a fly pattern generated by AI, merging classic techniques with cutting-edge technology. Whether you're a seasoned tier or just starting out, this step-by-step tutorial will help you craft a fly that’s not only visually stunning but also deadly effective on the water.
Why Use AI for Fly Design?
Fly fishing is an ever-evolving sport, and while traditional patterns have proven their worth, AI offers a fresh perspective. By analyzing countless successful fly designs and fish behavior data, AI can generate patterns optimized for specific conditions—sometimes even suggesting unconventional materials or color combinations that might never occur to a human tier.
The real question is: Could an AI-designed fly be so effective that it gets banned?
That’s the kind of pattern we’re after—one that looks natural, moves convincingly, and triggers aggressive strikes from even the wariest trout.
Materials You’ll Need
Before we dive into the tying process, let’s gather the essentials. The AI’s suggested pattern relies on a mix of natural and synthetic materials to create a lifelike, durable fly.
Core Materials:
- Hook: Curved nymph hook (size 12-16)
- Bead: Matte black (for weight and realism)
- Thread: Black (strong and reliable)
- Wire: Lead-free wire & gold wire (for ribbing and durability)
- CDC Feathers (Tan): Creates a lifelike tail
- Pheasant Tail Fibers: Adds texture and movement
- Lateral Flash: Subtle shimmer to mimic natural insects
- Thin Skin (Green): For a segmented body effect
- Ostrich Herl (Brown): Builds body bulk
- Peacock Herl: Adds natural iridescence
- Mallard Flank Feathers: Enhances the wet-fly profile
- Grizzly Saddle Hackle: For added wing definition
Essential Tools:
- Vise: Keeps your hook steady
- Bobbin Holder: For smooth thread control
- Fine-Tipped Scissors: Precision trimming
- Whip Finisher: Secures your thread neatly
- Hackle Pliers: Helps wrap feathers evenly
Step-by-Step Tying Guide
1. Setting the Foundation: Bead & Thread
Start by sliding a matte black bead onto your curved nymph hook. Secure it in place with tight wraps of black thread behind the bead. Snip any excess thread for a clean base.
2. Adding Weight & Stability: Lead-Free Wire
Wrap lead-free wire around the hook shank to reinforce the bead’s position and add a bit of sink rate. Trim the excess and ensure a smooth, streamlined profile.
3. Creating a Hotspot: Gold Wire Ribbing
Gold wire isn’t just for looks—it acts as a trigger point for trout. Secure a small section near the bend of the hook and wrap it forward in tight spirals.
4. Building the Tail: CDC & Pheasant Tail
Blend tan CDC feathers with pheasant tail fibers for a natural, flowing tail. Secure them at the hook’s bend, ensuring they splay outward for lifelike movement.
5. Adding Flash: Lateral Lace
A touch of lateral flash mimics the reflective properties of real insects. Tie it in alongside the tail for subtle underwater sparkle.
6. Crafting the Body: Thin Skin & Ostrich Herl
Loop green thin skin over the hook to create segmentation, then wrap brown ostrich herl forward to bulk up the body. Follow with peacock herl for extra shimmer.
7. Finishing Touches: Wing & Head
Add mallard flank and grizzly saddle hackle for wing definition. Once everything is secured, build a neat thread head and whip-finish for durability.
Pros & Cons of the AI Fly
✔️ Pros:
- Highly realistic – Mimics natural insect movement
- Durable construction – Built to last multiple fish
- Versatile – Works in various trout waters
- Innovative design – AI-driven efficiency
❌ Cons:
- Material-heavy – Some components may be hard to find
- Time-consuming – Not the fastest tie for beginners
- Effectiveness varies – Depends on local trout behavior
FAQs
Q: Can I substitute materials if I don’t have the exact ones?
Absolutely! Synthetic dubbing can replace natural fibers, and different wire colors can be used—just keep the overall profile similar.
Q: Why use a curved nymph hook?
The curve mimics the natural posture of aquatic insects, making the fly more convincing.
Q: Does the bead really help?
Yes! It adds weight for deeper presentations and enhances the fly’s sink rate.
Final Thoughts
AI might not replace the art of fly tying, but it certainly pushes the boundaries of what’s possible. This pattern blends tradition with innovation, resulting in a fly that’s both beautiful and effective. Give it a try—you might just find your new secret weapon on the water.
Tight lines! 🎣


 Anthropic's experimental AI Claude completes negotiations and transactions in e-commerce test
As artificial intelligence advances rapidly, Anthropic quietly rolled out an internal experiment called "Project Deal" last Friday, showcasing AI's potential in e-commerce. The experiment had its AI model Claude autonomously handle buying, selling, a
Anthropic's experimental AI Claude completes negotiations and transactions in e-commerce test
As artificial intelligence advances rapidly, Anthropic quietly rolled out an internal experiment called "Project Deal" last Friday, showcasing AI's potential in e-commerce. The experiment had its AI model Claude autonomously handle buying, selling, a
 DeepSeek Code poised for launch
As AI technology accelerates, DeepSeek is at a thrilling juncture. The AI company recently revealed it has secured over 70 billion yuan in funding. Leadership has emphasized a commitment to groundbreaking AI research over immediate commercial gains.
DeepSeek Code poised for launch
As AI technology accelerates, DeepSeek is at a thrilling juncture. The AI company recently revealed it has secured over 70 billion yuan in funding. Leadership has emphasized a commitment to groundbreaking AI research over immediate commercial gains.
 Musk’s Grok: 1.5 Trillion Parameters and Cursor Code Absorption—Game Changer or Bluff?
Elon Musk is finally making a move.In the AI programming race, OpenAI and Anthropic are accelerating, while xAI appears to be lagging. Musk has often stated his aim to rival Claude, yet despite multiple updates to the Grok4.X series, the results look
Musk’s Grok: 1.5 Trillion Parameters and Cursor Code Absorption—Game Changer or Bluff?
Elon Musk is finally making a move.In the AI programming race, OpenAI and Anthropic are accelerating, while xAI appears to be lagging. Musk has often stated his aim to rival Claude, yet despite multiple updates to the Grok4.X series, the results look

Discover the 2026 latest top-rated AI recruiting tools on XIX.AI. Our curated list features powerful, game-changing solutions for screening resumes and automating candidate interview scheduling. Compare free vs paid options with real-world tests and weekly updated rankings. Find your perfect hiring assistant and streamline your recruitment today!
10 tools
xix.ai

Discover the 2026 best AI personal wellness and focus coaches on XIX.AI. Our curated rankings feature top-rated, game-changing tools to manage burnout and boost mental energy. Compare free vs paid options with real-world insights. Unlock your path to peak productivity and well-being today.
10 tools
xix.ai

Discover the 2026 latest top-rated AI romantic chatbots for building genuine, long-term connections. Our curated list features powerful, consistent personalities, free vs paid comparisons, and real-world tests. Find your perfect companion and start building today at XIX.AI.
10 tools
xix.ai

Discover the 2026 best AI data science mentors to master SQL, Pandas & ML workflows. Explore our top-rated, curated selection at XIX.AI for powerful, game-changing guidance. Compare free vs paid options with real-world insights. Unlock your data science mastery today.
10 tools
xix.ai

Discover the 2026 best AI flirting and conversation trainers on XIX.AI. Our curated, top-rated selection helps you build social charisma and confidence in real-time. Explore must-try, game-changing tools with free vs paid comparisons and weekly updated rankings. Unlock your social edge today.
10 tools
xix.ai

Discover the 2026 latest top-rated AI tools for automated unit testing. Our curated selection features powerful, game-changing solutions to generate Jest, PyTest & JUnit test cases instantly. Compare free vs paid options with real-world tests and weekly updated rankings on XIX.AI. Unlock your AI edge and boost development productivity today.
10 tools
xix.ai

Interessant, wie KI selbst in so traditionelle Handwerke wie das Fliegenbinden Einzug hält. Die Idee, Algorithmen Muster entwerfen zu lassen, finde ich faszinierend, aber ich frage mich, ob die 'perfekte' Fliege dann nicht etwas von ihrer Seele verliert. Vielleicht ist der Prozess des Ausprobierens ja genau das, was es ausmacht? 🎣
這概念超酷的!但AI設計的毛鉤真的能釣到魚嗎?傳統工藝被數位化感覺有點矛盾,不過老釣手們大概會邊罵邊偷偷試用吧🤔
This AI fly tying guide is mind-blowing! I never thought tech could blend so well with such a traditional craft. Excited to try designing my own fly patterns with AI—hope it doesn’t outfish me! 🎣
Whoa, AI designing fishing flies? That's wild! I wonder if it can outsmart the trout like my grandpa's old patterns did. 🤔 Cool read!
This AI fly tying guide is wild! I never thought tech could jazz up something as old-school as fishing. The step-by-step is super clear, but I’m curious—can AI really outdo a seasoned angler’s intuition? 🤔 Excited to try this out next weekend!


